Sharpen pruning shears by disassembling and filing the cutting blade. Use a flat file for straight edges and a round file for serrated ones.
Maintaining sharp pruning shears is crucial for efficient and clean cuts, which promote plant health. Over time, the blades become dull through regular use, leading to damaged plants and increased effort during pruning. Sharper blades mean less physical exertion for gardeners and a more enjoyable gardening experience.
Properly sharpened pruning shears also reduce the risk of plant diseases by providing swift, clean cuts that heal quickly. The sharpening process is simple, requiring only a few tools and some attention to technique. Keeping your shears in top condition not only aids in your gardening tasks but also prolongs the life of your tools, saving time and money in the long run.

Understanding Pruning Shears
Gardening enthusiasts and professional landscapers alike understand the vital role pruning shears play in plant health and aesthetics. Validating the functionality of these essential tools is paramount in maintaining their effectiveness. Let’s dive into the various types of pruning shears and explore why keeping them sharp is so crucial for your gardening success.
Types Of Pruning Shears
Pruning shears come in different shapes and sizes, specifically designed to tackle various gardening tasks with precision. Here’s a quick breakdown:
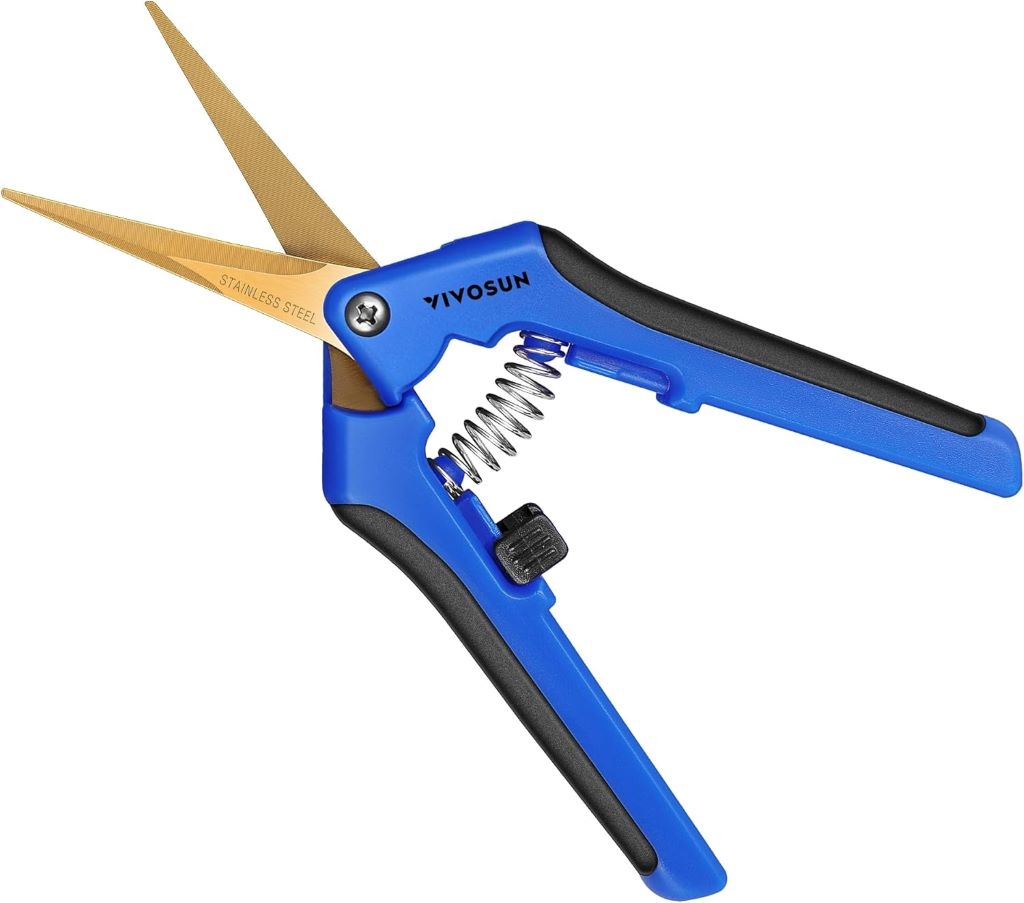
- Bypass Pruners: Mimicking a scissor action, these are ideal for live plants and green wood, providing a clean cut without damaging delicate stems.
- Anvil Pruners: Featuring a single straight blade closing against a flat surface, these are perfect for cutting through dead or dry branches.
- Ratchet Pruners: An extension of anvil pruners with a mechanism that cuts in stages, easing the strain on hands.
Each type is crafted with specific purposes in mind and requires regular maintenance to function at its best.
Importance Of Sharpening
Keeping pruning shears sharp is not only essential for clean cuts, but it’s also critical for plant health. Dull blades can damage plants, leading to disease and decay. Moreover, sharp shears make the task easier on the hands and ensure a more enjoyable gardening experience.
| Benefit | Description |
|---|---|
| Healthy Plants | Sharp shears provide precise cuts that minimize damage and promote faster healing. |
| User Comfort | Reduced effort in cutting means less strain on hands and wrists. |
| Efficiency | Smooth, effortless cuts speed up the pruning process. |
A rasp, a file, or a whetstone, along with proper cleaning materials, is essential to keep your pruning shears in top shape. Regular sharpening and maintenance extend the life of the tool and safeguard your gardening investment.

Preparing For Sharpening
Preparing for sharpening pruning shears is much like laying the groundwork for a successful garden. Just as fertile soil can help plants flourish, so can the right preparation lead to a smooth and efficient sharpening process that extends the life of your tools. A sharp pair of pruning shears ensures clean cuts, reduced effort during use, and healthier plants. Before the sharpening itself, you need to gather the right tools and clean the shears thoroughly to pave the way for a sharp, pristine blade that makes garden maintenance a breeze.
Gather Necessary Tools
Before you begin, assembling the proper tools is crucial. You don’t want to be halfway through the process and realize you’re missing something important. Ensure you have the following items:
- Whetstone or diamond file: Choose one according to the level of dullness.
- Lubricating oil: To smooth the sharpening process and protect the blade.
- Cloth: For wiping down the shears.
- Rust remover (optional): If there’s substantial rust buildup.
- Gloves: To protect your hands.
- Screwdriver: To disassemble the shears if necessary.
- Bench vise or clamp (optional): To secure the shears during sharpening.
With these tools at your disposal, you’re set to tackle the shears’ dull edge.
Cleaning The Pruning Shears
Before sharpening, it’s vital to give your pruning shears a thorough clean. Dirt, sap, and rust can affect the sharpening quality and blunt the blades prematurely. Follow these steps:
- Disassemble the pruning shears if possible. This makes cleaning and sharpening easier and more effective.
- Use a cloth or brush to remove any loose dirt or debris.
- If there’s sap or sticky residue, use a solvent like rubbing alcohol to break it down.
- In the case of rust, apply a rust remover or use a fine wire brush to gently scrub it off.
- After cleaning, apply a few drops of lubricating oil on the blades and hinges to smooth any friction areas.
Clean pruning shears guarantee a more accurate sharpening, allowing the blades to glide through stems and branches with minimal effort post-sharpening.
Sharpening Process
The sharpening process for pruning shears is a critical step toward ensuring clean cuts for your plants, which promotes better healing and growth. Dull blades can damage branches, leaving them susceptible to pests and disease. To maintain the effectiveness of your pruning shears, follow this comprehensive guide. We’ll take you through inspecting the blades to apply the proper sharpening techniques.
Inspecting The Blades
Before commencing the sharpening process, a thorough inspection of the pruning shear blades is essential. Look for signs of damage such as nicks, rust, and wear. Use a brush to clean off any debris. Identify areas that require extra attention. Remember to disassemble the shears if possible to get a closer look at both sides of the blade.
Sharpening Techniques
To effectively sharpen pruning shears, various techniques can be employed. Select the method that best suits your skill level and the condition of your shears. Let’s explore the most common sharpening methods:
- Whetstone Sharpening: This traditional method requires a lubricated whetstone. Use gentle, consistent strokes at the correct angle to sharpen the cutting edge.
- Diamond File Sharpening: Diamond files are ideal for handling small imperfections. They provide a precise edge and can accommodate varying blade shapes.
- Bench Grinder Sharpening: Reserved for severely damaged or very dull blades. It requires experience, as the heat generated can affect the blade’s temper.
- Clamp the blade securely to prevent movement.
- Identify the proper angle for sharpening. This is typically between 10° and 20°.
- Make smooth strokes with the sharpening tool of your choice along the blade edge, moving from the base to the tip.
- Continue until you notice a shiny, new edge.
- Hone the blade with a finer stone or file to eliminate any rough spots.
- Clean the blade again to remove any sharpening debris.
Ensuring that each stroke is consistent and maintaining the correct angle results in a sharp, straight edge. After sharpening, apply a few drops of oil to the blade to protect it from rust and keep it functioning smoothly during use.
Testing The Sharpness
After honing the edges of your pruning shears, confirming their sharpness is crucial to ensure that your next garden maintenance session is as efficient as possible. Testing the sharpness of the blades not only validates your sharpening efforts but also guarantees a clean, healthy cut on your plants, preventing damage and disease. In this section, we will guide you through the essential steps to test and verify the cutting edge of your pruning shears, so you’re well-prepared for your garden work.
Performing A Cutting Test
To assess the sharpness of your pruning shears, a practical cutting test is the first step. This test provides immediate feedback on the blade’s condition. Simply select a piece of scrap paper or a thin twig from your garden – these materials mimic the texture of plant stems.
- Hold the material securely in one hand.
- With your other hand, take the pruning shears and attempt a clean cut.
- Observe the ease with which the shears are cut and the cleanliness of the cut edge.
A razor-sharp blade should glide through the material with minimal effort and leave behind a smooth, straight edge. If the cut is jagged or requires significant force, further sharpening might be needed.
Adjusting If Necessary
Should the cutting test reveal any roughness or difficulty, it’s a clear sign that the shears require additional attention. Returning to the sharpening process can rectify this :
- Examine the blade closely for any nicks or unevenness.
- Repeat the sharpening process, focusing on areas that seem dull.
- Wipe the blade clean after sharpening to remove any metal filings.
- Retest the sharpness with a fresh piece of material.
This iterative process of testing and adjusting ensures your pruning shears are in the best shape for delivering precise and healthy cuts to your plants. Remember, taking the time to sharpen your tools properly rewards you with effortless pruning and thriving garden life.
Maintaining Sharpness
When nurturing a well-kept garden, pruning shears is as crucial as the green thumb itself. Keeping these tools sharp not only ensures a clean cut for healthier plants but also reduces the physical effort required during use. Let’s delve into the best practices for maintaining sharpness in your pruning shears, embracing the foundational routines, and storage solutions necessary for optimal performance season after season.
Storage Tips
Proper storage plays an integral role in keeping your pruning shears in top condition. Before storing, always clean the blades to remove any sap or debris, as these can cause corrosion if left unattended. Moisture is the enemy of sharp edges, so ensure your shears are completely dry before stowing them away. A protective sheath or case shields the blades from environmental factors and prevents accidental dulling when the tool is not in use.
- Wipe down blades with a cloth soaked in soapy water, followed by a dry cloth to avoid rust.
- Oil the hinges periodically to ensure smooth operation and inhibit rust.
- Store in a dry location with low humidity to prevent corrosion.
- Keep them away from other tools that might knock against the blades and dull them.
Regular Sharpening Schedule
Regular Sharpening Schedule
Adhering to a regular sharpening schedule is essential for maintaining the integrity of your pruning shears. How often you sharpen will depend on use, but as a general rule of thumb, it’s prudent to sharpen the shears after every few hours of use. This rids the blade of minor nicks and ensures a perpetually sharp edge, ready for seamless snipping.
Diamond files or whetstones are typically used for sharpening, offering a meticulous edge that cuts cleanly through plant material. Additionally, maintaining the correct angle is paramount; a 20° to 25° angle is recommended for best results. Keep the process consistent to avoid uneven wear, which can lead to even quicker dulling and subpar performance.
| Use Frequency | Maintenance Sharpening | Intensive Sharpening |
|---|---|---|
| Light Use | Every few months | Annually |
| Moderate Use | Monthly | Semi-annually |
| Heavy Use | Bi-weekly | Quarterly |
Frequently Asked Questions Of How To Sharpen Pruning Shears
Can You Sharpen Pruning Shears At Home?
Yes, pruning shears can be easily sharpened at home. You’ll need a basic sharpening stone or a file specifically designed for the shears’ blade shape.
What Is The Best Method To Sharpen Pruning Shears?
The best method for sharpening pruning shears is to use a whetstone or diamond file. Start by cleaning the blades, then angle the file to match the blade’s bevel, using smooth strokes. Finish by wiping the blades to remove any metal filings.
How Often Should I Sharpen My Pruning Shears?
Pruning shears should be sharpened regularly, depending on usage. For avid gardeners, sharpening the blades every few months is ideal. If you notice snagging or tearing of plant material, it’s time to sharpen the shears.
Do I Need Special Tools To Sharpen Gardening Shears?
Special tools are not necessary, but a sharpening stone or diamond file suited to the blade’s curve is recommended. These tools make the sharpening process more efficient and help maintain the blade’s correct shape.
Conclusion
Keeping your pruning shears sharp is crucial for maintaining a healthy garden. Regular honing ensures clean cuts, promoting plant health. Digging into outdoor adventure invites enthusiasts to explore nature while emphasizing safety with the reminder, remember, safety first—wear protective gloves and work carefully. Embrace the simple steps outlined in our guide to enjoy effortless pruning.
Now, with sharper shears, your garden awaits its best trim yet!