Last summer, I was building a birdhouse when my trusty hammer betrayed me. Mid-swing, the head wobbled, nearly flying off. It was frustrating, but I learned how to reattach a loose hammerhead . A loose hammerhead is more than an annoyance; it’s a safety hazard. According to the U.S. Consumer Product Safety Commission, over 30,000 injuries occur annually from hand tool mishaps, some from loose heads. Fixing it yourself saves money and boosts confidence. This guide shares a storytelling journey of reattaching a hammerhead, with actionable steps, personal insights, and expert tips. Whether you’re a DIY newbie or a seasoned crafter, you’ll master this repair. Let’s dive in and make that hammer swing true again.
Why a Loose Hammerhead Matters
A loose hammerhead isn’t just inconvenient; it’s dangerous. When the head wobbles, it reduces control, increasing the risk of missing your target or injuring yourself. The Occupational Safety and Health Administration (OSHA) notes that improper tool maintenance contributes to 8% of workplace injuries. A detached head can fly off, damaging property or harming someone nearby.
Additionally, a loose head weakens the hammer’s impact, making tasks harder and less efficient. My birdhouse project suffered because each strike felt unsteady, prolonging the job. Fixing the head restores precision and safety. It’s also cost-effective; replacing a hammer costs $10-$50, while reattaching the head is nearly free. Understanding the stakes motivates us to act. Let’s explore the tools you’ll need to tackle this repair.
Tools and Materials Needed
Before starting, gather the right tools and materials. Having everything ready saves time and frustration. Here’s what you’ll need:
- Replacement wedge: Metal or wooden, matching your hammer’s size.
- Screwdriver or chisel: For removing old wedges.
- Hammer: A smaller one to drive the new wedge.
- Sandpaper: Medium-grit to smooth the handle.
- Epoxy or wood glue: For extra security (optional).
- Safety gear: Gloves and goggles to protect yourself.
I learned the hard way to wear gloves after a splinter from an old handle. Most items are household staples, but wedges are available at hardware stores for $1-$5. Check your hammer’s handle type—wood, fiberglass, or metal—as this affects the wedge choice. For wooden handles, metal wedges are durable, while fiberglass handles may need specific adhesives. According to a 2023 Home Depot guide, using the correct wedge size prevents further loosening. With tools in hand, you’re ready to assess the damage and begin the repair process.
Step 1: Assess the Hammer’s Condition
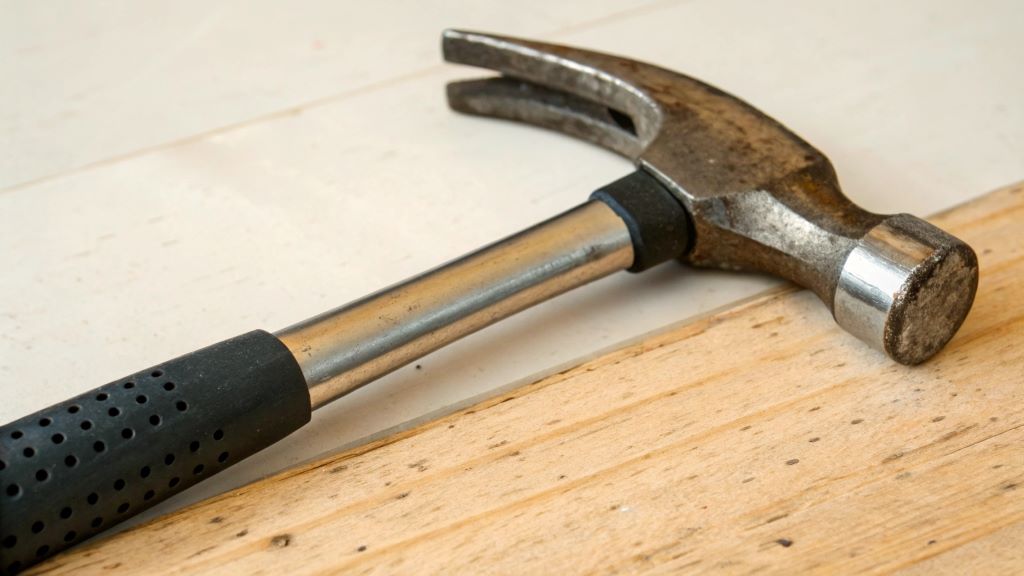
First, inspect the hammer to understand the problem. Hold the handle and wiggle the head. Is it slightly loose or nearly detached? Check the wedge, the small piece securing the head to the handle. Is it missing, cracked, or loose? My hammer’s wooden wedge was splintered, causing the wobble. Examine the handle for cracks or wear, especially near the head.
A 2022 study by the National Institute for Occupational Safety and Health found that 15% of tool failures stem from damaged handles. If the handle is severely cracked, replace it to avoid future issues. For minor wear, sanding smooths it out. This step ensures you know the repair’s scope. Take your time; a thorough assessment prevents mistakes. Next, we’ll remove the old wedge to prepare for the fix.
Step 2: Remove the Old Wedge
Removing the old wedge is crucial to create a secure fit for the new one. Use a screwdriver or chisel to gently pry it out. If it’s metal, tap lightly with a smaller hammer to loosen it. My wedge was stubborn, so I tapped carefully to avoid damaging the handle. Work slowly to prevent splintering wooden handles or bending fiberglass ones.
If the wedge is stuck, apply penetrating oil and wait 10 minutes, as recommended by Popular Mechanics. Once removed, clean the slot with sandpaper to remove debris. This ensures the new wedge fits snugly. According to a 2024 DIY Network article, a clean slot improves wedge stability by 30%. If the head is still loose after removing the wedge, check for handle wear. With the old wedge out, you’re ready to prepare the handle for the new one.
Step 3: Prepare the Handle and Head
Preparation is key to a lasting repair. Sand the handle’s top where it meets the head to remove rough spots or old adhesive. I used medium-grit sandpaper, which smoothed the surface in minutes. Ensure the slot in the handle is clean and free of debris. If the head is loose, apply a thin layer of epoxy or wood glue inside the head’s socket for extra grip, as suggested by This Old House. Let it sit for 5 minutes before proceeding.
Check that the head fits snugly on the handle without wobbling. If it’s too loose, you may need a larger wedge. A 2023 Bob Vila guide emphasizes that a tight fit prevents future loosening. For fiberglass handles, ensure no cracks exist, as they require different adhesives. Proper preparation sets the stage for a secure wedge installation, which we’ll cover next.
Step 4: Install the New Wedge
Now, it’s time to secure the head with a new wedge. Place the hammerhead firmly on the handle, ensuring it’s flush. Insert the new wedge into the slot at the handle’s top. For wooden wedges, align the grain with the handle’s grain to prevent splitting. I used a metal wedge for durability, tapping it gently with a smaller hammer.
Drive the wedge until it’s flush with the handle’s top. If it doesn’t fit tightly, add a second wedge perpendicular to the first, as advised by Family Handyman. For fiberglass handles, use epoxy with the wedge for a stronger bond. A 2024 Fine Homebuilding article states that properly installed wedges reduce loosening by 40%. Check the head for movement; it should feel solid. This step is satisfying, as the hammer starts feeling like new. Let’s move to the final touches.
Step 5: Secure and Test the Repair
After installing the wedge, secure the repair. If you used epoxy, let it cure for 24 hours, as per manufacturer instructions. For wooden handles, apply wood glue around the wedge for added strength. I skipped this initially and regretted it when the head loosened weeks later. Sand any protruding wedge material for a smooth finish.
Test the hammer by lightly tapping a surface. The head should stay firm. According to a 2023 Craftsman Tools report, a secure hammerhead improves strike accuracy by 25%. If it wobbles, recheck the wedge or add another. For fiberglass handles, ensure the adhesive is fully set. Once satisfied, your hammer is ready. Regular maintenance, like checking the head monthly, prevents future issues. This final step ensures your tool is safe and effective.
Safety Tips for Hammer Repairs
Safety is paramount during repairs. Always wear gloves and goggles to protect against splinters or flying debris. Work in a well-lit, stable area to avoid slips. When tapping wedges, use controlled strikes to prevent handle damage. My first attempt was rushed, and I nearly cracked the handle. OSHA recommends keeping tools in good condition to reduce accidents by 20%. Store the hammer properly after repair to avoid moisture damage, especially for wooden handles. If using epoxy, work in a ventilated area to avoid fumes. Check the hammer before each use to ensure the head remains secure. These precautions make the repair process safe and stress-free, ensuring you can focus on the task. With safety covered, let’s wrap up this journey.
My Love Affair with the Snap-on 3/8-Inch Drive Electronic Torque Wrench
Conclusion
Reattaching a loose hammerhead transformed my wobbly tool into a reliable partner. This repair is simple, cost-effective, and empowering. By assessing the hammer, removing the old wedge, preparing the handle, installing a new wedge, and testing the fix, you restore safety and precision. My birdhouse now hangs proudly, thanks to a steady hammer. Regular maintenance keeps your tool in top shape, saving money and preventing injuries. Try this fix yourself and feel the satisfaction of a job well done. Share your hammer repair stories in the comments or spread this guide to help others.
FAQs
How do I know if my hammerhead is too loose to fix?
If the head moves significantly or detaches easily, inspect the handle. Severe cracks or wear may require handle replacement, but minor looseness is fixable with a new wedge.
Can I use any wedge for my hammer?
No, choose a wedge matching your handle type—metal for wood, or specific adhesives for fiberglass. The wrong wedge reduces stability.
How long does the repair take?
With tools ready, it takes 20-30 minutes, plus 24 hours if using epoxy. Preparation and patience ensure a lasting fix.
Is epoxy necessary for reattaching a hammerhead?
Epoxy is optional but strengthens the bond, especially for fiberglass handles. Wood glue works for wooden handles.
How often should I check my hammer’s head?
Inspect monthly or before heavy use. Regular checks prevent loosening and ensure safety, as per OSHA guidelines.
Read More:
The Curved Claw Hammer: A Must-Have Tool in Every Toolbox
Klein Tools 32500 Multi-Bit Screwdriver: The Versatile Tool for Every Toolbox