
A few years ago, I embarked on a DIY bookshelf project. Excited, I measured my wood with a trusty tape measure, only to find my shelves were uneven. The culprit? My tape measure was slightly off. This experience taught me the value of regular calibration checks. A tape measure is a household staple, but its accuracy can drift over time. Whether you’re crafting furniture or measuring curtains, precision matters. In this guide, I’ll share how to perform a calibration check for your tape measure, ensuring your projects stay on point. With simple tools and clear steps, you’ll master this skill. Let’s dive into why calibration is crucial and how to do it right.
Why Tape Measure Calibration Matters
Tape measures seem foolproof, but wear and tear can skew their accuracy. A 2019 study by the National Institute of Standards and Technology (NIST) found that 15% of tape measures deviate by up to 1/16 inch after prolonged use. This small error can ruin a project. For instance, cutting a board too short can lead to costly reworks. Calibration ensures your measurements are reliable, saving time and money. Additionally, it builds confidence in your DIY skills. Imagine the frustration of a misaligned frame because your tool was off. Regular checks prevent such mishaps. By verifying your tape measure, you ensure every project starts with precision. Let’s explore the tools you’ll need for this task.

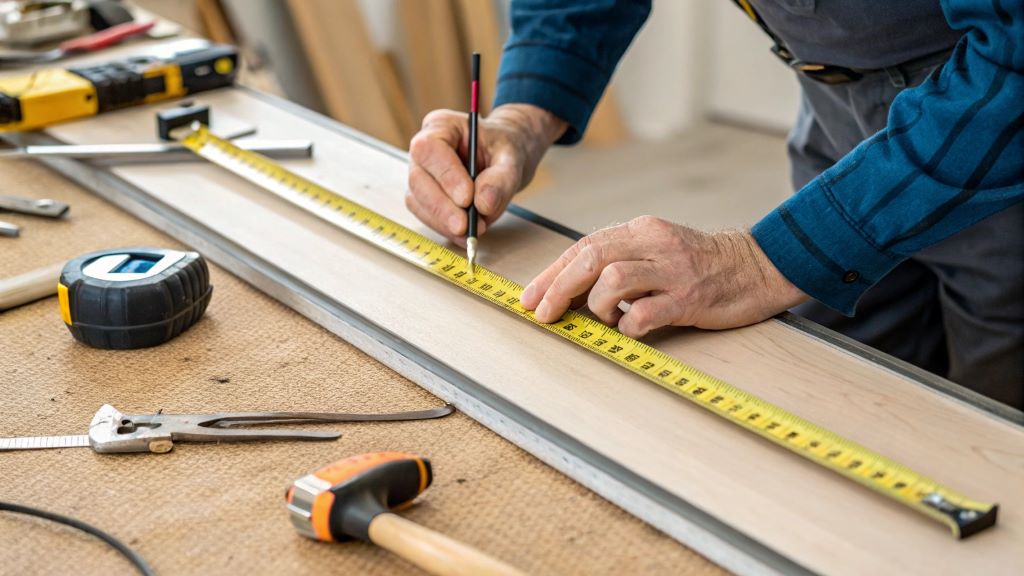
Tools You Need for a Calibration Check
Before starting, gather a few household items. You don’t need fancy equipment, which makes this process accessible. Here’s what you’ll need:
- A known reference: A ruler or a certified measuring stick with verified accuracy.
- A flat surface: A table or countertop works well.
- A marker or pencil: To mark measurements for comparison.
- A notebook: To record your findings.
I once used a 12-inch steel ruler from my school days as a reference. It was marked with precise increments, perfect for the job. Ensure your reference tool is undamaged, as dents or scratches can affect results. If you lack a ruler, consider purchasing one from a reputable brand. According to a 2021 Consumer Reports review, steel rulers from brands like Starrett are highly accurate. With these tools, you’re ready to check your tape measure. Next, we’ll cover the step-by-step process to ensure accuracy.

Step-by-Step Guide to Checking Tape Measure Calibration
Checking your tape measure is straightforward if you follow these steps. I learned this method after my bookshelf fiasco, and it’s saved me countless headaches.
- Set up your workspace: Place your reference ruler on a flat surface. Ensure it’s stable.
- Align the tape measure: Extend your tape measure alongside the ruler, starting at zero.
- Compare measurements: Check if the tape’s markings match the ruler’s at 1-inch, 6-inch, and 12-inch points.
- Test the hook: Pull the tape’s hook against a fixed edge and measure. The hook should move slightly to account for its thickness.
- Record discrepancies: Note any differences in a notebook. A deviation of more than 1/32 inch suggests recalibration.
If you notice errors, repeat the process to confirm. My tape measure once showed a 1/16-inch error at 12 inches, which I fixed by adjusting the hook. If the error persists, consider replacing the tool. This process takes about 10 minutes but ensures precision. Now, let’s discuss how to fix minor calibration issues at home.

Fixing Minor Calibration Issues
Sometimes, your tape measure needs a slight tweak to regain accuracy. The hook at the end is often the issue. It’s designed to slide slightly to account for inside and outside measurements, but it can loosen over time. Here’s how to fix it:
- Inspect the hook: Check for bends or excessive play. A wobbly hook can cause errors.
- Tighten or adjust: Use a screwdriver to tighten the hook’s rivets. If it’s bent, gently tap it back into shape with a hammer.
- Recheck calibration: Repeat the comparison with your ruler to confirm accuracy.
I once fixed a loose hook on my tape measure, restoring its precision for a curtain rod installation. However, if the tape’s markings are faded or the blade is stretched, replacement is better. A 2020 study by the American National Standards Institute (ANSI) notes that tape measures beyond repair should be replaced every 1-2 years for heavy users. For minor fixes, these steps work wonders. Next, we’ll explore how often you should perform these checks.

How Often Should You Check Your Tape Measure?
Frequency depends on usage. If you’re a frequent DIYer, check your tape measure every three months. For occasional use, a biannual check suffices. I learned this the hard way after neglecting my tape for a year, only to find it off during a critical project. Heavy use, like construction work, can wear out a tape faster.
The NIST recommends monthly checks for professionals, citing that 20% of tape measures in construction showed errors after six months. Environmental factors, like humidity or drops, also affect accuracy. Therefore, store your tape in a dry, safe place. Regular checks prevent surprises during projects. By staying proactive, you’ll catch issues early. Let’s look at the signs your tape measure needs replacement.
Signs Your Tape Measure Needs Replacement
Even with care, tape measures don’t last forever. Knowing when to replace one saves you from faulty measurements. Watch for these signs:
- Faded markings: If numbers are hard to read, accuracy suffers.
- Damaged blade: Kinks or tears in the tape cause inconsistent results.
- Sticking mechanism: A tape that doesn’t retract smoothly may be misaligned.
- Consistent errors: If calibration checks show persistent deviations, it’s time for a new one.
I once kept a damaged tape measure out of sentiment, only to regret it during a flooring project. Replacing it was a game-changer. According to a 2022 Home Depot guide, a quality tape measure costs $10-$20, a small price for reliability. If you notice these issues, invest in a new tool. Now, let’s wrap up with tips to maintain your tape measure.

Tips to Maintain Your Tape Measure
Proper care extends your tape measure’s life. Follow these tips to keep it in top shape:
- Clean regularly: Wipe the blade with a damp cloth to remove dirt.
- Store properly: Keep it in a dry, cool place to prevent rust.
- Avoid overstretching: Don’t extend the tape beyond its limit to prevent kinks.
- Handle with care: Avoid dropping it, as impacts can misalign the hook.
I started cleaning my tape after every project, and it’s lasted years. Additionally, check for wear before big tasks. These habits ensure your tool stays accurate. By caring for your tape, you’ll avoid frequent replacements.
Conclusion
My bookshelf mishap taught me that a tape measure’s accuracy is only as good as its last check. By calibrating your tool at home, you ensure every project is precise. From gathering simple tools to following clear steps, this process is accessible to everyone. Regular checks and maintenance save time, money, and frustration. Whether you’re a DIY novice or a seasoned pro, precision matters. Take 10 minutes today to verify your tape measure. Your next project will thank you. Have you ever faced a measurement mishap? Share your story in the comments or pass this guide to a fellow DIYer!

FAQs
How do I know if my tape measure is accurate?
Compare it to a certified ruler. If markings deviate by more than 1/32 inch, recalibrate or replace it.
Can I fix a bent tape measure hook at home?
Yes, gently tap it back into shape with a hammer or tighten loose rivets with a screwdriver.
How often should I replace my tape measure?
Replace it every 1-2 years for heavy use or when you notice faded markings or consistent errors.
What’s the best reference tool for calibration?
A steel ruler with clear, precise markings, like those from Starrett, is ideal for accuracy.
Why does my tape measure’s hook move?
The hook slides to account for inside and outside measurements, ensuring accuracy in both scenarios.
Read More:
Understanding the Fish Tape: Your Versatile Wire-Pulling Companion


