If you have ever watched an HVAC technician work, you may have noticed how they create perfectly shaped connections at the ends of copper tubing. That small but important process is called flaring. With the right flaring tool and a bit of practice, you can achieve the same professional results at home. This guide will walk you through everything you need to know, from choosing the right tool to avoiding common mistakes.
What Is a Flaring Tool and Why Does It Matter
A flaring tool is a device used to widen the end of a copper or aluminum tube into a cone shape. This cone, or flare, allows the tube to connect securely to fittings without leaking. In HVAC systems, leaks can cause refrigerant loss, reduced efficiency, and even system failure. Therefore, a proper flare is not just a technical detail. It is the difference between a system that works and one that breaks down.
Most homeowners think flaring is too complex for a DIY project. However, with modern flaring tools, the process has become much more accessible. You do not need years of training to do this well. You just need the right information and a steady hand.
Types of Flaring Tools Available
Before you start, it helps to understand what types of tools are available. There are three main categories.
The first is the traditional yoke and bar flaring tool. This is the most common type and works by clamping the tube in a bar and using a yoke with a cone-shaped die to press into the end of the tube. It is affordable and widely available.
The second is the eccentric flaring tool. This type uses an off-center rotating motion to create the flare. It tends to produce a more consistent and smooth flare than the traditional type. Many professionals prefer it for this reason.
The third is the hydraulic or pneumatic flaring tool. This type uses mechanical force rather than manual effort. It is faster and reduces the chance of uneven flares. However, it is more expensive and better suited for frequent use.
For most home HVAC projects, a quality eccentric or yoke-style tool will do the job very well.
Choosing the Right Flaring Tool for Home Use
Not all flaring tools are created equal. When choosing one for home use, consider these factors.
First, look at the tube size compatibility. HVAC systems commonly use tubing that ranges from 1/4 inch to 5/8 inch in diameter. Make sure the tool you buy handles the sizes your system requires. A kit that includes multiple die sizes is a smart investment.
Second, consider the material quality. A tool made from hardened steel or aircraft-grade aluminum will last much longer and produce cleaner flares than a cheap import.
Third, think about ease of use. If you are new to this task, choose a tool with clear markings and a simple clamping mechanism. This will help you stay consistent during the process.
Additionally, read user reviews from other DIY HVAC users. Real-world feedback often reveals issues that product descriptions miss.
Tools and Materials You Will Need
Gathering everything before you start will save you a lot of time and frustration. Here is what you will need:
- A flaring tool kit suited to your tube size
- A tube cutter for clean, square cuts
- A deburring tool or reamer
- Copper or aluminum tubing of the correct size
- Flare fittings and nuts
- A measuring tape
- Refrigerant-compatible thread sealant (if required by your system)
- Safety gloves and eye protection
Having all of this ready means you can move through each step without stopping. This also reduces the risk of mistakes caused by rushing.
Step-by-Step Guide to Using a Flaring Tool
Now comes the most important part. Follow these steps carefully and you will create clean, professional flares every time.
Step 1: Cut the Tube Cleanly
Start by cutting your copper tubing to the required length. Use a tube cutter rather than a hacksaw. A tube cutter creates a smooth, perfectly square cut. A hacksaw leaves rough edges and metal debris that can damage your system.
Tighten the cutter gently around the tube and rotate it around the tube slowly. After each full rotation, tighten it a little more. Continue until the tube is fully cut through.
Step 2: Deburr the End of the Tube
After cutting, the inside edge of the tube will have a small burr. This burr must be removed. If it is not, it can get into your HVAC system and cause damage. Use the built-in reamer on your tube cutter or a separate deburring tool to clean the inside edge. Rotate it a few times until the edge feels smooth.
Step 3: Slide On the Flare Nut
This step is easy to forget and very costly if you do. Before flaring, slide the flare nut onto the tube with the threaded end facing the end you are about to flare. If you forget this step, you will have to cut off the flare and start over.
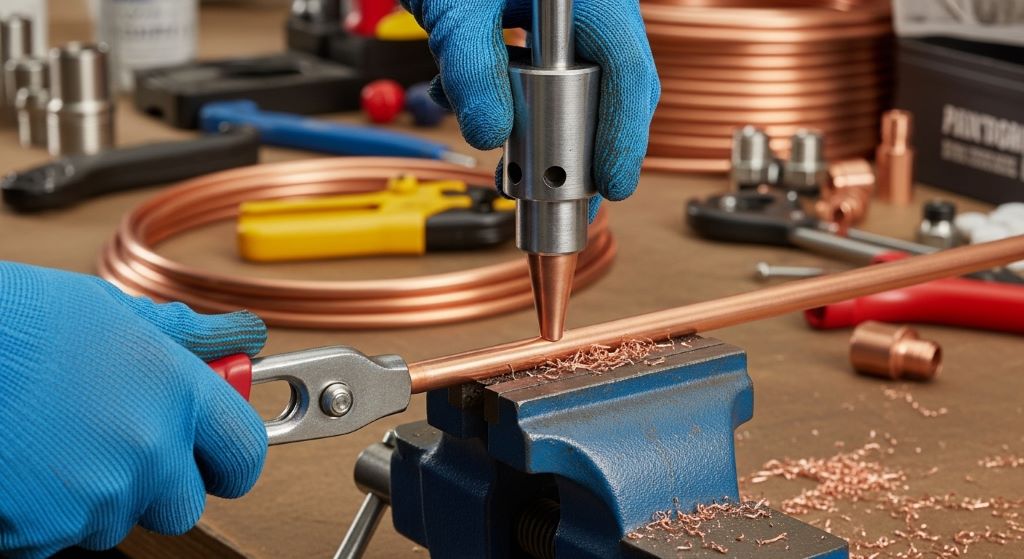
Step 4: Clamp the Tube in the Flaring Bar
Place the tube into the correct hole in the flaring bar. The end of the tube should sit just above the top of the bar. How far it extends depends on the flare angle your system requires.
For most HVAC systems, the standard flare angle is 45 degrees. Some systems use a 37-degree flare, so check your system specifications before proceeding. Tighten the wing nuts or clamp firmly so the tube does not move during the flaring process.
Step 5: Create the Flare
Place the yoke over the bar so the cone-shaped tip aligns with the center of the tube. Begin turning the handle clockwise. You will feel resistance as the cone presses into the copper. Continue turning slowly and steadily until the cone has fully formed the flare.
Do not rush this step. Applying too much pressure too quickly can crack or split the flare. A slow, even motion produces the best result.
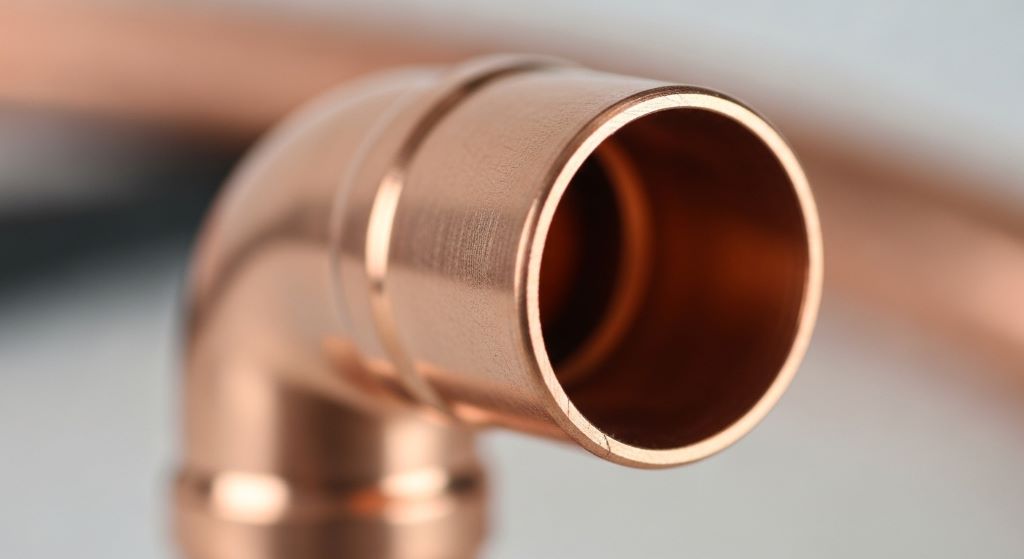
Step 6: Remove and Inspect the Flare
Once you have finished, remove the tube from the bar and inspect the flare. It should be smooth, even, and symmetrical. There should be no cracks, splits, or rough edges. The inner surface should look shiny and uniform.
If the flare looks uneven or shows any cracking, cut it off and redo it. A compromised flare will leak. It is better to start over than to risk a refrigerant leak in your system.
Step 7: Connect the Flared Tube to the Fitting
Align the flared end with the matching fitting and hand-tighten the flare nut first. Then use a wrench to tighten it further. Do not overtighten, as this can deform the flare. A good rule of thumb is to go about one-quarter to one-half turn past hand-tight, depending on the tube size and fitting type.
Common Mistakes to Avoid
Even experienced DIYers make mistakes when flaring. Here are the most common ones and how to avoid them.
Not deburring the tube is one of the top errors. Even a tiny burr can cause an uneven flare or contaminate your system. Always deburr before flaring.
Forgetting to slide on the flare nut is another common mistake. Once the flare is formed, the nut cannot pass over it. Always check before you start.
Using the wrong tube extension length leads to flares that are too thin or too wide. Follow the manufacturer’s guidelines for how far the tube should extend above the bar.
Overtightening the fitting is also a problem. Too much force will crack the copper and ruin the seal. Use controlled, measured tightening.
Finally, using a dull or worn flaring cone will produce rough flares. Replace the cone when it shows signs of wear.
Tips for Getting Consistent, Professional Results
Getting good results every time comes down to consistency and care. Here are some tips that professionals use:
Practice on scrap tubing first. Before working on your actual HVAC system, practice the flaring process on pieces of tubing you do not need. This helps you develop a feel for the right amount of pressure and rotation.
Keep your tools clean and lubricated. A well-maintained flaring cone creates smoother flares. Wipe the cone before each use and apply a small amount of refrigerant oil if needed.
Work in a stable position. Flaring requires steady hands and a firm surface. Avoid working in awkward positions or on an unstable surface.
Double-check tube sizes. Using the wrong hole in the flaring bar is a surprisingly common mistake. Always confirm the tube diameter before clamping.
When to Call a Professional
Knowing your limits is also part of being a good DIYer. Some HVAC tasks go beyond what a flaring tool can address at home. If your system uses high-pressure refrigerant lines, requires EPA certification to handle, or involves electrical components you are not trained on, call a licensed technician. Additionally, if you notice refrigerant leaks after installation, do not try to fix them yourself without the proper recovery equipment. Safety comes first.
Conclusion
Using a flaring tool at home is a practical skill that can save you time and money on HVAC repairs and installations. The key is to choose the right tool for your needs, prepare your materials properly, and follow each step with care and patience. Start by cutting your tube cleanly, deburr the edges, slide on the flare nut, clamp it correctly, and create the flare with slow, steady pressure. Always inspect your work before connecting. Avoid the common mistakes of forgetting the nut, skipping deburring, and overtightening. With practice, your flares will look and perform just like a professional’s. However, always know when a job calls for expert help. The goal is a safe, efficient HVAC system that keeps your home comfortable year-round.
Frequently Asked Questions
What size flaring tool do I need for a home HVAC system?
Most residential HVAC systems use copper tubing between 1/4 inch and 5/8 inch in diameter. A flaring kit that covers this range will handle most home projects. Always check the specifications of your specific system before purchasing.
Can I use a flaring tool on aluminum tubing?
Yes, many modern flaring tools work on both copper and aluminum tubing. However, aluminum is softer and more prone to cracking. Use lighter pressure and take extra care during the flaring process.
What is the correct flare angle for HVAC systems?
Most residential HVAC systems require a 45-degree flare. Some commercial or older systems use a 37-degree flare. Check your equipment manual or the fitting specifications to confirm the correct angle before starting.
How do I know if my flare is good enough to use?
A good flare is smooth, symmetrical, and free of cracks or rough spots. The surface should be shiny and even. If you see any splitting, unevenness, or thin spots, cut the flare off and redo it. Never use a flare that looks compromised.
Do I need to use any sealant on a flared connection?
Generally, a correctly made flare does not need sealant. The metal-to-metal contact creates the seal. However, some technicians apply a small amount of refrigerant oil to the flare surface before connecting, which helps seat the connection and reduce galling on the copper.
Related Topics:
The Ultimate Guide to the Amazon Basics 10 Ft 3-Prong Indoor Extension Cord: Power Up with Confidence
Innovations in Electrician Wire Strippers: What’s New in the Market