A paint sprayer can be a DIYer’s best friend or a professional’s trusted sidekick, making quick work of projects that would take hours with a brush and roller. But just like any hardworking tool, it demands proper care to ensure its longevity and optimal performance. Cleaning your paint sprayer thoroughly after each use is non-negotiable. Neglecting this crucial step can lead to clogged nozzles, damaged parts, and ultimately, a sprayer that sputters, spits, and fails when you need it most.
This comprehensive guide will walk you through the intricacies of cleaning various types of paint sprayers, offer insights into choosing the right cleaning solutions, and provide answers to frequently asked questions. Whether you’re a seasoned pro or a weekend warrior tackling your first painting project, this guide has you covered.
Understanding Your Paint Sprayer

Before we dive into the cleaning process, it’s essential to understand the type of paint sprayer you’re working with. Different sprayers require slightly different cleaning approaches. Here’s a quick breakdown:
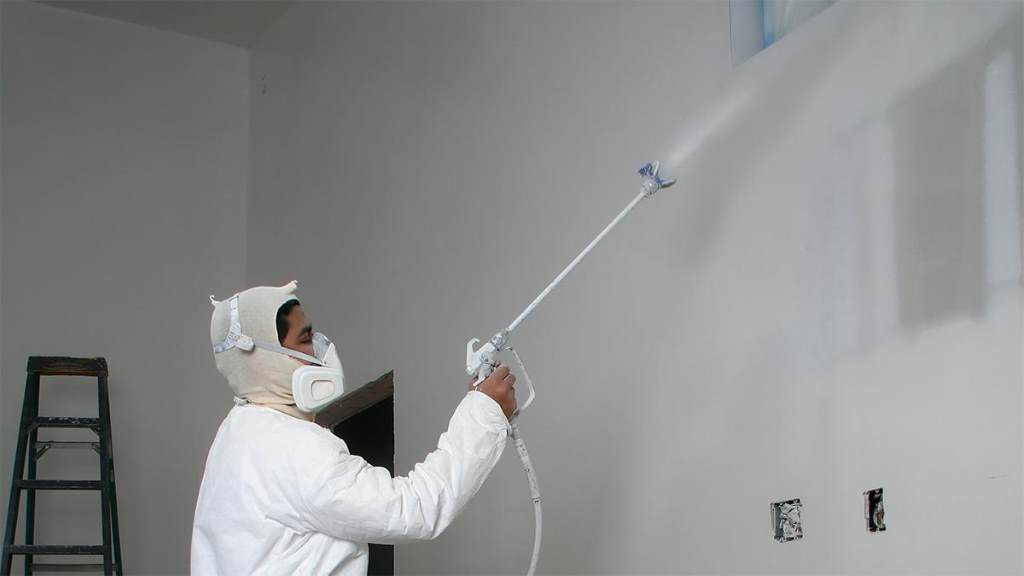
- Airless Sprayers: These powerful workhorses use a pump to force paint through the nozzle at high pressure. They’re ideal for large projects and thick paints but require meticulous cleaning to prevent paint from drying and clogging the system.
- HVLP Sprayers: High Volume, Low Pressure sprayers atomize paint using a high volume of air at low pressure. They’re known for their smooth finish and minimal overspray, making them suitable for fine finishing work. Cleaning HVLP sprayers is generally easier due to the lower pressure and thinner paints used.
- Gravity-Fed Sprayers: These sprayers rely on gravity to feed paint from a cup mounted above the gun. They’re versatile and easy to use, making them popular for DIY projects. Cleaning involves disassembling the gun and cleaning the cup, fluid passages, and nozzle.
Gathering Your Cleaning Arsenal
Having the right tools and cleaning solutions at your disposal will make the cleaning process smoother and more effective. Here’s a checklist of essential items:
- Cleaning Solution: The type of cleaning solution you need depends on the type of paint you used. Water is sufficient for water-based paints, while mineral spirits or paint thinner are necessary for oil-based paints. Always refer to your paint manufacturer’s recommendations for compatible cleaning solutions.
- Cleaning Brushes: Soft-bristled brushes, such as toothbrushes or nylon brushes, are ideal for cleaning delicate parts like nozzles and spray tips.
- Cleaning Rags: Lint-free cloths are essential for wiping down surfaces and removing excess paint.
- Bucket or Container: A bucket or container is needed to hold the cleaning solution during the process.
- Safety Gear: Protect yourself by wearing gloves, safety glasses, and a respirator, especially when working with solvents.
- Sprayer Cleaning Kit: Many sprayer manufacturers offer cleaning kits that include specialized brushes, cleaning needles, and other tools designed for their specific models.
Step-by-Step Cleaning Guide
Now, let’s get down to the nitty-gritty of cleaning your paint sprayer. Remember to always consult your sprayer’s user manual for specific instructions and safety precautions.
- Prepare Your Workspace:
- Choose a well-ventilated area, preferably outdoors or in a garage with good airflow.
- Protect the surrounding area with drop cloths or newspapers to prevent spills and splatters.
- Gather all your cleaning supplies and have them readily available.
- Empty the Paint Reservoir:
- Disconnect the sprayer from the power source.
- Carefully pour any remaining paint back into its original container.
- Wipe down the reservoir with a rag to remove any excess paint.
- Flush the System (for Airless and HVLP Sprayers):
- Fill the reservoir with the appropriate cleaning solution.
- For airless sprayers, attach the spray gun to the prime/clean valve or a waste container.
- For HVLP sprayers, adjust the air pressure to a low setting.
- Spray the cleaning solution through the system until it runs clear.
- Repeat this process with fresh cleaning solution if necessary.
- Disassemble the Spray Gun:
- Carefully disassemble the spray gun according to the manufacturer’s instructions.
- Separate the nozzle, spray tip, guard, and other removable parts.
- Clean the Components:
- Soak the disassembled parts in the cleaning solution for the recommended time.
- Use brushes to gently scrub away any stubborn paint residue.
- Pay close attention to the nozzle and spray tip, as these are prone to clogging.
- Use a cleaning needle or toothpick to carefully clear any blockages in the nozzle orifice.
- Rinse and Dry:
- Thoroughly rinse all the components with clean water or solvent, depending on the type of paint used.
- Dry all parts completely with a lint-free cloth.
- Reassemble and Lubricate:
- Reassemble the spray gun according to the manufacturer’s instructions.
- Lubricate any moving parts or seals with the recommended lubricant.
- Store Properly:
- Store the sprayer in a clean, dry place, away from direct sunlight and extreme temperatures.
- For long-term storage, consider adding a few drops of oil to the fluid passageways to prevent them from drying out.
Read More Also: The Dynamic Duo of Piping Connections
Choosing the Right Cleaning Solution
Selecting the appropriate cleaning solution is crucial for effective cleaning and preventing damage to your sprayer. Here’s a guide to help you choose:
- Water-Based Paints: Warm soapy water or a dedicated water-based paint cleaner is usually sufficient for cleaning up after using water-based paints.
- Oil-Based Paints: Mineral spirits or paint thinner are necessary to dissolve and remove oil-based paints. Always work in a well-ventilated area when using these solvents.
- Lacquer and Shellac: Denatured alcohol is the preferred cleaning solution for lacquer and shellac-based paints.
- Epoxy and Polyurethane: Specialized cleaning solutions are available for epoxy and polyurethane paints. Consult your paint manufacturer for recommendations.
Pro Tip: Always test the cleaning solution on a small, inconspicuous area of the painted surface first to ensure compatibility and prevent damage.
Reviews: Top-Rated Paint Sprayer Cleaning Products
To help you choose the right cleaning solution for your needs, we’ve compiled a list of some top-rated paint sprayer cleaning products:
- Graco Pump Armor: This cleaner is specifically designed for airless paint sprayers and effectively removes both water-based and oil-based paints. It also helps to lubricate and protect the pump, extending its lifespan.
- Wagner Universal Sprayer Cleaner: This versatile cleaner is suitable for all types of paint sprayers and can be used with both water-based and oil-based paints. It’s also biodegradable and phosphate-free, making it an environmentally friendly option.
- HomeRight Sprayer Cleaner: This cleaner is formulated for use with HomeRight paint sprayers but can also be used with other brands. It’s effective at removing both water-based and oil-based paints and is available in convenient pre-measured packets.
- Klean-Strip Lacquer Thinner: This powerful solvent is ideal for cleaning up lacquer and shellac-based paints. It’s also effective at removing stubborn paint residue and adhesives.
- Simple Green All-Purpose Cleaner: This biodegradable cleaner is a safe and effective option for cleaning up water-based paints. It’s also great for general cleaning around the house and workshop.
Read More Also: Pipe Flange Spreaders: An Essential Tool for Pipe Maintenance
FAQ: Your Paint Sprayer Cleaning Questions Answered
Q: How often should I clean my paint sprayer?
A: It’s crucial to clean your paint sprayer thoroughly after each use, regardless of the type of paint used. Even if you’re switching between different colors of the same paint type, cleaning prevents color contamination and ensures optimal performance.
Q: Can I leave paint in my sprayer overnight?
A: Leaving paint in your sprayer overnight, or even for a few hours, is not recommended. Paint can dry and harden, clogging the nozzle, lines, and other components. This can lead to damage and costly repairs.
Q: What happens if I don’t clean my paint sprayer properly?
A: Neglecting proper cleaning can have several negative consequences, including:
- Clogged Nozzles and Lines: Dried paint can obstruct the fluid passageways, causing uneven spraying, spitting, and inconsistent pressure.
- Damaged Parts: Paint residue can corrode and damage internal components, such as seals, O-rings, and the pump.
- Reduced Sprayer Lifespan: Improper cleaning can significantly shorten the lifespan of your paint sprayer, leading to premature failure and the need for replacement.
Q: Can I use household cleaners to clean my paint sprayer?
A: While some household cleaners may seem like a convenient option, they’re not recommended for cleaning paint sprayers. They may not be compatible with the sprayer’s materials and could cause damage or affect performance.
Q: How do I prevent my paint sprayer from clogging?
A: To prevent clogging, follow these tips:
- Strain your paint: Before filling the reservoir, strain the paint through a mesh filter or cheesecloth to remove any particles or debris.
- Clean the sprayer immediately after use: Don’t let paint dry in the sprayer. Clean it thoroughly as soon as you’re finished with your project.
- Store the sprayer properly: Store the sprayer in a clean, dry place to prevent dust and debris from entering the system.
Q: My paint sprayer is clogged. How can I unclog it?
A: If your sprayer is clogged, try these troubleshooting steps:
- Soak the affected parts: Soak the nozzle, spray tip, and other clogged parts in the appropriate cleaning solution for the recommended time.
- Use a cleaning needle: Carefully use a cleaning needle or toothpick to clear any blockages in the nozzle orifice.
- Backflush the system: For airless sprayers, try backflushing the system by reversing the flow of cleaning solution.
- Consult the user manual: Refer to your sprayer’s user manual for specific troubleshooting instructions.
Q: Can I use a pressure washer to clean my paint sprayer?
A: Using a pressure washer to clean your paint sprayer is not recommended. The high pressure can damage delicate parts and force water into areas where it shouldn’t go.
Q: How do I dispose of paint thinner and other cleaning solutions?
A: Never pour paint thinner or other solvents down the drain or into the ground. Contact your local waste disposal authority for proper disposal guidelines. Many communities have designated hazardous waste collection sites or events.
Conclusion
Cleaning your paint sprayer is an essential part of owning and maintaining this valuable tool. By following the steps outlined in this guide and using the right cleaning solutions, you can ensure your sprayer performs flawlessly for years to come. Remember to prioritize safety by wearing appropriate protective gear and working in a well-ventilated area. With proper care and attention, your paint sprayer will continue to be your trusted companion for all your painting endeavors.