Painter’s tape – that humble roll of blue or green adhesive – is a DIY enthusiast’s best friend. It promises crisp, clean lines and professional-looking paint jobs, but only when used correctly. Like any tool, there’s a right way and a wrong way to wield its power. Master the art of painter’s tape, and you’ll unlock a world of painting possibilities, from sharp accent walls to intricate geometric designs. Get it wrong, and you could be facing a sticky situation with messy bleeds and peeled paint.
This comprehensive guide dives deep into the do’s and don’ts of using painter’s tape, offering expert advice, product reviews, and answers to frequently asked questions. Whether you’re a seasoned DIYer or a newbie just starting out, this article will equip you with the knowledge to achieve painting perfection.
Understanding Painter’s Tape
Before we delve into the practicalities, let’s understand what makes painter’s tape different from your average masking tape. Painter’s tape is specifically designed for use with paint. Its unique adhesive allows it to stick firmly to surfaces while remaining gentle enough to prevent damage or leave residue upon removal. This delicate balance is crucial for achieving those coveted clean lines.
Types of Painter’s Tape:
- Blue Painter’s Tape: This is the most common type, suitable for a wide range of surfaces like walls, trim, and glass. It offers moderate adhesion and is generally safe for up to 14 days.
- Green Painter’s Tape: Formulated for more delicate surfaces like wallpaper, freshly painted walls (typically within 24 hours), and cabinets. It has a lower adhesion level than blue tape.
- Purple Painter’s Tape: This high-adhesion tape is ideal for rough or textured surfaces like brick, stucco, and concrete.
- Specialty Tapes: You’ll also find painter’s tapes designed for specific purposes, such as masking off curves, delicate surfaces, or outdoor applications.
The Do’s of Using Painter’s Tape
-
Do Choose the Right Tape for the Job:
As mentioned earlier, different tapes are designed for different surfaces and situations. Using the wrong tape can lead to poor adhesion, residue, or even damage to the surface. Consider the surface type, the paint you’re using (latex or oil-based), and the duration the tape will be in place. When in doubt, consult the manufacturer’s recommendations or seek advice from your local paint store.
-
Do Prepare the Surface Properly:
Painter’s tape adheres best to clean, dry, and smooth surfaces. Before applying the tape, ensure the surface is free from dust, dirt, grease, and moisture. Use a damp cloth to wipe down the area, and allow it to dry completely. For surfaces with loose paint or peeling wallpaper, address these issues before taping to prevent further damage.
-
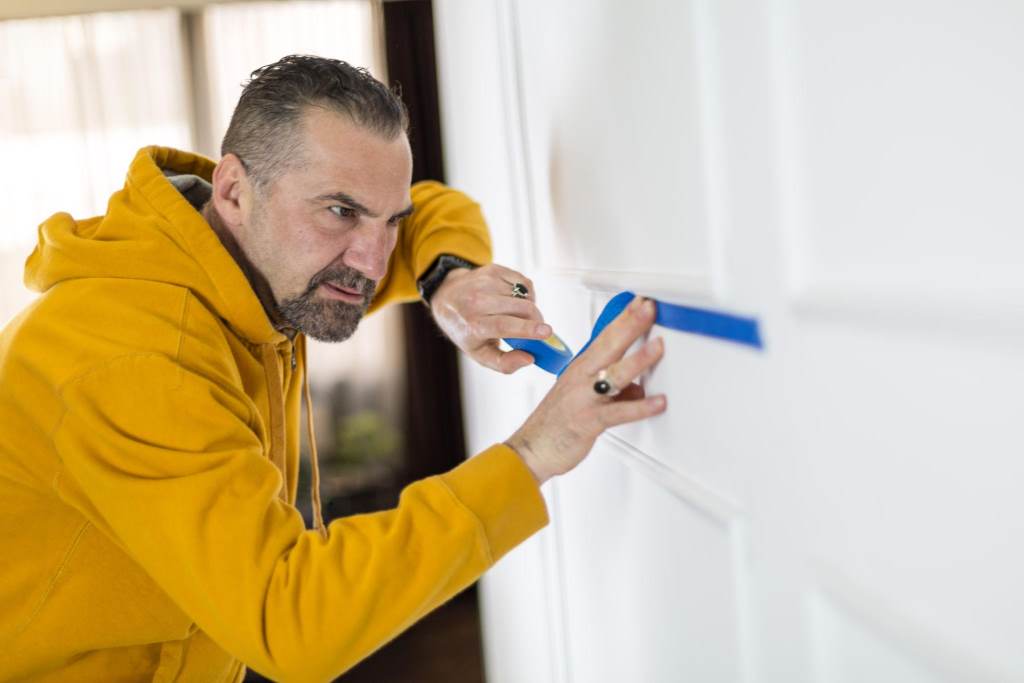
Do Apply the Tape Carefully:
Unroll the tape as you go, pressing it down firmly and smoothly onto the surface. Avoid stretching the tape, as this can cause it to lift or break. Overlap the tape slightly at the seams to prevent paint bleed. For long lines, use a putty knife or a credit card to ensure proper adhesion and avoid air bubbles.
-
Do Seal the Edges:
To achieve truly crisp lines, seal the edge of the tape with a thin coat of the base color you’re painting over. This creates a barrier that prevents the new paint from seeping under the tape. Allow the base coat to dry completely before applying the top coat.
-
Do Remove the Tape at the Right Time:
Timing is crucial when it comes to removing painter’s tape. For most tapes, the ideal time to remove is when the paint is dry to the touch but not fully cured. This usually means waiting at least an hour or two after painting. Removing the tape too early can result in smudging while waiting too long can cause the tape to bond too strongly and peel off the paint.
-
Do Remove the Tape Correctly:
Peel the tape back slowly at a 45-degree angle. If you encounter resistance, use a utility knife or razor blade to score the edge of the tape before peeling. This helps prevent the tape from pulling up the paint.
The Don’ts of Using Painter’s Tape
-
Don’t Use Masking Tape:
Masking tape is not designed for painting. Its adhesive is too strong and can damage surfaces or leave behind a sticky residue. Always opt for painter’s tape, which is specifically formulated for this purpose.
-
Don’t Apply Tape to Damp Surfaces:
Moisture can weaken the adhesive of painter’s tape, causing it to lift or lose its grip. Ensure the surface is completely dry before applying the tape.
-
Don’t Stretch the Tape:
Stretching the tape can cause it to become too thin and lose its adhesion. It can also lead to uneven lines and paint bleed. Apply the tape with gentle pressure, allowing it to follow the contours of the surface naturally.
-
Don’t Leave the Tape on for Too Long:
As mentioned earlier, leaving painter’s tape on for an extended period can cause it to bond too strongly to the surface. This can make it difficult to remove and may even pull up the paint. Follow the manufacturer’s recommendations for removal time.
-
Don’t Use a Heat Gun to Remove Tape:
While a heat gun can help soften the adhesive, it can also damage the paint or the surface underneath. If you’re having trouble removing the tape, try scoring it with a utility knife or using a hairdryer on a low setting.
-
Don’t Forget to Store Tape Properly:
Proper storage can extend the life of your painter’s tape. Store it in a cool, dry place away from direct sunlight. Avoid storing it in extreme temperatures, as this can affect the adhesive.
Related: FrogTape Pro Grade Orange Painter’s Tape: A Deep Dive
Painter’s Tape Reviews

- ScotchBlue Original Multi-Surface Painter’s Tape:
- Pros: Affordable, versatile, good adhesion, easy to remove.
- Cons: Can sometimes bleed through on textured surfaces.
- Best for: General painting projects on smooth surfaces.
- FrogTape Multi-Surface Painter’s Tape:
- Pros: Excellent bleed resistance, sharp lines, easy to remove.
- Cons: More expensive than other options.
- Best for: Achieving professional-looking results, especially on textured surfaces.
- 3M Scotch Delicate Surface Painter’s Tape:
- Pros: Gentle on delicate surfaces like wallpaper and freshly painted walls.
- Cons: Lower adhesion than other tapes.
- Best for: Use on surfaces that are prone to damage.
- Shurtape CP-32 Contractor Grade Painter’s Tape:
- Pros: Strong adhesion, durable, good for outdoor use.
- Cons: Can be difficult to remove from delicate surfaces.
- Best for: Demanding projects, rough surfaces, and outdoor applications.
Do’s and Don’ts of Using Painter’s Tape (FAQ)
- Can I use painter’s tape on textured walls?
Yes, but choose a tape specifically designed for textured surfaces, like FrogTape or purple painter’s tape. These tapes have a thicker adhesive that can conform to the uneven surface and prevent bleed-through.
- How can I prevent paint bleed?
Ensure the surface is clean and dry, apply the tape firmly and smoothly, and seal the edges with a thin coat of the base color. Using a high-quality painter’s tape like FrogTape can also help minimize bleed.
- My painter’s tape keeps peeling off. What should I do?
This could be due to several factors, such as a dirty or damp surface, improper application, or using the wrong type of tape. Ensure the surface is clean and dry, apply the tape firmly, and choose a tape with appropriate adhesion for the surface.
- Can I reuse painter’s tape?
While it’s technically possible to reuse painter’s tape, it’s not recommended. The adhesive loses its strength after each use, making it less effective. For best results, use fresh tape for each project.
- How do I remove painter’s tape residue?
If you encounter stubborn residue, try rubbing it with a cloth dampened with warm soapy water or white vinegar. You can also use a commercial adhesive remover, but test it on an inconspicuous area first to ensure it doesn’t damage the surface.
- What is the best way to store painter’s tape?
Store painter’s tape in a cool, dry place away from direct sunlight and extreme temperatures. This will help preserve the adhesive and prevent it from drying out.
Beyond the Basics: Creative Uses for Painter’s Tape
Painter’s tape isn’t just for achieving crisp lines. It’s a versatile tool that can be used for a variety of creative painting projects:
- Geometric Patterns: Create stunning geometric designs on walls, furniture, or even floors using painter’s tape to mask off different sections.
- Ombre Effects: Achieve a gradual color transition by using painter’s tape to create sections and blending the colors at the edges.
- Stripes and Patterns: Use painter’s tape to create perfectly spaced stripes or other patterns on walls, furniture, or fabric.
- Custom Designs: Let your creativity run wild! Use painter’s tape to mask off shapes, letters, or even intricate designs for a truly personalized touch.
Tips for Creative Taping:
- Plan your design: Sketch out your design beforehand to ensure proper placement and spacing.
- Use a level: For straight lines and geometric patterns, use a level to ensure accuracy.
- Get creative with shapes: Don’t limit yourself to straight lines. Experiment with curves, angles, and organic shapes for a unique look.
- Consider the color palette: Choose colors that complement each other and create the desired effect.
Conclusion
Mastering the art of painter’s tape is an essential skill for any DIY enthusiast. By following the do’s and don’ts outlined in this guide, you can achieve professional-looking results with clean lines and sharp edges. Remember to choose the right tape for the job, prepare the surface properly, and remove the tape at the correct time. With a little practice and patience, you’ll be able to tackle any painting project with confidence.
So, grab your brushes, unleash your creativity, and transform your living spaces with the magic of painter’s tape!