Clean paint lines can make or break a room. Even a high quality paint job looks amateur if edges bleed or lines look uneven. According to the U.S. Environmental Protection Agency, proper surface preparation can improve coating performance by over 50 percent. Meanwhile, data from the National Institute of Standards and Technology shows that controlled application methods significantly reduce material waste and rework. That means technique matters just as much as tools. Painter’s tape is one of the simplest ways to achieve crisp, professional edges, yet many people still struggle with it. This guide explains exactly how to use it the right way, step by step, so your results look clean every time.
What Is Painter’s Tape and Why It Matters
Painter’s tape is a low adhesive masking tape designed to protect surfaces while painting. Unlike regular tape, it removes cleanly without leaving residue or damaging paint underneath. This makes it essential for detailed work.
However, many people assume tape alone guarantees perfect lines. That is not true. The outcome depends on how you apply, seal, and remove it. When used correctly, painter’s tape helps you:
- Create sharp paint edges
- Protect trim, ceilings, and fixtures
- Save time on corrections
- Improve overall finish quality
Therefore, learning the right method gives you results that look like professional work, even if you are painting for the first time.
Choosing the Right Painter’s Tape
Not all painter’s tape performs the same. Picking the right type directly affects your results. You need to match the tape to your surface and project.
Types of Painter’s Tape
- Multi surface tape works well for walls, trim, and baseboards
- Delicate surface tape protects freshly painted or fragile surfaces
- Exterior tape handles sunlight and moisture exposure
Each type uses a different adhesive strength. Using the wrong one often leads to peeling paint or weak adhesion.
Key Features to Look For
- Clean removal without residue
- Medium adhesion for most interior jobs
- UV resistance for outdoor projects
- Flexibility for curved edges
In addition, always check how long the tape can stay applied before removal. Some tapes lose performance if left too long.
Preparing the Surface for Best Results
Preparation is where most people go wrong. Even the best tape cannot fix a poorly prepared surface. So, take time to do this step correctly.
Clean the Surface Thoroughly
Dust, grease, or moisture can prevent tape from sticking properly. Use a damp cloth or mild cleaner to remove dirt. Let the surface dry completely before applying tape.
Smooth the Area
Rough surfaces create gaps where paint can bleed. Light sanding helps create a smooth base. This step is especially important for trim and woodwork.
Plan Your Lines
Before applying tape, visualize where your lines should go. Mark lightly if needed. This reduces mistakes and helps maintain symmetry.
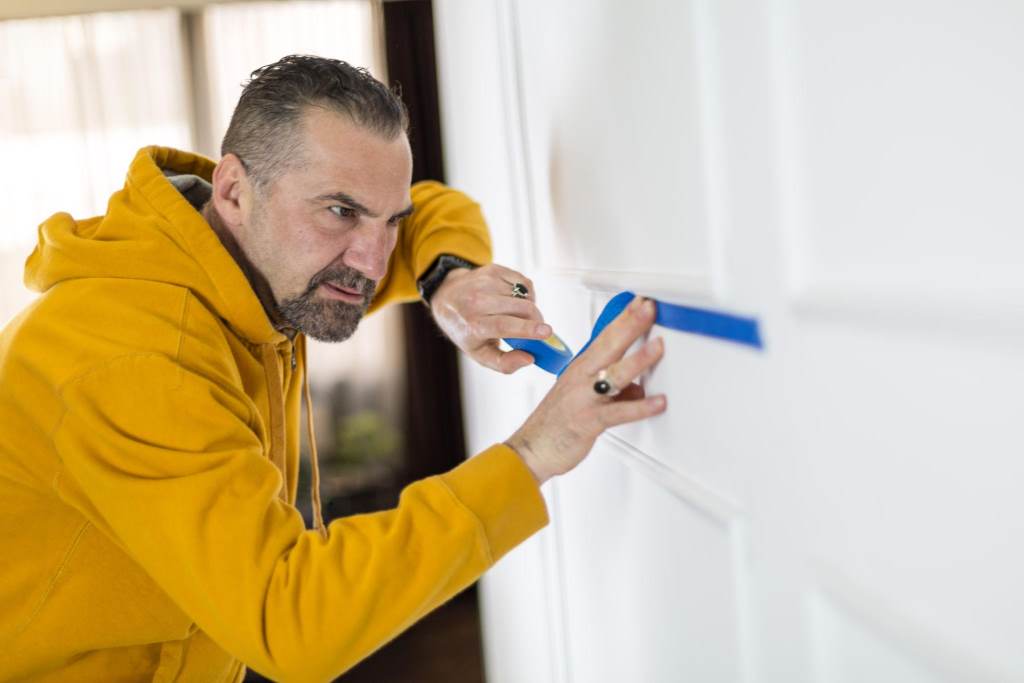
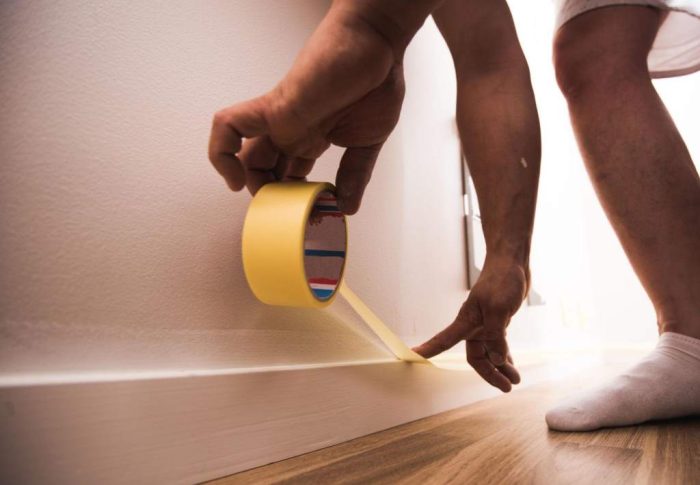
How to Apply Painter’s Tape Correctly
Applying tape is not just about sticking it on the wall. Technique matters. Follow these steps carefully for the best results.
Step by Step Application
- Apply slowly and evenly
Start at one end and press the tape down as you go. Avoid stretching it. - Keep the line straight
Use steady hand movement. For long lines, step back occasionally to check alignment. - Press firmly
Use your fingers or a flat tool to seal the edge. Focus on the side where paint will meet the tape. - Overlap corners slightly
This prevents gaps where paint can seep through. - Avoid wrinkles or bubbles
Smooth out imperfections immediately.
When done correctly, the tape creates a tight seal that blocks paint from bleeding underneath.
Sealing the Tape Edge for Sharp Lines
This step separates average results from professional ones. Many painters skip it, but it makes a big difference.
Why Sealing Matters
Even well applied tape can have tiny gaps. Paint can seep through these gaps and ruin your line. Sealing closes those gaps.
How to Seal the Edge
- Apply a thin coat of the base color along the tape edge
- Let it dry before applying the new color
This technique fills any gaps with the original color, so any bleed remains invisible. As a result, your final line looks sharp and clean.
Painting Over Painter’s Tape
Once the tape is applied and sealed, you can begin painting. However, your method still affects the outcome.
Best Practices While Painting
- Use light coats instead of heavy layers
- Brush or roll away from the tape edge
- Avoid overloading your brush or roller
Heavy paint application increases the risk of seepage. Meanwhile, controlled strokes help maintain clean lines.
Drying Time Matters
Allow each coat to dry before adding another. Rushing this step can cause smudging or uneven coverage.
When and How to Remove Painter’s Tape
Removing tape at the right time is just as important as applying it.
Ideal Timing
Remove the tape while the paint is slightly dry but not fully hardened. This prevents peeling and tearing.
Proper Removal Technique
- Pull the tape slowly at a 45 degree angle
- Keep your movement steady and controlled
- If resistance occurs, use a utility knife to score the edge lightly
This method ensures the paint line remains intact and clean.
Common Mistakes and How to Avoid Them
Even small mistakes can ruin your finish. Here are the most common issues and how to fix them.
Mistakes to Watch For
- Applying tape on dirty surfaces
- Leaving tape on for too long
- Using the wrong tape type
- Skipping the sealing step
- Applying thick paint layers
Simple Fixes
- Always clean and dry surfaces first
- Remove tape within recommended time
- Choose tape based on surface type
- Seal edges before painting
- Use thin, even coats
By avoiding these mistakes, you improve both efficiency and results.
Pro Tips for Perfect Paint Lines
Professionals rely on small techniques that make a big difference. You can apply the same methods easily.
Expert Tips
- Use a putty knife to press tape edges firmly
- Work in sections instead of taping the whole room at once
- Combine tape with steady brush control for best results
- Test your tape on a small area before full use
- Keep lighting bright so you can see edges clearly
These small adjustments help you achieve consistent, high quality results.
Conclusion
Using painter’s tape correctly is not complicated, but it does require attention to detail. From choosing the right tape to sealing edges and removing it at the right time, each step plays a role in the final result. When you follow the proper process, you get clean, sharp lines that elevate your entire paint job. Start applying these techniques on your next project, and you will notice the difference immediately. Practice consistently, and your results will begin to look truly professional.
FAQs
What is the best way to prevent paint bleed under tape
Apply the tape carefully, press the edges firmly, and seal with a thin coat of the base color before painting. This method blocks gaps effectively.
Can I leave painter’s tape on overnight
It depends on the tape type. However, most tapes perform best when removed within a few hours. Leaving it too long can cause peeling.
Why does my paint peel when I remove tape
This usually happens when the paint is fully dry or the tape adhesion is too strong. Removing tape at the right time helps avoid this issue.
Do I need to use painter’s tape for every project
Not always. Skilled painters can cut in without tape. However, tape is highly useful for beginners and for detailed work.
Can I reuse painter’s tape
No, painter’s tape is designed for single use. Reusing it reduces adhesion and leads to poor results.


