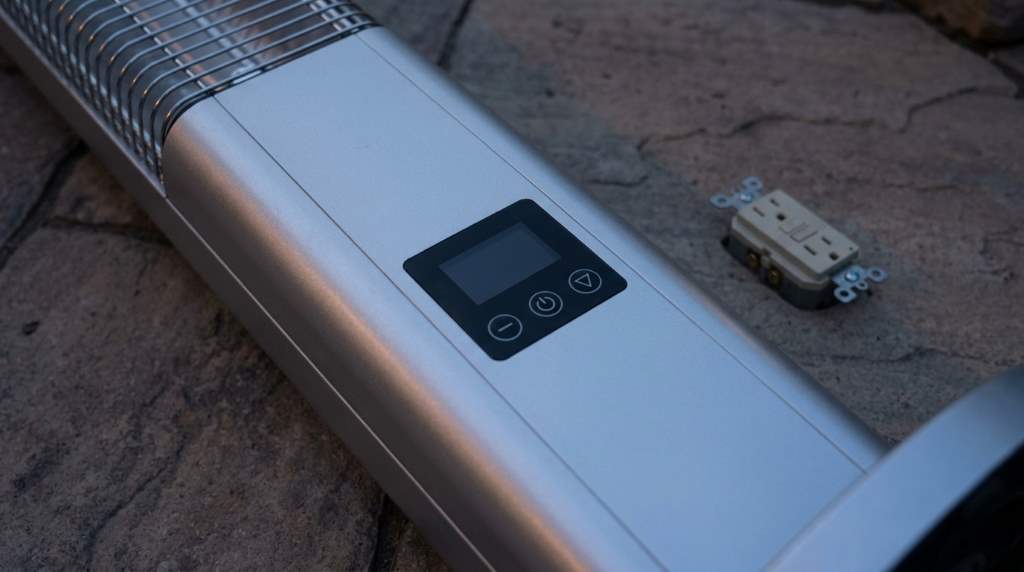
A tripped GFCI outlet, a tilted switch, or dead remote batteries usually stop your heater. Next, inspect your electrical wiring connections and test the carbon infrared heating tube. In fact, appliance repair data indicates that outdoor moisture causes seventy percent of patio heater shutdowns.
Chilly evenings require steady radiant warmth from your SereneLife outdoor electric heater. However, built-in safety sensors shut down power when heaters tilt past forty-five degrees. Additionally, simple multimeter tests identify internal component failures within minutes. Therefore, this troubleshooting guide outlines clear repair steps to restore comfortable patio warmth today.
Key Takeaways
- Reset tripped outdoor GFCI outlets and ensure weather-resistant outlet covers block morning moisture.
- Place the heater upright on level ground to disengage the internal mechanical tip-over switch.
- Replace depleted remote control batteries and point the transmitter directly at the infrared sensor.
- Test the carbon infrared heating tube with a digital multimeter to confirm electrical continuity.
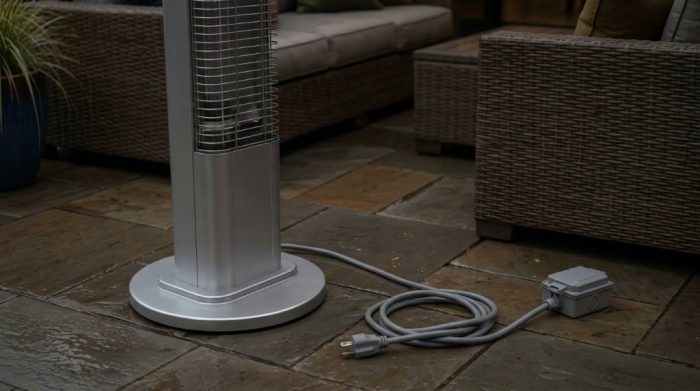
- Use a heavy-duty 14-gauge or 12-gauge extension cord to prevent dangerous circuit voltage drops.
- Verify the IP weather rating to shield internal electrical components against heavy rainwater.
SereneLife Outdoor Heater Symptoms and Diagnosis Matrix
Diagnosing an electric patio heater requires matching specific failure symptoms with practical mechanical fixes. For example, sudden electrical shutdowns point to tripping safety switches rather than burned elements. The following reference matrix matches common operating failures with targeted repair procedures.
| Observed Symptom | Likely Root Cause | Recommended Diagnostic Action |
|---|---|---|
| No power lights or heat | Tripped GFCI outlet or circuit breaker | Reset breaker and test outlet with multimeter. |
| Heater shuts down abruptly | Tilted base or stuck tip-over switch | Place heater on level ground and check switch. |
| Remote control fails completely | Dead CR2025 battery or blocked receiver | Install fresh battery and clean infrared lens. |
| Power light active without heat | Broken carbon infrared heating tube | Measure element continuity with digital multimeter. |
| Heater cycles off repeatedly | Thermal overload from blocked heat shield | Clear patio debris and allow full cool down. |
| Power cord feels unusually hot | Undersized 16-gauge outdoor extension cord | Replace cord with 12-AWG heavy-duty cable. |
Consequently, systematic troubleshooting eliminates guesswork and protects delicate internal electronic control boards. Always unplug your patio heater before opening access panels or touching internal wiring. Next, explore the detailed repair guides below to resolve your specific equipment issue.
Troubleshooting the Power Supply and Outdoor GFCI Outlets
Resolving Sensitive GFCI Moisture Trips
Outdoor patio heaters draw significant electric current through exterior ground-fault circuit interrupter outlets. However, morning dew and driving rain frequently penetrate unsealed outdoor electrical outlet boxes. Moisture creates tiny current leaks to ground that instantly trip sensitive GFCI breakers.
First, disconnect the patio heater power cord and inspect the plug pins for water droplets. Dry the outlet completely using a clean cloth or gentle warm air from a hairdryer. Additionally, install an in-use weatherproof bubble cover to protect your outdoor electrical connections.
Checking Dedicated Circuit Breakers
SereneLife electric patio heaters typically consume 1,500 watts of electricity during peak operation. Consequently, the heating element draws 12.5 amps across standard 120-volt household branch circuits. Sharing that same fifteen-amp breaker with patio string lights or grills overloads the circuit.
Examine your main electrical panel for tripped circuit breakers with handles resting in center positions. Next, flip the breaker firmly to the off position before switching it back on. Always connect high-wattage patio heaters to dedicated twenty-amp outdoor branch circuits for dependable operation.
Fixing the Internal Tip-Over Safety Switch
How the Mechanical Ball Switch Operates
SereneLife incorporates a mechanical tip-over safety switch inside the heater base or lower pole. This crucial safety device cuts electrical power whenever the heater tilts past forty-five degrees. Specifically, a weighted metallic ball rolls away from internal electrical contacts during excessive tipping.
Strong patio winds or uneven deck pavers often tilt freestanding heaters just enough to trigger disconnects. Furthermore, accidental bumps from patio chairs can dislodge the internal balance mechanism without warning. The heater remains completely lifeless until you restore the unit to an upright position.
Leveling the Base and Clearing Jammed Switches
First, move your SereneLife heater onto a flat, solid concrete slab or level deck surface. Gently shake the vertical pole to listen for the distinctive rattle of the internal ball switch. A clear metallic click confirms that the weighted ball moves freely inside its safety housing.
However, corrosion or impact shock can occasionally jam the weighted ball in an open position. Unplug the unit, turn it upside down briefly, and set it upright once again. This simple inversion maneuver frees sticky mechanical contacts and resets the automatic power connection.
Restoring Remote Control and Infrared Sensor Functionality
Replacing Dead Transmitter Batteries
Many SereneLife patio heaters rely on handheld infrared remotes for primary power and heat adjustment. Consequently, a dead transmitter battery prevents the heater from turning on despite active wall power. Freezing outdoor temperatures drain small coin-cell batteries much faster than warm indoor conditions.
Open the battery tray on the rear of your remote control using a small coin. Next, remove the old CR2025 or CR2032 lithium battery and install a fresh replacement. Ensure the positive plus sign faces upward before sliding the battery door shut securely.
Maintaining Clear Sensor Line of Sight
Infrared remotes require an unobstructed visual line of sight to the heater receiver lens. Outdoor dust, pollen, and spiderwebs often coat the front infrared sensor dome over time. Consequently, dirty optical covers block invisible light signals from reaching the internal control module.
Wipe the dark sensor window on the heater housing with a soft microfiber cloth. Furthermore, stand within fifteen feet and aim the transmitter directly at the front receiver. Bright direct sunlight can wash out infrared signals, so shield the receiver during daylight testing.
Testing the Carbon Infrared Heating Tube with a Multimeter
Performing a Visual Inspection for Element Cracks
SereneLife heaters utilize high-efficiency carbon fiber heating elements to generate instant outdoor radiant warmth. However, severe mechanical impacts or sudden thermal shocks can shatter delicate quartz glass envelopes. Disconnect power completely before peering through the protective metal mesh grille to inspect tubes.
Shine a bright work light along the entire length of the carbon filament tube. Look closely for hairline fractures, dark burn patches, or snapped carbon fiber filaments inside. Additionally, inspect both ceramic end caps for heat discoloration, cracking, or loose terminal screws.
Measuring Electrical Resistance and Continuity
A digital multimeter provides the most reliable way to confirm heating element integrity. First, set your multimeter rotary dial to the lowest ohms setting or continuity mode. Touch the black and red test probes to the opposite metal terminals of the tube.
Specifically, a healthy 1,500-watt heating element produces an electrical resistance reading between nine and twelve ohms. In contrast, an infinite resistance reading or open-loop signal proves a broken carbon filament. Replace broken carbon tubes with authentic SereneLife factory parts to restore heating performance.
Selecting the Correct Outdoor Cord Gauge and Preventing Voltage Drops
Why 16-Gauge Extension Cords Cause Failures
High-wattage electric heaters demand thick copper conductors to transmit electric current without heavy power loss. Unfortunately, many homeowners use cheap sixteen-gauge household extension cords on patio appliances. Thin copper wires produce severe electrical resistance across long runs of twenty-five feet or more.
Consequently, excessive voltage drops starve the carbon heating tube of necessary electrical energy. The undersized cord overheats quickly, melting insulation and triggering thermal cutoff switches inside heaters. Furthermore, low input voltage prevents digital control boards from energizing internal power relays properly.
Choosing 12-AWG and 14-AWG Heavy-Duty Cables
Always plug your SereneLife heater directly into a wall receptacle whenever possible. If you must use an extension lead, select an outdoor-rated fourteen-gauge cord under twenty-five feet. Similarly, for runs reaching fifty feet, choose a heavy-duty twelve-gauge cable with grounded three-prong plugs.
Additionally, verify the cable jacket features an SJTW or STW weather-resistant rating designation. These thick rubber jackets resist solar ultraviolet degradation, foot traffic, and freezing winter temperatures. Proper cable sizing delivers full electrical wattage to the heating element for maximum radiant heat.
Understanding Ingress Protection Ratings and Weather Resistance
Interpreting IP24 and IP55 Ratings
SereneLife manufactures outdoor electric heaters with certified Ingress Protection ratings like IP24 or IP55. The first digit measures protection against solid objects like insects, fingers, and windblown dust. Meanwhile, the second digit defines moisture resistance against rain droplets, splashing water, or water jets.
For example, an IP24 rating protects internal components against water splashes from any direction. However, IP24 enclosures cannot withstand driving torrential rain, heavy snow accumulation, or garden hoses. Higher IP55 ratings provide superior dust sealing and protection against pressurized water spray.
Shielding Patio Heaters from Direct Rain
Water intrusion into electronic housings trips GFCI circuits and corrodes internal wire splices. Therefore, mount wall heaters under covered patio eaves, pergolas, or protective architectural overhangs. Keep freestanding tower heaters away from roof drip lines, gutter downspouts, and automated lawn sprinklers.
Allow damp heaters to dry completely in the sunshine before turning on the power. Additionally, purchase a custom fitted waterproof vinyl cover for every outdoor patio heater. Covering your equipment prevents morning condensation from penetrating sensitive switch contacts and control modules.
Preventive Maintenance and Seasonal Care for SereneLife Heaters
Cleaning Reflectors and Heating Tubes Safely
Polished aluminum reflectors bounce infrared thermal waves directly toward your patio seating area. However, outdoor grime, soot, and dust dull the reflective mirror surface over several months. A dirty reflector absorbs heat internally rather than projecting soothing warmth across your deck.
First, disconnect electrical power and allow the heater to cool for thirty minutes completely. Blow compressed air through the protective grille to remove loose patio dust and spiderwebs. Next, wipe the aluminum reflector gently using an isopropyl alcohol wipe on a foam swab.
Proper Storage and Off-Season Protection
Proper off-season storage prevents costly repairs and extends your heater lifespan by several years. Remove coin batteries from handheld remotes before packing equipment away for warm summer months. Specifically, this simple precaution eliminates battery acid leaks that ruin expensive remote transmitter circuit boards.
Wrap the power cord loosely around the base brackets without twisting or kinking wires. Furthermore, store freestanding patio heaters in a dry garage, basement, or garden shed. Dry indoor storage protects delicate carbon heating tubes from humid summer air and nesting rodents.
Conclusion: Bring Reliable Warmth Back to Your Patio
Troubleshooting your SereneLife heater requires checking basic power sources, safety switches, and element continuity. Most heating failures stem from simple issues like tripped GFCIs, tilted bases, or dead remote batteries. Therefore, systematic testing saves you significant time, replacement expense, and unnecessary service calls.
Inspect your power cords, level your heater base, and verify your outlet connections today. Additionally, protect your heating investment with weatherproof covers throughout damp winter weather. Follow these proven steps now and enjoy reliable, cozy radiant warmth across your outdoor patio!
Frequently Asked Questions
Why does my SereneLife heater turn off when moved?
The internal tip-over switch automatically cuts power when the unit tilts past forty-five degrees.
How do I know if my carbon heating tube burned out?
A digital multimeter shows infinite resistance across element terminals if the carbon filament broke.
Why does my outdoor heater trip the GFCI outlet immediately?
Moisture inside the plug or outlet box leaks electrical current and trips the sensitive interrupter.
What size extension cord should I use with SereneLife patio heaters?
Use an outdoor-rated fourteen-gauge cord under twenty-five feet or a twelve-gauge cord for longer distances.
Why is my SereneLife remote control not operating the heater?
Replace the depleted CR2025 coin battery and align the transmitter directly with the infrared receiver.