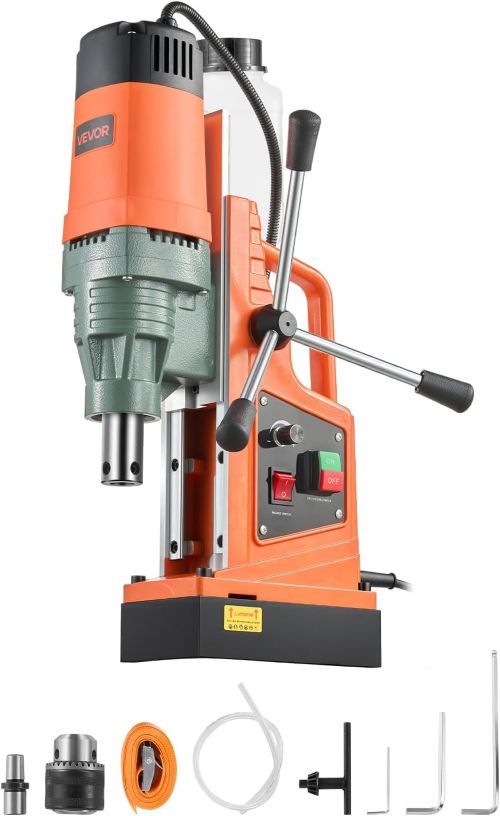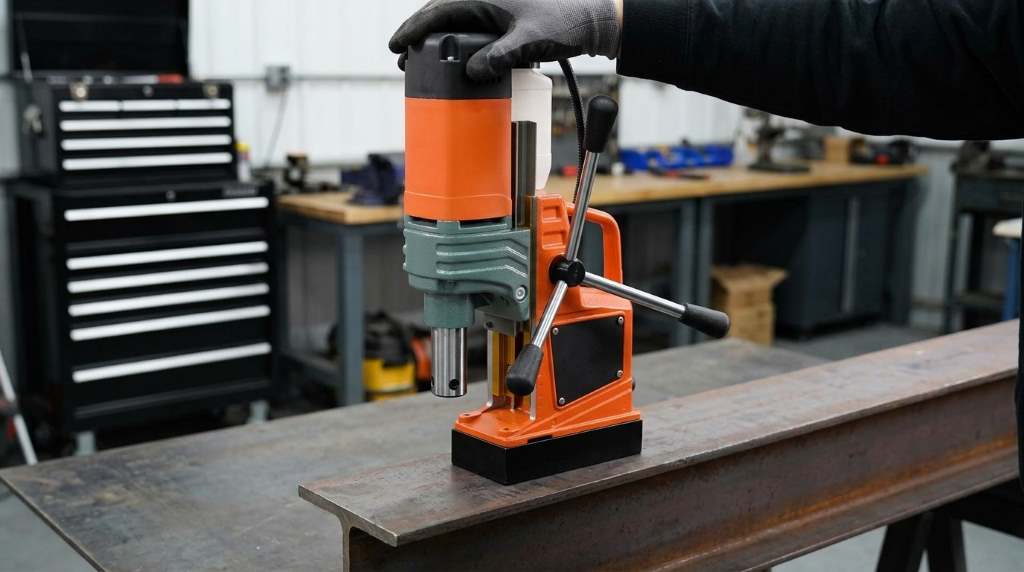
You fix common magnetic drill issues by cleaning motor commutators, adjusting slide gibs, and testing rectifiers. Next, replace worn carbon brushes whenever the drill motor produces heavy blue electrical sparks. Unclog the through-spindle coolant valve quickly to stop severe annular cutter overheating on thick plate.
Metal fabricators rely heavily on compact magnetic drills for accurate on-site structural steel drilling. However, tough jobsites expose the Vevor magnetic drill press to heavy vibration and fine metal dust. In fact, repair shop records show that seventy percent of field failures involve basic mechanical issues. Therefore, this repair guide provides practical diagnostic procedures to restore your drill immediately.
Key Takeaways
- Test the base bridge rectifier with a multimeter when the electromagnet loses magnetic clamping force.
- Tighten the slide gib set screws evenly to eliminate arbor chatter and cutter binding.
- Clean motor commutator copper bars using fine abrasive stone to eliminate excessive brush arcing.
- Clear swarf and metal shavings from the spring-loaded internal spindle coolant valve frequently.
- Check spindle runout with a dial indicator before mounting expensive annular cutters.
- Always wipe steel workpieces clean to maximize direct contact with the electromagnetic base.
Diagnosing Electromagnet Holding Failures and Rectifier Circuit Issues
Testing the Base Bridge Rectifier Circuit
The electromagnetic base requires smooth direct current to produce massive magnetic holding force. Specifically, an internal bridge rectifier converts alternating current from the wall into direct current. Voltage spikes from generator power supplies often blow diodes inside this small rectifier board.
First, disconnect the power cord and open the side electrical access cover. Set your digital multimeter to diode check mode to test the four rectifier terminals. Healthy diodes display forward voltage drops between 0.5 and 0.7 volts. In contrast, a shorted rectifier reads zero volts and requires immediate replacement.
Measuring Coil Resistance and Power Switch Continuity
A damaged electromagnet coil also prevents the magnetic base from securing against steel. Consequently, you must measure total coil resistance across the disconnected magnet wire leads. Touch your meter probes across the two magnet wires using resistance mode.
Normal Vevor base coils produce steady resistance readings between 120 and 280 ohms. Additionally, infinite resistance signals an internal broken copper wire winding. Inspect the magnetic rocker switch contacts for burnt plastic or loose spade connectors. Furthermore, clean corroded wire terminals with contact cleaner spray to restore strong conductivity.
Cleaning the Magnetic Base Plate Surface
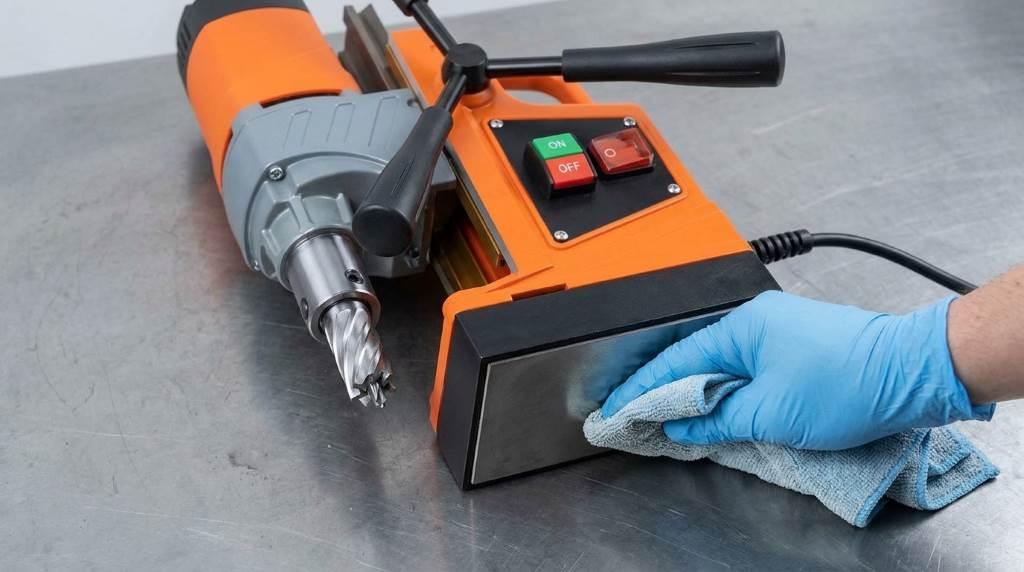
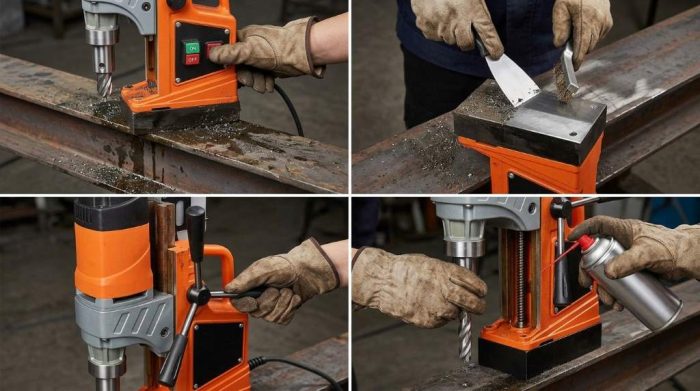
Physical debris beneath the magnetic base drastically weakens holding power on steel plates. For example, a tiny metal chip creates an air gap that reduces clamping force. Always scrape welding spatter and rust scale off the steel plate before drilling.
Next, polish the bottom steel base plate with a medium-grit whetstone. Wipe away residual grinding slurry using an acetone-soaked microfiber cloth. This maintenance step ensures maximum magnetic flux transfer into your steel workpiece.
Adjusting Rack and Pinion Gib Strips to Eliminate Slide Play
Identifying Carriage Slop and Cutter Chatter
Dovetail slide play causes aggressive drill chatter and snags annular cutter teeth. Loose gib strips allow the heavy motor carriage to wobble during drilling operations. Consequently, unstable cutters chip their tungsten carbide edges against hard structural steel.
You can detect slide slop by wiggling the motor housing by hand. However, proper adjustments require checking side clearance with a flat feeler gauge. Aim for three to five thousandths of an inch total carriage clearance.
Calibrating the Dovetail Gib Set Screws
Four set screws secure the brass gib strip against the carriage slide. First, loosen the outer locking hex nuts on all four adjustment screws. Use a quality hex key to turn each set screw clockwise gently.
Tighten each screw until you feel light contact against the brass gib. Then, back each screw out one-quarter turn to eliminate excessive carriage friction. Hold the set screw stationary while locking the hex nut with a wrench. Additionally, test the vertical feed handle across the entire travel stroke.
Lubricating the Slide Way and Pinion Gear
Dry dovetail slide ways accelerate brass gib wear and cause rough feeding action. Therefore, wipe away dirty grease and metal swarf using mineral spirits. Apply high-pressure way oil along both machined dovetail sliding surfaces.
Next, pack lithium grease into the steel rack and pinion gear teeth. Cycle the carriage up and down several times to distribute the lubricant. Smooth carriage movement eliminates operator hand fatigue during demanding production shifts.
Correcting Spindle Runout and Cutter Arbor Misalignment
Measuring Spindle Runout with a Dial Indicator
Excessive spindle runout ruins hole roundness and shatters costly annular cutters. Specifically, runout occurs when the spindle axis wobbles off true rotational center. Mount a magnetic base dial indicator directly onto the drill press frame.
Place the indicator contact point against the inner taper of the spindle. Then, rotate the spindle slowly by hand to observe total indicator reading. A healthy magnetic drill press maintains runout under two thousandths of an inch. Higher readings indicate debris contamination or bent spindle shafts.
Cleaning the Morse Taper and Weldon Shank Socket
Tiny metal chips often lodge inside the Morse taper or Weldon arbor socket. Consequently, trapped chips cock the cutter arbor sideways during tool installation. Remove the cutter arbor using an appropriate steel drift key.
Next, clean the internal socket taper using a brass bore brush. Spray quick-drying electrical contact cleaner inside the arbor bore to dissolve grime. Furthermore, wipe the arbor shank dry before reinserting it into the spindle.
Replacing Worn Spindle Bearings
Worn spindle ball bearings cause grinding noises and severe axial play. Heavy vertical feed pressure eventually degrades the lower spindle bearing races. Therefore, replace noisy spindle bearings before they destroy the gearbox housing.
First, remove the gearbox faceplate screws and pull the lower spindle assembly. Press out old bearings using a mechanical arbor press and bearing splitter. Install premium sealed deep-groove ball bearings to ensure smooth cutter rotation.
Unclogging and Servicing the Internal Coolant Delivery System
Flushing the Gravity Coolant Tank and Hoses
Through-spindle coolant prolongs cutter life and flushes hot metal chips away. However, dried cutting oil residue frequently clogs the gravity feed bottle. Empty stagnant fluid from the plastic tank after completing your daily drilling.
Next, detach the clear polyurethane hose from the spindle collar fitting. Flush warm water and degreaser through the plastic hose using a syringe. In fact, regular flushing removes sticky fluid varnish before blockages form.
Clearing Chips from the Spring-Loaded Pilot Pin Valve
The center pilot pin activates internal coolant flow when touching steel. Specifically, upward pin movement opens a spring-loaded brass ball check valve. Fine metal dust often jams this delicate valve in the closed position.
First, pull the pilot pin out of the annular cutter arbor. Inspect the spring cavity for trapped swarf or bent internal pins. Blow fifty PSI of compressed air into the coolant port. Additionally, lubricate the pilot pin shaft with light cutting fluid.
Inspecting Spindle Fluid Flow Seals and O-Rings
Worn rubber rotary seals allow coolant to spray across the drill housing. Escaping cutting fluid can enter the motor housing and cause electrical shorts. Therefore, inspect the spindle coolant ring O-rings during monthly maintenance checks.
Remove the snap ring holding the coolant collar onto the spindle. Then, slide the collar off to examine the inner Nitrile O-rings. Replace flattened or torn rubber seals to preserve reliable fluid delivery.
Restoring Motor Performance and Servicing Armature Commutators
Inspecting and Replacing Carbon Brushes
Electric drill motors rely on carbon brushes to transfer power to armatures. However, constant friction wears these carbon blocks down over regular use. Short brushes cause severe electrical arcing and sudden motor speed drops.
Unscrew the black plastic brush caps on both motor sides. Next, pull the spring-loaded brushes out and measure their remaining length. Replace carbon brushes immediately whenever their length drops below one-quarter inch. Furthermore, confirm that internal copper shunt wires remain firmly attached.
Polishing Commutator Bars and Removing Carbon Glaze
Heavy carbon dust forms a dark glaze across the copper commutator segments. Consequently, this conductive carbon residue causes short circuits between adjacent copper bars. You must clean the cylindrical commutator surface to restore smooth electrical contact.
First, insert a fine commutator cleaning stone through the brush holder opening. Rotate the armature shaft by hand while pressing the stone lightly. In fact, non-conductive abrasive stones polish copper bars without gouging soft metal. Blow dry compressed air through the motor vents to eject carbon particles.
Checking Armature Windings for Electrical Shorts
Overheated motors often suffer melted varnish insulation on copper armature coils. Specifically, insulation breakdown creates internal winding shorts that produce extreme heat. Noticeable acrid burning smells strongly signal scorched armature coils during drilling.
Measure resistance between opposing commutator bars using your digital multimeter. Similarly, healthy armature coils show consistent low resistance across every segment pair. A zero-ohm reading indicates a dead short that demands armature replacement.
Component Diagnostic and Resistance Testing Matrix
Accurate electrical measurements eliminate guesswork during magnetic drill press repairs. For example, tracking baseline component resistance values isolates failing electrical parts fast. The following reference table outlines key electrical specifications and diagnostic procedures.
| Component System | Baseline Specification | Diagnostic Procedure |
|---|---|---|
| Base Electromagnet Coil | 120 to 280 Ohms DC | Test leads with multimeter for open circuits or ground shorts. |
| Bridge Rectifier Board | 0.5 to 0.7V diode drop | Verify forward voltage drop and confirm complete reverse blocking. |
| Motor Carbon Brushes | Under 1.5 Ohms | Measure brush length and replace below one-quarter inch. |
| Armature Commutator Bars | 0.2 to 0.8 Ohms | Polish copper bars and clean conductive carbon dust away. |
| Coolant Pilot Pin Valve | Mechanical spring seal | Clear trapped metal shavings and test spring recoil motion. |
| Slide Dovetail Gib Strip | 0.003 to 0.005 inch gap | Tighten four set screws to eliminate carriage wobble. |
Comparing your test readings against these factory benchmarks speeds up troubleshooting. Additionally, write your test results in a maintenance logbook for future reference. Routine electrical checks prevent sudden jobsite breakdowns on tight project deadlines. Consequently, you save valuable fabrication time while protecting expensive equipment.
Preventative Maintenance Checklist for Jobsite Reliability
Daily Worksite Inspections
Daily equipment inspections stop minor mechanical wear from turning into costly failures. First, inspect the power cord for cuts, cracked insulation, or exposed copper. Vibrations and sharp metal chips damage rubber electrical cords on fabrication floors.
Next, test the emergency magnetic safety strap before beginning overhead drilling jobs. Always anchor the drill frame securely to structural steel with this strap. In fact, safety straps prevent catastrophic equipment drops during unexpected power blackouts.
Monthly Deep Servicing Routines
Schedule comprehensive monthly drill servicing to preserve mechanical precision and power. Specifically, remove the gearbox cover to inspect internal gear teeth for wear. Wipe away aged black grease and apply fresh extreme-pressure molybdenum gear grease.
Furthermore, disassemble the feed handle pinion shaft to clean out accumulated grit. Spray anti-corrosion lubricant across all exposed bare metal surfaces before long-term storage. Proper storage safeguards precision machine surfaces against humid shop environments.
Conclusion: Maintain Peak Magnetic Drill Productivity
Regular maintenance keeps your magnetic drill operating smoothly through tough fabrication projects. Moreover, understanding rectifier circuits, gib adjustments, and commutator care saves significant repair money. Consistent care also maximizes annular cutter longevity and prevents dangerous worksite accidents.
Therefore, inspect your drill press components before tackling your next structural steel project. Grab your multimeter, adjust your slide gibs, and replace worn brushes today. Equip your fabrication workshop with dependable drilling power and drill clean holes reliably!
Frequently Asked Questions
Why is my Vevor magnetic drill press not sticking to steel?
A failed bridge rectifier, dirty steel surface, or severed coil wire breaks magnetic holding power.
Why does my magnetic drill motor spark heavily during drilling?
Worn carbon brushes and dirty copper commutator bars cause intense electrical arcing inside motors.
How do I stop my annular cutter from chattering and binding?
Tighten the four slide gib set screws to eliminate loose carriage slop and vibration.
Why is coolant not flowing through my drill spindle?
Metal chips often jam the spring-loaded internal pilot pin check valve inside the arbor.
How often should I inspect the motor carbon brushes?
Inspect carbon brush length every fifty operating hours and replace them below one-quarter inch.