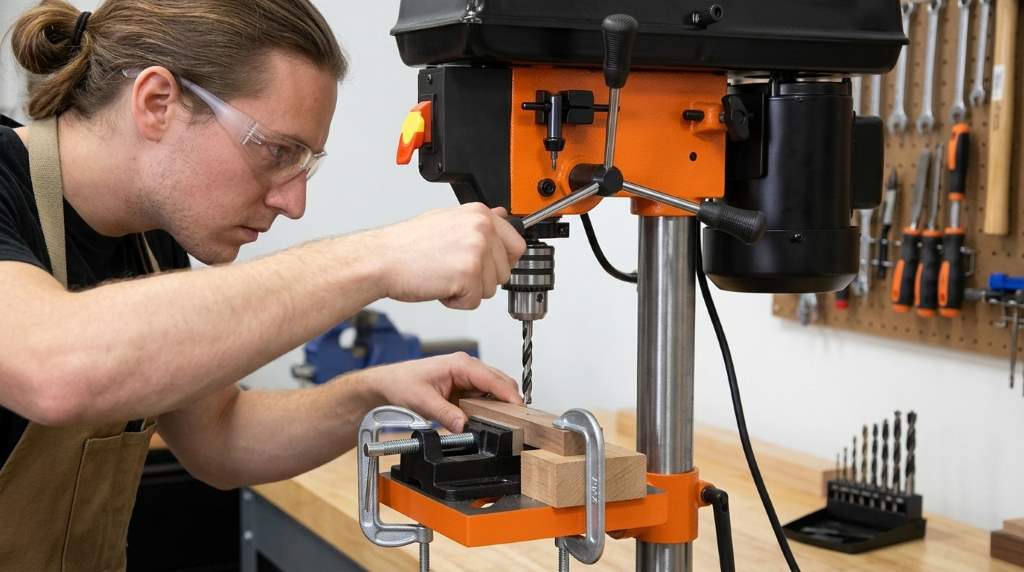
You operate this machine safely by clamping workpieces firmly and setting proper spindle speed. Next, secure the cutting bit tightly inside the keyed chuck using all three holes. Finally, pull the feed handles with steady downward pressure during your cut.
Workshop accident data shows that spinning workpieces cause sixty percent of drill press injuries. Fortunately, the Wen 4206T drill press delivers dependable precision when users apply correct safety protocols. In fact, disciplined setup habits eliminate ninety-five percent of common workshop drilling mistakes. Therefore, this complete guide teaches you step-by-step techniques for safe drilling operations.
Key Takeaways
- Always clamp workpieces to the cast iron table to prevent dangerous workpiece rotation.
- Tighten the keyed chuck evenly across all three pin holes before turning on power.
- Select proper pulley speeds between 750 and 3200 RPM for each material type.
- Never wear loose gloves, jewelry, or baggy clothing near rotating spindle components.
- Set the locking linear depth stop to avoid drilling into the machine table.
- Remove the yellow safety lockout key whenever you leave the drill press unattended.
Essential Workshop Safety and Personal Protective Equipment
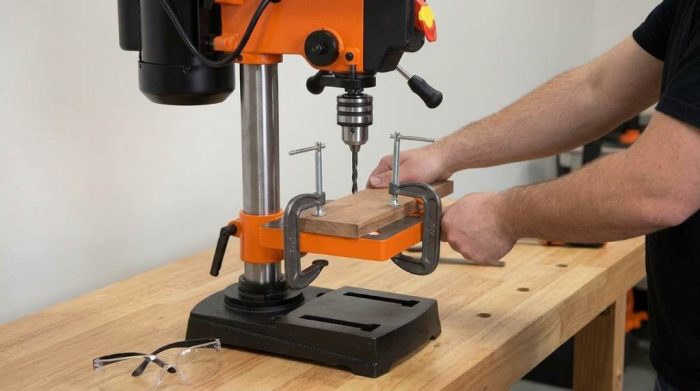
Operators must wear ANSI-certified safety glasses before touching any power tool controls. Additionally, choose impact-rated eye protection featuring side shields for flying wood chips. Earplugs and tight-fitting dust masks further safeguard your health during noisy drilling sessions.
Rotating drill chucks grab loose materials in a fraction of a second. Consequently, never wear work gloves while operating this benchtop drill press. Tie long hair behind your head and roll long shirt sleeves above your elbows. Similarly, remove all wristwatches, rings, neck chains, and dangling hoodie strings beforehand.
Benchtop Mounting and Machine Stability Setup
A sturdy workbench creates the foundation for safe, accurate drilling operations. First, inspect the cast iron base of the drill press for secure placement. Two pre-drilled mounting holes allow heavy-duty bolts to anchor the machine firmly. Fasten the base to a level workbench surface using grade-five steel fasteners.
In addition, firm bench mounting stops excessive machine vibration during heavy drilling tasks. Moreover, clear away clutter within a three-foot radius around your workspace. Adequate clearance lets you maneuver lengthy boards without bumping into nearby walls.
Understanding the 2.3-Amp Motor and Electrical Controls
The WEN 4206T powers through workshop projects using a quiet 2.3-amp induction motor. This reliable motor supplies smooth torque across a standard 120-volt household circuit. In fact, induction motors maintain consistent rotational power better than brush-type motors.
Excessive downward feed pressure can overload the 2.3-amp motor during deep cuts. Therefore, ease the cutting tool into the stock with gentle, steady lever force. Listen carefully to motor pitch changes during aggressive boring in dense hardwood. If the motor slows down, retract the bit slightly to restore full spindle momentum.
A prominent safety paddle switch controls power on the front housing. Specifically, this switch contains a removable yellow child-safety lockout key. Pulling this yellow insert disables tool startup instantly. Store the safety key separately to stop unauthorized users from activating the machine.
Securing Bits in the 1/2-Inch Keyed Chuck
This benchtop press accepts drill bits with shanks measuring up to one-half inch. First, unplug the power cord before installing or changing any cutting accessory. Center the clean bit shank squarely between the three hardened chuck jaws. Never clamp a bit crookedly or grip cutting flutes between the jaws.
The chuck features three gear holes around its outer perimeter sleeve. Next, insert the steel chuck key into each hole sequentially to tighten the jaws. Tightening all three points ensures uniform clamping pressure around the bit shank. Consequently, the bit resists slippage even under heavy axial drilling loads.
A forgotten chuck key turns into a lethal projectile when the motor starts. Therefore, develop the strict habit of removing the key immediately after tightening. Meanwhile, place the key into its designated rubber holder on the machine body. Always verify an empty chuck perimeter before you flip the main power switch.
Setting Spindle Speeds with the 5-Speed Pulley System
The WEN 4206T uses a step-pulley system to deliver five distinct spindle speeds. First, disconnect electrical power before opening the protective top pulley cover. Loosen the motor lock knob located on the right side of the headstock. Pivot the motor forward to slacken tension across the rubber V-belt.
Different drill bit diameters and workpiece densities require specific rotational speeds. As a general rule, larger bits require slower speeds to avoid burning stock. Conversely, tiny twist bits need higher RPM to cut cleanly through materials. Consult the speed chart affixed inside the hinged metal top cover.
Roll the flexible belt onto your chosen pulley grooves by hand. Next, pull the motor housing backward to apply proper mechanical tension. Aim for approximately one-half inch of belt deflection under light finger pressure. Finally, tighten the motor lock knob securely and latch the protective top lid.
WEN 4206T Speed Selection and Material Guide
Matching speed to material properties prevents bit overheating and jagged workpiece tear-out. For example, drilling cast iron at excessive speeds destroys expensive high-speed steel cutters. The reference table below outlines recommended pulley configurations for common workshop tasks.
| Pulley Setting | Spindle Speed (RPM) | Recommended Materials | Tool Bits & Safety Tips |
|---|---|---|---|
| Step 1 (Slowest) | 750 RPM | Carbon steel, thick iron, dense hardwood | Large hole saws, Forstner bits; apply cutting oil |
| Step 2 | 1100 RPM | Mild steel, brass, thick aluminum plates | Spade bits, medium twist drills; clamp stock firmly |
| Step 3 | 1530 RPM | Acrylic, plastics, hardwoods like maple | Twist drill bits under 3/8-inch; clear waste chips |
| Step 4 | 2100 RPM | Soft pines, plywood, fiberglass sheets | Brad point drill bits; use moderate feed rate |
| Step 5 (Fastest) | 3200 RPM | Thin veneer, balsa wood, soft plastics | Micro drill bits under 1/8-inch; evacuate debris quickly |
As a result, operating at correct spindle speeds preserves cutting edges across hundreds of drilling cycles. Furthermore, reduced friction keeps the workpiece cool and eliminates dangerous smoke in the shop. Always double-check your belt position before starting production work on costly raw lumber.
Adjusting and Beveling the Cast Iron Table
The 6.5-inch square cast iron table supports workpieces under heavy cutting force. First, loosen the large table bracket clamp handle on the main support column. Then, slide the table manually to your desired height beneath the chuck. Tighten the column clamp handle firmly before placing your workpiece on the table.
Many carpentry projects require accurate angled holes through thick stock. Fortunately, the WEN 4206T table bevels up to forty-five degrees left and right. Locate the heavy hex bevel bolt positioned directly beneath the table surface. Loosen this bolt using an adjustable wrench or appropriate socket tool.
Tilt the table until the indicator needle aligns with your target bevel degree. Next, retighten the underside hex bolt securely to lock the table angle. Additionally, check the actual table angle with a digital angle gauge for critical joints. Solid clamping prevents angled workpieces from slipping downhill during drilling.
Calibrating the Locking Linear Depth Stop
The WEN 4206T features a two-inch spindle travel for various woodworking tasks. A threaded linear depth stop rod controls this vertical movement with high precision. Specifically, this assembly includes a clear measurement scale and two knurled locking nuts.
First, lower the drill bit until the tip touches your marked workpiece surface. Spin the upper knurled nut downward along the threaded rod to your desired depth. Thread the lower locking nut tightly against the first nut to secure the position. Consequently, the stop collar blocks further downward spindle descent at that precise point.
Calibrated depth stops prevent drill bits from chewing into the cast iron table. Moreover, this feature enables flawless repetitive blind holes for dowels and shelf pins. Test your calibrated setting on scrap lumber before drilling finished furniture parts.
Workpiece Clamping Techniques to Prevent Spin Accidents
Never hold unfastened workpieces with your bare hands during drilling operations. Twist drills can catch in metal or grain knots without warning. Consequently, the rotating spindle spins the loose workpiece like a dangerous helicopter blade. This violent reaction causes severe lacerations and broken bones within milliseconds.
Always orient long workpieces toward the left side of the machine column. Because the spindle rotates clockwise, centrifugal torque drives the stock against the column. Thus, the steel column physically blocks dangerous counter-clockwise workpiece spinning. For shorter pieces, clamp the material directly to the table slots using locking pliers.
A sturdy drill press vise securely holds small metal bars and awkward parts. Specifically, bolt the vise body directly into the table slots using carriage bolts. Additionally, place a flat scrap wooden board directly beneath your primary workpiece. This sacrificial board prevents messy wood blowout and protects the iron table surface.
Step-by-Step Safe Drilling Procedure
Preparing the Cut and Workpiece Layout
Careful preparation eliminates costly workshop mistakes and prevents dangerous operator panic. First, mark your desired hole center using a sharp awl or center punch. The small dimple keeps the spinning drill bit from wandering off your target mark. Next, clamp the stock firmly and align the dimple directly under the bit point.
Executing the Cut with Controlled Feed Pressure
Plug in the power cord and verify that all bystanders stand clear. Then, push the safety paddle switch to the On position to start spindle rotation. Allow the motor to reach full operational speed before lowering the cutting tool. Grip the three-spoke feed handle firmly and lower the bit smoothly into the stock.
Use the peck drilling technique when cutting holes deeper than one inch. Specifically, plunge the bit slightly and retract it repeatedly to eject packed wood shavings. Furthermore, apply thin cutting fluid when drilling through tough steel or aluminum stock. Lubrication dissipates friction heat and preserves the razor-sharp geometry of drill flutes.
Once the hole finishes, guide the feed lever upward at a controlled pace. Never let the spring-loaded quill snap back upward against the head casting. Shut off the power switch immediately and let the chuck stop spinning completely. Finally, remove your finished workpiece only after the spindle comes to a dead rest.
Routine Maintenance and Machine Care
Routine maintenance guarantees smooth mechanical operation and prolongs drill press longevity. First, brush away wood sawdust and metal filings using a clean workshop brush. Never use high-pressure air hoses to blow debris off the machine surfaces. In fact, pressurized air drives abrasive particles directly into sensitive spindle bearings and gear teeth.
Bare cast iron surfaces corrode quickly in damp or unheated home garages. Therefore, apply a thin coat of paste wax to the column and worktable. Buff the wax with a dry towel to create a slick, rust-resistant barrier. Additionally, apply a few drops of lightweight machine oil to the quill splines.
Inspect the drive belt every few months for dry cracks or fraying edges. Consequently, replace worn belts promptly to maintain smooth power transfer from the motor. Similarly, verify the tightness of all mounting bolts and column clamp screws.
Conclusion: Master Precision Drilling with Total Confidence
Operating your benchtop drill press safely requires consistent discipline and methodical setup habits. Specifically, proper clamping, correct pulley speed selection, and depth stop calibration ensure pristine hole quality. In addition, respecting the 2.3-amp motor keeps every workshop project running smoothly.
Never rush your cuts or compromise on essential personal protective gear. Therefore, equip your workshop with reliable clamps, put on your safety glasses, and drill with confidence!
Frequently Asked Questions
What causes the drill bit to slip in the WEN 4206T chuck?
Worn bit shanks or failing to tighten all three chuck holes causes bit slippage.
Can you drill steel with the WEN 4206T benchtop drill press?
Yes, set the belt to 750 RPM and apply cutting oil while clamping steel securely.
How do you adjust the table angle for bevel drilling?
Loosen the bevel bolt beneath the table, tilt the cast iron surface, and retighten firmly.
Why does the drill press motor hum without spinning?
Excessive belt tension or a jammed spindle prevents the 2.3A motor from turning freely.
What is the purpose of the yellow switch key?
The removable yellow key locks the main switch to prevent unauthorized or accidental tool startup.