Painting walls, cabinets, or furniture at home can feel like a big task. However, using a paint sprayer can make the job faster and deliver a clean, even finish that looks professional. According to the U.S. Environmental Protection Agency, proper paint application techniques can reduce waste by up to 30 percent. Meanwhile, research from the U.S. Department of Energy shows that efficient tools like sprayers can cut project time significantly.
If you have ever struggled with brush marks or roller streaks, a paint sprayer offers a better solution. It spreads paint evenly and reaches tight corners with ease. This guide will walk you through everything you need to know so you can confidently use a paint sprayer at home and get flawless results.
What Is a Paint Sprayer and Why Use One?
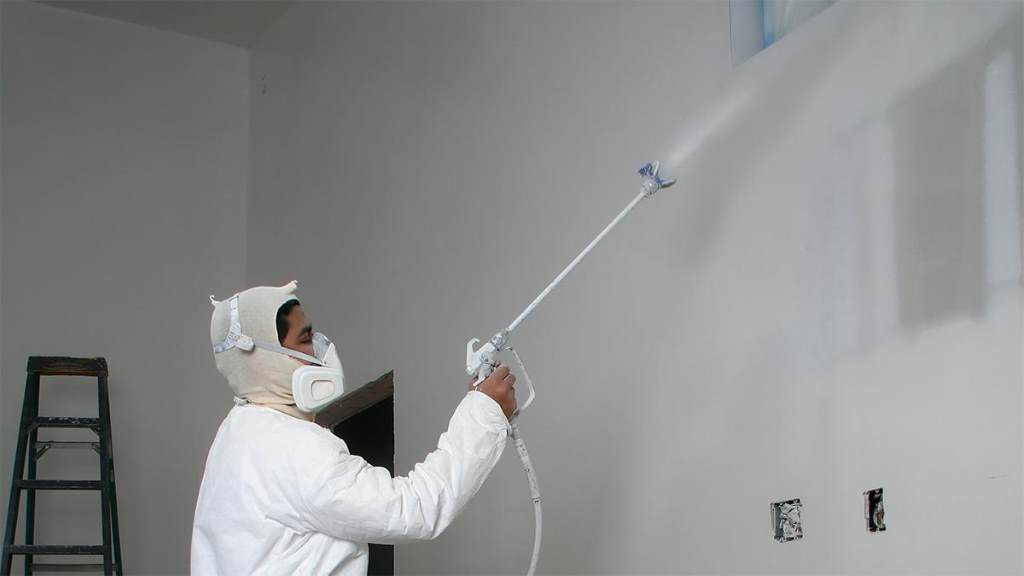
A paint sprayer is a tool that uses pressure to atomize paint into a fine mist. This mist spreads evenly across surfaces, which helps you achieve a smooth finish without visible lines. Unlike brushes or rollers, sprayers cover large areas quickly and consistently.
Many homeowners prefer paint sprayers because they save time and effort. You can paint walls, fences, cabinets, and even ceilings much faster. Additionally, sprayers reduce the need for multiple coats when used correctly. As a result, you get better coverage with less paint.
Another advantage is precision. With the right technique, you can control the spray pattern and adjust the flow. This control helps you avoid uneven patches and creates a professional look.
Types of Paint Sprayers You Should Know
Before you begin, it is important to understand the different types of paint sprayers. Each type works best for specific projects.
Airless Paint Sprayers
Airless sprayers use high pressure to push paint through a small tip. They are powerful and ideal for large surfaces like walls and exteriors. Many professionals use them because they provide fast coverage.
HVLP Sprayers
High Volume Low Pressure sprayers use a steady flow of air to apply paint. They offer more control and produce less overspray. Therefore, they are perfect for furniture, cabinets, and detailed work.
Compressed Air Sprayers
These sprayers use compressed air to atomize paint. They are easy to use but may create more overspray. As a result, they are better suited for small projects where precision is not critical.
Choosing the right sprayer depends on your project size and desired finish. For most home users, HVLP sprayers offer the best balance of control and quality.
Tools and Materials You Will Need
Preparation is key to a successful painting project. Before you start, gather all necessary tools and materials.
Essential Items
- Paint sprayer
- Paint suitable for spraying
- Drop cloths or plastic sheets
- Painter’s tape
- Sandpaper or sanding block
- Primer if needed
- Safety gear such as gloves, goggles, and a mask
Having everything ready saves time and helps you focus on the task. Moreover, it reduces the risk of mistakes caused by rushing.
How to Prepare Your Surface for Spraying
Surface preparation plays a major role in achieving a smooth finish. Skipping this step often leads to poor results.
First, clean the surface thoroughly. Remove dust, grease, and dirt using a mild cleaner. This step ensures that the paint adheres properly.
Next, sand the surface lightly. Sanding smooths out imperfections and creates a better base for the paint. After sanding, wipe away all dust with a damp cloth.
Then, apply painter’s tape to protect areas you do not want to paint. Cover floors and furniture with drop cloths. Proper masking prevents accidental overspray and keeps your space clean.
Finally, apply a primer if needed. Primer improves adhesion and enhances the final finish. It also helps you achieve a more uniform color.
How to Set Up Your Paint Sprayer Correctly
Setting up your sprayer correctly is essential for consistent results.
Start by thinning the paint if required. Many sprayers need paint to be slightly diluted for smooth flow. Always follow the manufacturer’s instructions.
Next, fill the sprayer container with paint. Secure all parts tightly to prevent leaks. Then, adjust the spray pattern and pressure settings. Most sprayers allow you to choose between horizontal, vertical, or circular patterns.
Before painting your main surface, test the sprayer on a scrap material. This step helps you fine tune the settings and avoid mistakes.
Step by Step Guide to Using a Paint Sprayer
Using a paint sprayer may seem complex at first. However, following a clear process makes it simple.
Step 1: Maintain the Right Distance
Hold the sprayer about 6 to 12 inches away from the surface. Keeping a consistent distance ensures even coverage.
Step 2: Start Moving Before You Spray
Always begin moving your hand before pulling the trigger. This technique prevents paint buildup at the starting point.
Step 3: Use Smooth, Steady Strokes
Move the sprayer in straight, overlapping strokes. Each pass should overlap the previous one by about 50 percent. This method creates a uniform finish.
Step 4: Keep a Consistent Speed
Maintain a steady pace while spraying. Moving too slowly causes drips, while moving too fast leads to thin coverage.
Step 5: Apply Multiple Thin Coats
Instead of one thick coat, apply several thin layers. Allow each coat to dry before applying the next. This approach results in a smoother and more durable finish.
Common Mistakes to Avoid
Even experienced users can make mistakes. Knowing what to avoid helps you achieve better results.
- Spraying too close to the surface, which causes drips
- Moving too quickly, leading to uneven coverage
- Skipping surface preparation
- Using the wrong paint type
- Ignoring safety precautions
By avoiding these errors, you improve both the appearance and durability of your paint job.
Tips for a Smooth, Professional Finish
Getting a flawless finish requires attention to detail.
First, always work in a well ventilated area. Proper airflow helps the paint dry evenly.
Next, maintain consistent lighting. Good lighting allows you to spot missed areas or uneven spots quickly.
Also, practice your technique before starting the actual project. Even a few minutes of practice can make a big difference.
Finally, clean your sprayer immediately after use. Proper cleaning extends the life of your equipment and ensures consistent performance for future projects.
Safety Tips When Using a Paint Sprayer
Safety should always come first when working with paint and equipment.
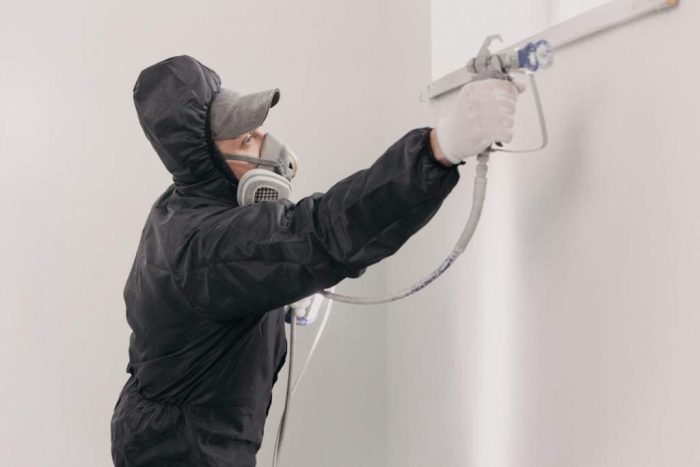
Wear protective gear such as gloves, goggles, and a mask. These items protect you from fumes and overspray.
Ensure proper ventilation in your workspace. Open windows or use fans to improve airflow.
Avoid spraying near open flames or heat sources. Paint fumes can be flammable, so it is important to stay cautious.
Lastly, follow all instructions provided with your sprayer. Proper use reduces risks and ensures better results.
Conclusion
Using a paint sprayer at home can transform your painting projects. It saves time, improves coverage, and delivers a smooth, professional finish. With proper preparation, correct setup, and the right technique, anyone can achieve impressive results.
Focus on surface preparation, maintain consistent movement, and apply thin coats for the best outcome. Avoid common mistakes and follow safety guidelines to ensure a successful project.
Now it is your turn to put these tips into action. Grab your paint sprayer, prepare your space, and start creating a flawless finish in your home.
FAQs
What type of paint works best with a paint sprayer?
Most latex and oil based paints work well with sprayers. However, you may need to thin the paint depending on the sprayer type. Always check the manufacturer’s recommendations for best results.
Do I need to thin paint before spraying?
In many cases, yes. Thinning helps the paint flow smoothly through the sprayer. The amount of thinning depends on the paint and the equipment you use.
How do I prevent overspray?
You can reduce overspray by adjusting the spray pattern and pressure. Additionally, use painter’s tape and drop cloths to protect surrounding areas.
Can beginners use a paint sprayer easily?
Yes, beginners can use a paint sprayer with some practice. Start with a small project and test your technique before moving to larger surfaces.
How long should I wait between coats?
Drying time depends on the paint type and environmental conditions. Typically, you should wait a few hours between coats. Always follow the paint manufacturer’s instructions.


