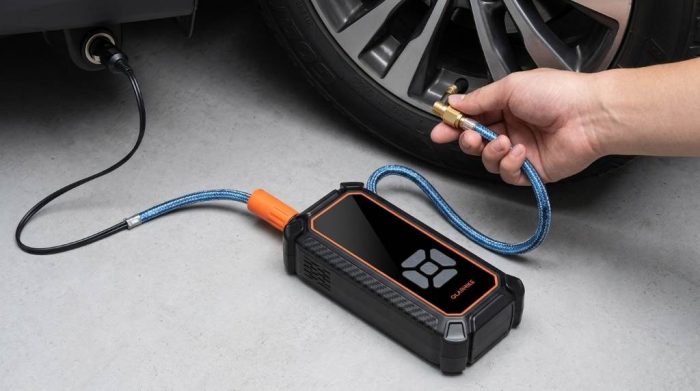
Operating the OlarHike Portable Tire Inflator is simple. Connect the air hose, set the correct pressure, and start inflation until the device stops automatically. Most users complete tire inflation within a few minutes when they follow the recommended pressure guidelines.
Portable tire inflators have become essential emergency tools because underinflated tires reduce fuel efficiency by nearly 3%, according to transportation studies. Additionally, proper tire pressure helps improve tire lifespan and driving safety. Many drivers also rely on the OlarHike tire inflator portable air compressor for quick roadside inflation and routine vehicle maintenance. This guide explains every important operating step with practical tips for safe, reliable performance.
Why Learn to Operate the OlarHike Portable Tire Inflator?
Understanding proper operation prevents equipment damage and improves inflation accuracy. Correct usage also saves valuable time during roadside emergencies.
Many portable inflators include automatic pressure detection and auto shutoff features. However, users still need the correct operating sequence for the best results.
Know the Main Parts Before You Begin
Spend a minute identifying every component before connecting the inflator. Familiarity reduces mistakes during emergency situations.
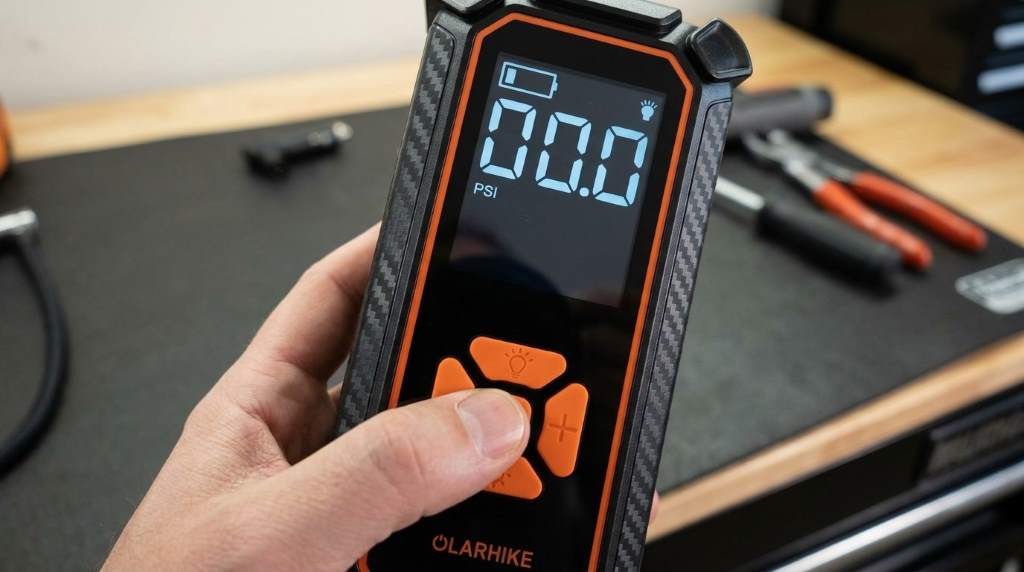
- Digital pressure display
- Power button
- Pressure adjustment controls
- Inflation start button
- Air hose with valve connector
- LED work light
- Power cable or rechargeable battery
- Accessory nozzles
Prepare Before Inflating
Always park your vehicle on flat ground before checking tire pressure. Turn the engine off unless the manual recommends otherwise.
Next, inspect the tire for visible damage or punctures. Serious tire damage requires repair instead of additional air.
Check the Recommended Tire Pressure
Locate the recommended PSI on the driver’s door sticker. Never rely only on the maximum PSI printed on the tire sidewall.
Using the correct pressure improves handling, braking, and tire longevity. Proper inflation also helps maintain even tread wear.
How to Operate OlarHike Portable Tire Inflator Step by Step
Step 1: Connect the Power Source
Plug the inflator into the appropriate power source before starting. Some models use rechargeable batteries while others connect through a vehicle outlet.
Ensure every connection feels secure before continuing. Loose connections may interrupt the inflation process.
Step 2: Remove the Tire Valve Cap
Unscrew the valve cap carefully and place it somewhere safe. Keeping the cap clean protects the valve from dirt.
Step 3: Attach the Air Hose
Press the connector firmly onto the valve stem before locking it into position. A tight seal prevents air leakage.
Listen carefully for escaping air after connecting the hose. Reattach the connector if you hear continuous leakage.
Step 4: Turn On the Inflator
Press the power button until the digital display activates. Wait briefly while the screen displays the current tire pressure.
Step 5: Set the Target Pressure
Use the adjustment buttons to select the recommended PSI value. Double check your selected pressure before inflation begins.
Many OlarHike models remember the previous pressure setting. Nevertheless, verify every setting before each use.
Step 6: Start Inflation
Press the start button to begin pumping air into the tire. Monitor the display while the compressor operates.
The compressor may produce noticeable operating noise during inflation. This sound is completely normal.
Step 7: Wait for Automatic Shutoff
Most OlarHike inflators stop automatically after reaching the selected pressure. This feature helps prevent accidental overinflation.
Remove the hose immediately after the compressor finishes. Replace the valve cap securely afterward.
Tips for Better Inflation Results
Following several simple habits improves inflation accuracy and extends compressor life. These practices require very little additional effort.
- Check tire pressure before long trips.
- Inflate cold tires whenever possible.
- Keep the air hose free from sharp bends.
- Store the inflator inside its carrying case.
- Recharge the battery after extended use.
- Inspect accessories regularly for wear.
Using Different Inflation Accessories
Many OlarHike inflators include several nozzle attachments. Each accessory serves a different inflation purpose.
- Sports balls
- Bicycle tires
- Motorcycle tires
- Air mattresses
- Pool toys
Always install the correct attachment before inflation begins. Using the proper nozzle improves efficiency and reduces air leaks.
Important Safety Tips
Never exceed the recommended pressure listed for the equipment. Overinflation may damage tires or inflatable products.
Keep children away from the operating compressor during use. Hot compressor components may cause minor burns after extended operation.
Avoid operating the inflator in standing water or heavy rain. Dry conditions help protect electronic components.
Common Problems and Quick Solutions
The Inflator Will Not Turn On
Check the battery charge or power connection first. Inspect the cable for visible damage before trying again.
Air Leaks Around the Valve
Reconnect the hose until the locking mechanism fits securely. Most leaks result from loose connections.
Pressure Reading Seems Incorrect
Disconnect the hose and reconnect it carefully. Dirt around the valve may also affect readings.
Compressor Stops Early
Many inflators pause automatically to prevent overheating. Allow the unit to cool before restarting.
Cleaning and Storage
Wipe the exterior using a soft dry cloth after each use. Avoid harsh cleaning chemicals on electronic surfaces.
Store the inflator in a cool, dry location away from direct sunlight. Organized storage protects hoses and accessories.
When Should You Replace the Inflator?
Replace the inflator if it cannot maintain consistent pressure readings. Frequent overheating also indicates excessive internal wear.
Modern portable inflators usually provide years of dependable service with proper maintenance. Regular inspection helps identify problems early.
Conclusion
Learning how to operate the OlarHike Portable Tire Inflator takes only a few minutes. Correct setup, accurate pressure selection, and routine maintenance deliver reliable performance every time.
Keep your inflator charged, inspect it regularly, and check tire pressure consistently. These simple habits improve safety, extend tire life, and prepare you for unexpected roadside situations.
Frequently Asked Questions
How long does it take to inflate a car tire?
Most standard vehicle tires inflate within several minutes depending on starting pressure.
Can I use the inflator for bicycle tires?
Yes, use the appropriate nozzle attachment for bicycle valves.
Does the inflator stop automatically?
Most OlarHike models automatically stop after reaching the selected pressure.
Should I check tire pressure when tires are cold?
Yes, cold tires provide the most accurate pressure measurement.
Can the inflator overheat?
Yes, continuous operation may trigger temporary overheating protection before normal operation resumes.