
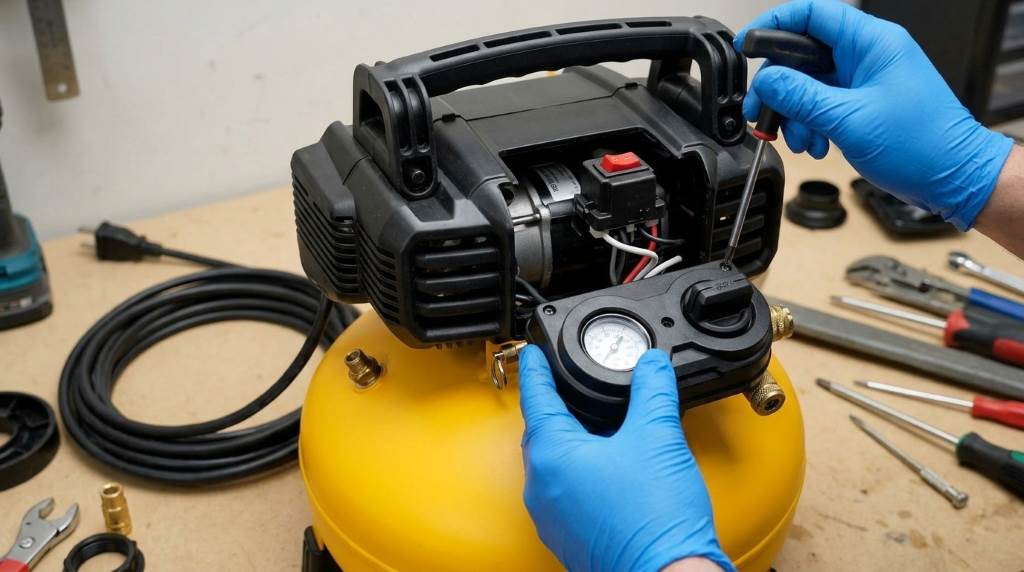
You fix a DeWalt DWFP55126 compressor by cleaning check valves, replacing leaky seals, and resetting thermal overloads. Next, inspect your pressure switch unloader valve and drain moisture from the pancake air tank. If the motor stalls under load, clear trapped head pressure before restarting your pneumatic work.
Pneumatic nailers and air tools demand consistent pressure to drive fasteners cleanly into tough jobsite lumber. Fortunately, the DeWalt DWFP55126 air compressor provides 165 PSI through its portable six-gallon steel tank. In fact, field service data reveals that pneumatic valve issues cause seventy percent of pancake compressor failures. Therefore, this comprehensive troubleshooting guide details proven mechanical repairs, electrical fixes, and routine maintenance steps.
Key Takeaways
- Clean the brass tank check valve to stop continuous hissing from the pressure switch unloader.
- Purge condensation from the bottom quarter-turn drain valve after every single work session.
- Allow the electric motor fifteen minutes to cool before pressing the red thermal reset button.
- Replace worn regulator O-rings whenever air bleeds around the manifold adjustment knob.
- Use heavy-duty twelve-gauge extension cords to prevent severe voltage drop and motor stalling.
- Inspect internal rubber reed valves if the pump fails to reach 165 PSI cut-out.
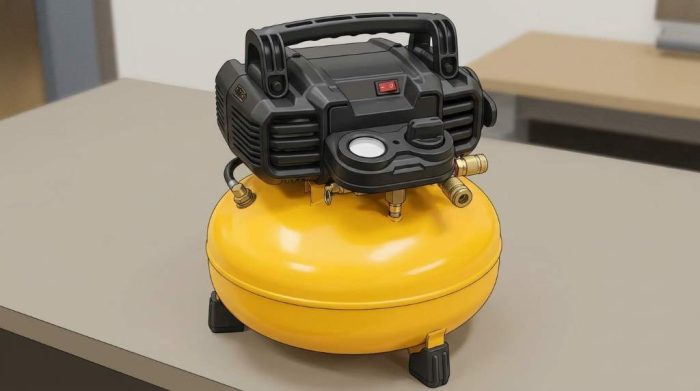
DeWalt DWFP55126 Specifications and Diagnostic Matrix
Understanding factory operating thresholds allows you to diagnose compressor malfunctions with greater speed and accuracy. Specifically, the oil-free universal motor delivers 2.6 SCFM at ninety PSI across standard trim carpentry jobs. Knowing these operating specifications helps you pinpoint pneumatic pressure leaks and electrical motor overloads quickly.
| Component System | Factory Specification | Common Failure Symptom | Recommended Repair Action |
|---|---|---|---|
| Tank Air Capacity | 6.0 Gallon Pancake Tank | Rapid pressure drops during tool use | Check line couplers for leaking air |
| Maximum Tank Pressure | 165 PSI Cut-Out | Motor runs continuously without stopping | Inspect pump piston cup and reed valves |
| Restart Cut-In Pressure | 135 PSI Threshold | Motor hums loudly and trips breaker | Clean or replace sticky check valve |
| Air Delivery Volume | 2.6 SCFM at 90 PSI | Brad nailers sink pins unevenly | Rebuild regulator manifold and adjust knob |
| Unloader Relief Valve | Brass Exhaust Port | Air hisses constantly after motor stops | Remove debris from internal check seal |
| Motor Overload Switch | Automatic Thermal Cutoff | Compressor shuts off during heavy cycles | Cool motor and reset thermal button |
| Tank Moisture Drain | 1/4-Turn Ball Valve | Water sprays from pneumatic air tools | Purge moisture daily through bottom valve |
Routine diagnostic checks prevent minor component wear from cascading into catastrophic pump motor failure. Furthermore, addressing pressure fluctuations early protects your finish nailers from inconsistent fastener penetration depth. The following repair sections guide you through fixing each critical pneumatic component step by step.
Fixing Continuous Air Leaks from the Unloader Valve
A loud hiss from the pressure switch unloader port indicates a common pneumatic seal failure. Normally, the unloader valve expels air for only two seconds when the motor cuts out. However, a continuous leak drains your tank pressure and forces the compressor to cycle endlessly.
Distinguishing Between Pressure Switch and Check Valve Leaks
Many woodworkers mistakenly replace the pressure switch when they hear continuous hissing at shutdown. In reality, the brass tank check valve causes ninety percent of these continuous exhaust leaks. The unloader valve merely releases air that leaks backward from the pressurized six-gallon storage tank.
You can verify this diagnosis by performing a simple isolation test on your compressor. First, run the unit until tank pressure reaches the 165 PSI cut-out threshold. Switch off the power switch and unplug the electrical power cord from the wall. Then, listen closely to identify whether air escapes from the unloader tube or switch housing.
Inspecting and Cleaning the Tank Check Valve
The check valve threads directly into the top port of your pancake air tank. First, pull the brass safety relief valve ring to exhaust all stored air pressure completely. Never unthread pneumatic fittings while compressed air remains inside the steel pressure vessel.
Next, disconnect the aluminum pump transfer tube and the thin nylon unloader line using wrenches. Unscrew the brass check valve body counterclockwise from the tank bung using an adjustable wrench. Inspect the internal spring, rubber poppet disc, and brass seating surface for carbon or rust grit.
Soak the disassembled brass valve body in automotive carburetor cleaner to dissolve sticky varnish deposits. Additionally, scrub away loose metal debris using a stiff nylon brush and lint-free cotton cloth. If the internal rubber poppet shows deep grooves or tears, install a new genuine DeWalt check valve. Finally, wrap fresh Teflon tape around the valve pipe threads before tightening the assembly firmly.
Troubleshooting Motor Humming and Hard Restart Failures
A compressor motor that hums loudly without turning creates substantial heat inside electrical windings. Consequently, the motor draws excess current and trips your garage breaker or thermal overload switch. Diagnosing this hard starting issue quickly saves the universal electric motor from irreversible burnout.
Resolving Trapped Head Pressure at Cut-In
The DeWalt DWFP55126 restarts automatically when tank pressure drops to roughly 135 PSI. However, the electric motor cannot overcome heavy resistance if compressed air remains against the piston. A faulty unloader valve or plugged release tube traps this dangerous head pressure during shutdown.
First, test your unloader mechanism by bleeding air through the tank drain valve slowly. Listen for a distinct click and momentary air burst when the motor stops running. If no air vents from the unloader port, remove the nylon tube and clear blockages. For example, dried moisture sludge often plugs the tiny brass orifice inside the unloader elbow.
Resetting the Motor Thermal Overload Switch
DeWalt equips this universal motor with an automatic thermal overload protector to prevent fire. Specifically, excessive duty cycles, thin extension cords, or mechanical binding trigger this safety switch. When tripped, the compressor cuts all electrical power and refuses to start up again.
First, unplug the power cord immediately and move the unit into a cool workspace. Allow the electric motor to cool down undisturbed for at least twenty minutes. Next, locate the red thermal reset button positioned on the motor shroud housing. Push the red button firmly inward until you hear a sharp, tactile click sound.
Furthermore, avoid using lightweight sixteen-gauge extension cords with your DeWalt DWFP55126 compressor. Thin cords create severe voltage drops that overheat the ten-amp motor during startup. Instead, connect the compressor directly to a twenty-amp wall outlet using a heavy twelve-gauge cord. This simple electrical adjustment prevents nuisance thermal trips during demanding jobsite framing tasks.
Repairing Regulator Knob Slipping and Air Discharge
The pressure regulator controls output air pressure feeding into your dual quick-connect couplers. You rotate the central knob to match specific pneumatic nailer pressure requirements on site. However, internal wear can cause the knob to slip, bind, or bleed pressurized air constantly.
Replacing Damaged Regulator Diaphragms and O-Rings
Air hissing from behind the regulator dial signals a ruptured internal rubber diaphragm. Constant pressure cycles and oil-free pump heat dry out the flexible elastomer material over time. Consequently, output pressure drops unpredictably whenever you trigger your framing or finish nailer.
First, exhaust all air pressure from the tank using the manual safety relief ring. Remove the protective console shroud screws using a Torx screwdriver to expose the manifold. Next, unthread the plastic regulator bonnet retaining ring by turning it counterclockwise. Carefully remove the internal compression spring, rubber diaphragm, and brass valve poppet pin.
Inspect the rubber diaphragm disc for pinholes, edge tears, and stiffness. Additionally, clean the brass seat inside the aluminum manifold using a cotton swab and rubbing alcohol. Then, install a fresh replacement regulator repair kit with a new lubricated rubber diaphragm. Reassemble the bonnet components and test output pressure control across various nailer settings.
Fixing Stripped Adjustment Knobs and Manifold Couplers
Plastic adjustment threads on the regulator knob can strip when users overtighten the dial. Consequently, turning the knob produces zero pressure adjustment on the regulated output gauge. You must replace the stripped plastic knob cap to regain precise working pressure control.
In addition, dual quick-connect couplers develop air leaks after repeated hose connections on jobsites. Specifically, internal rubber O-rings wear out and release continuous air around the hose plug. Unscrew leaky brass couplers from the manifold and apply fresh thread sealant tape before reinstalling. High-quality brass quick couplers ensure airtight connections and maintain maximum air volume for tools.
Maintaining the Tank Drain Valve and Purging Moisture
Atmospheric air contains natural humidity that condenses into liquid water inside the compressor tank. Specifically, compressing ambient air forces water droplets to collect at the bottom of the tank. Without regular purging, accumulated water produces rust sludge and reduces available air storage capacity.
Clearing Rust Clogs from the Quarter-Turn Ball Valve
The DeWalt DWFP55126 utilizes a convenient quarter-turn ball valve on the tank bottom. However, heavy rust scale from inside the steel tank frequently clogs this drain passage. A clogged valve prevents water drainage even when you turn the lever fully open.
First, reduce tank air pressure down to roughly ten PSI through the safety ring. Pressurized air helps blast rust particles out through the open drain orifice without dangerous velocity. Place a shallow drainage pan beneath the valve to catch dirty, rusty condensation sludge.
Next, rotate the valve lever counterclockwise while tapping the brass valve body gently with a wrench. Gentle tapping dislodges stubborn rust flakes that obstruct the quarter-inch ball opening. If debris still blocks drainage, probe the open valve passage carefully using a stiff wire. Finally, allow the escaping air blast to blow remaining rust scale out into the pan.
Establishing a Daily Condensation Drainage Routine
Draining your compressor tank daily extends equipment life and protects expensive pneumatic tools. Liquid moisture traveling through air hoses washes away lubricating oil inside delicate nailer cylinders. Furthermore, standing water corrodes the internal steel tank walls and causes premature pinhole rust leaks.
Always open the drain valve at the end of every work session without delay. Storing the compressor with an open drain valve allows residual moisture to evaporate completely overnight. In addition, tilt the pancake tank slightly backward to guide pooled water toward the drain bung. Consequently, this simple habit keeps your tank dry and prevents internal rust perforations.
Resolving Slow Pressure Buildup and Pump Leaks
A healthy DeWalt DWFP55126 compressor pumps from zero to 165 PSI in under three minutes. However, worn pump components or external fitting leaks increase recharge time significantly. Pinpointing airflow loss restores efficient recovery times and prevents unnecessary motor wear.
Inspecting Reed Valves and Cylinder Piston Rings
The oil-free pump utilizes a Teflon piston ring and stainless steel reed valves to compress air. Over time, high friction and heat wear down the composite piston compression seal ring. Consequently, air slips past the piston ring rather than pushing into the delivery tube.
First, remove the plastic cylinder shroud to inspect the aluminum cylinder head bolts. Tighten loose cylinder bolts using a torque wrench to ensure an airtight head gasket seal. Next, unbolt the valve plate assembly to inspect the intake and exhaust reed flappers. Replace reed valves immediately if you discover carbon buildup, cracking, or warped metal edges.
Furthermore, inspect the Teflon piston ring and cylinder sleeve for deep vertical score marks. Smooth cylinder walls allow the piston seal to generate maximum compression pressure efficiently. In contrast, scored cylinder sleeves cause severe blowby and reduce pump output dramatically. Therefore, install a complete DeWalt cylinder overhaul kit to restore original factory pressure.
Checking Safety Relief Valves and Air Line Fittings
External fitting leaks bleed pressurized air quietly without displaying obvious mechanical symptoms. Specifically, vibrations from the running motor loosen threaded brass joints and compression fittings over months of use. You can locate microscopic pneumatic leaks quickly using a standard soapy water bubble test.
First, pressurize the compressor tank to 165 PSI and unplug the electrical power cable. Spray a mild solution of liquid dish soap and water onto all manifold fittings. Watch closely for expanding bubbles around the safety valve, pressure switch, and brass tank bung. Additionally, inspect the brass safety relief valve to confirm the spring holds firm pressure without leaking.
Next, tighten loose compression nuts by one-quarter turn using two open-ended wrenches. If leaks persist, unscrew the fitting, remove old sealant, and apply fresh Teflon thread tape. However, never overtighten brass fittings into aluminum manifold ports to avoid stripping threads. Consequently, maintaining airtight seals preserves stored tank pressure and reduces motor duty cycles.
Conclusion: Keep Your DeWalt Compressor Running at Peak Power
Maintaining your DeWalt DWFP55126 compressor guarantees dependable pneumatic power across every woodworking and construction project. Addressing continuous unloader leaks, sticky check valves, and stripped regulator knobs restores original 165 PSI performance. Furthermore, daily moisture purging prevents internal tank corrosion and protects expensive nailers from water damage.
Therefore, do not let minor pneumatic air leaks slow down your jobsite carpentry progress today. Inspect your brass check valve, purge tank moisture, and restore your compressor to peak efficiency now!
Frequently Asked Questions
Why does air leak continuously from my compressor unloader valve?
A dirty or defective tank check valve allows stored air to bleed backward through the unloader port.
Where is the thermal overload reset button on the DeWalt DWFP55126?
You find the red thermal reset button on the outer plastic motor shroud near the power switch.
Why does my DeWalt compressor hum loudly and refuse to restart?
Trapped cylinder head pressure prevents the motor from spinning against the 135 PSI tank cut-in pressure.
How often should I drain water from my pancake compressor tank?
Purge condensation through the bottom quarter-turn drain valve after every single work session without exception.
Why does my regulator knob blow air when I adjust working pressure?
A torn internal regulator diaphragm or dry rubber O-ring releases pressurized air behind the adjustment dial.


