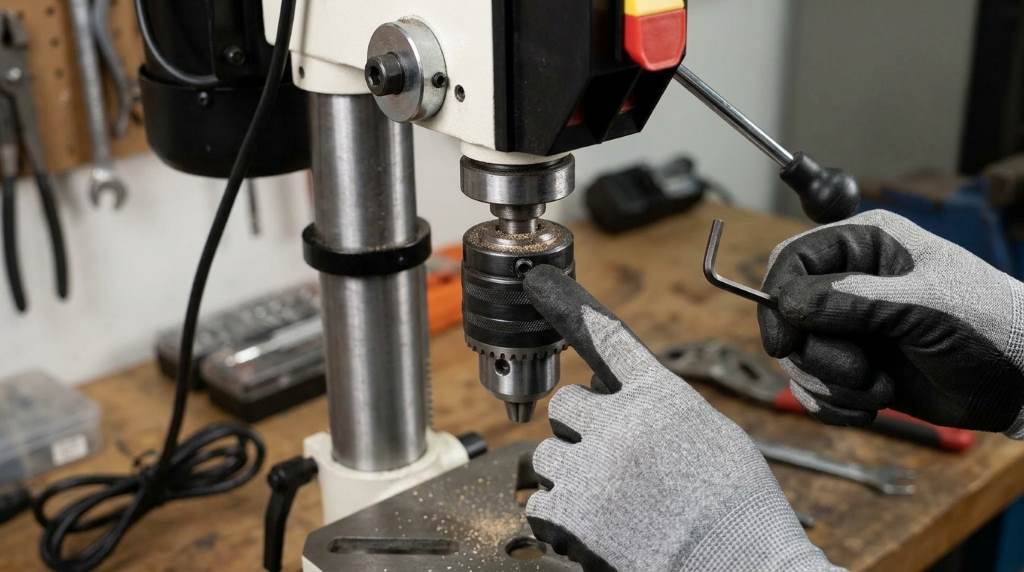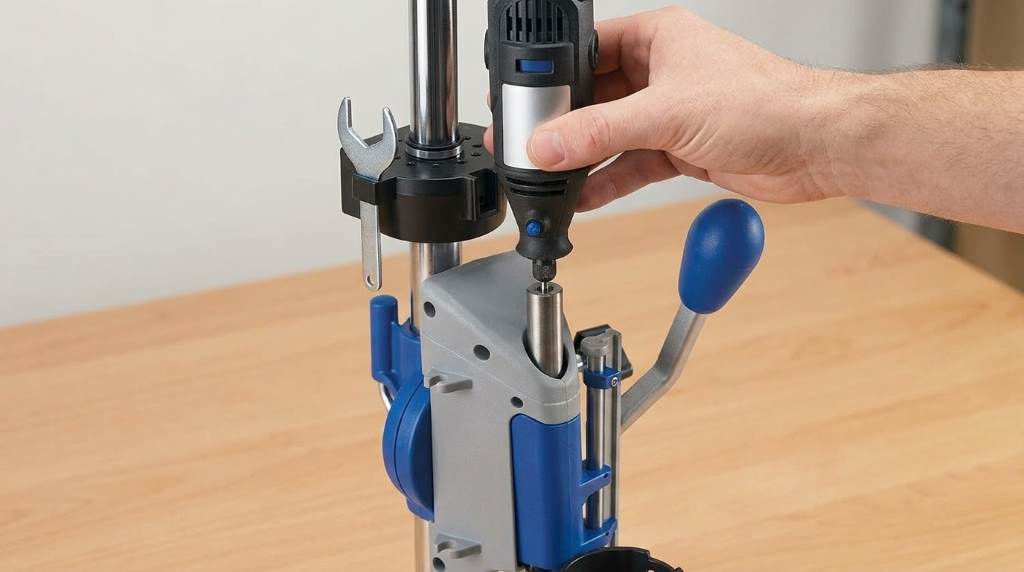
You use this workstation by mounting your rotary tool into the clamping collar securely. Next, you set your drilling depth and pull the rack-and-pinion feed lever downward. This rigid setup guides micro drill bits into workpieces with repeatable perpendicular precision.
Handheld rotary drilling often breaks fragile micro bits and ruins delicate craft projects. In fact, hobbyists report up to 65% fewer broken bits when using drill stands. Fortunately, the Dremel drill press workstation stand delivers 0.05-inch plunge accuracy. Therefore, this comprehensive guide details assembly, square calibration, depth stops, and angle drilling.
Key Takeaways
- Secure the heavy cast aluminum base to your workbench before operating the press.
- Thread the rotary tool nose collar firmly into the workstation clamping cradle.
- Check the 90-degree vertical alignment with an engineer square before drilling projects.
- Lock the depth stop ring securely to maintain consistent hole depths across workpieces.
- Loosen the bevel lock lever to tilt the carriage for angled drilling.
- Extend the telescoping hanger arm upward to support flexible shaft rotary tools cleanly.
Dremel Workstation 220 Component Overview and Assembly
Step-by-Step Bench Assembly
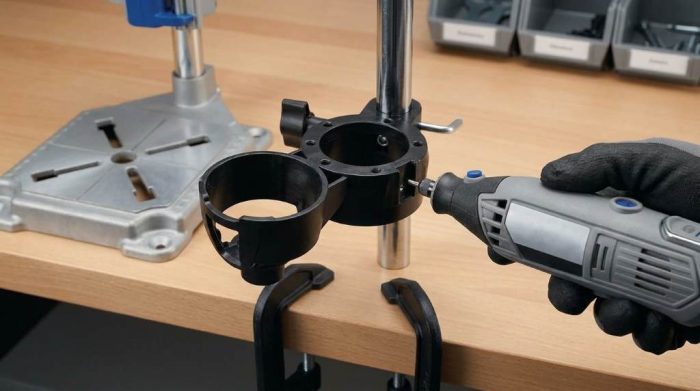
The Dremel 220 workstation package includes a cast base, steel column, and carriage. First, slide the round steel column downward into the aluminum base mounting socket. Tighten the heavy base clamping bolt using the supplied hex wrench to eliminate play.
Next, slide the drill press carriage down onto the vertical steel column. Ensure that the gear rack faces toward the front feed lever mechanism cleanly. Afterwards, attach the crow nest tool caddy onto the upper column tube securely.
Securing the Base to Your Workbench
Stable mounting prevents annoying vibrations and maintains pinpoint drilling accuracy during delicate operations. Specifically, four corner mounting holes allow direct bolting onto thick plywood worktables. You can also use heavy C-clamps across the cast aluminum base edge flanges.
Never operate the drill press without anchoring the base firmly to your bench. Loose stands wobble during plunge cuts and shatter brittle carbide micro bits easily. Consequently, solid workbench anchoring protects both your expensive bits and finished craft pieces.
Mounting and Aligning Your Rotary Tool
Removing the Nose Cap and Clamping the Collar
First, unplug your Dremel rotary tool from the electrical wall outlet for safety. Unscrew the standard plastic nose housing cap by turning it counterclockwise by hand. Set this nose cap aside safely inside your workshop tool storage drawer.
Insert the threaded metal tool nose downward through the workstation carriage ring collar. Then, screw the large blue clamping nut onto the exposed tool nose threads. Tighten this bezel nut firmly using the Dremel wrench to prevent rotational slippage.
Calibrating 90-Degree Perpendicular Alignment
Factory calibration occasionally shifts slightly during factory transit and shelf storage. Therefore, you must calibrate ninety-degree perpendicular alignment before boring critical pilot holes. Place a reliable small machinist square against the cast aluminum base table surface.
Next, lower the carriage until a straight steel rod touches the square blade. Loosen the bevel adjustment wing nut if you detect any visible angular gap. Align the indicator needle to zero degrees and retighten the bevel locking knob.
Adjusting Drill Plunge Depth and Tension
Setting the Mechanical Depth Stop
The Dremel workstation features an integrated depth stop gauge on the carriage side. Clearly, clear imperial and metric gradations indicate your current drilling plunge stroke distance. Loosen the depth stop thumbscrew to adjust your target hole depth precisely.
Lower the drill bit until the cutting tip contacts your material surface gently. Next, slide the depth stop collar downward to your desired boring measurement depth. Tighten the thumbscrew firmly so the carriage stops at that exact point repeatedly.
Adjusting Return Spring Tension and Lever Action
The internal return spring lifts the carriage automatically when you release the handle. However, excessive spring resistance can fatigue your hand during long production runs. You can adjust the spring tension screw to tailor your preferred lever resistance.
Always maintain smooth, steady feed pressure while plunging into hard materials. For example, jerking the feed handle downward can snap fragile small twist bits. Smooth mechanical feed motion creates clean entry edges without surface chipout or tearing.
Drilling Speeds and Material Settings
Proper rotary speed selection prevents bit overheating, material scorching, and jagged hole rims. For instance, acrylic sheets and soft plastics melt quickly under excessive drill friction. In contrast, dense hardwoods and soft metals require moderate speeds and constant downward pressure.
| Workpiece Material | Drill Bit Type | Recommended RPM Setting | Plunge Technique Tip |
|---|---|---|---|
| Softwoods (Pine, Balsa) | High-Speed Steel Twist Bit | 15,000 to 20,000 RPM | Plunge quickly to avoid scorching fibers. |
| Hardwoods (Oak, Maple) | Brad Point or Twist Bit | 10,000 to 15,000 RPM | Clear wood chips frequently to prevent binding. |
| Plastics and Acrylics | Standard HSS Twist Bit | 5,000 to 10,000 RPM | Use light pressure to prevent thermal melting. |
| Brass and Aluminum | Carbide or Cobalt Bit | 10,000 to 15,000 RPM | Apply a drop of cutting oil regularly. |
| Printed Circuit Boards | Solid Carbide Micro Bit | 20,000 to 30,000 RPM | Feed steadily without bending fragile carbide shanks. |
| Soft Sheet Metals | Cobalt Twist Drill Bit | 8,000 to 12,000 RPM | Clamp work securely to stop sheet spinning. |
Furthermore, always back your thin workpieces with a scrap piece of sacrificial wood. Sacrificial backer boards prevent backside breakout when the cutting bit punches through completely. Additionally, backer boards protect the aluminum workstation base grid from accidental drill bit scoring.
Advanced Operating Modes: Angle Drilling and Horizontal Tooling
Executing Precision Angle Drilling up to 90 Degrees
The Dremel 220 workstation offers flexible bevel articulation for difficult angular craft jobs. Specifically, the carriage head pivots in fifteen-degree increments up to ninety degrees horizontal. Loosen the bevel locking knob on the carriage rear to rotate the motor.
Match the carriage pointer to your required angle mark on the graduated protractor. Then, tighten the bevel wing nut firmly to lock your chosen drilling angle. Angled drilling allows woodworkers to create pocket screw holes and angled dowel joints cleanly.
Using the Workstation as a Stationary Horizontal Buffer
Rotating the tool carriage ninety degrees horizontal creates a versatile stationary rotary workstation. Now, you can mount sanding drums, wire brushes, or felt buffing wheels securely. This horizontal orientation frees both hands to guide delicate jewelry pieces against spinning accessories.
Lock the carriage height at a comfortable working level along the steel column. Next, hold small parts firmly with two hands while feeding them against accessories. Thus, stationary sanding delivers superior edge control compared to holding heavy rotary tools freehand.
Using the Telescoping Flex Shaft Tool Holder Arm
Extending the Telescoping Support Rod
The vertical column includes an integrated telescoping steel hanger rod inside the tube. First, loosen the upper column collar twist knob to release the inner hanger. Pull the telescoping rod upward to any desired height between sixteen and twenty-nine inches.
Tighten the collar knob clockwise to lock the extended hanger rod into position. In addition, route the rotary tool power cord through the built-in cord clips. Proper cord routing prevents snagging hazards during intricate benchtop woodcarving and detailing work.
Hanging the Rotary Tool for Detail Carving
You can hang your rotary motor unit directly from the top hook bracket. Next, attach the flexible shaft accessory cable to your Dremel rotary tool drive. This suspended setup transfers motor weight away from your working hand entirely.
Always ensure that the flexible shaft hangs in a gentle, sweeping downward curve. Sharp bends create internal cable friction and generate harmful heat inside the shaft. Consequently, generous curving extends inner core longevity and ensures smooth fingertip carving control.
Essential Safety and Workholding Practices
Clamping Workpieces Securely to the Slotted Base
Spinning drill bits catch loose materials and fling them across workshops with force. Therefore, you must clamp every workpiece securely onto the slotted base table surface. The workstation base features four wide clamping channels designed for standard hold-down clamps.
Never hold small workpieces with your bare fingers while plunging high-speed rotary bits. Instead, utilize a small drill press vise or wood screw clamp for safety. Solid mechanical clamping keeps your fingers safe and eliminates crooked, wallowed drill holes.
Eye Protection and Chip Management
High-speed rotary drilling throws fine wood dust and sharp metal shavings in all directions. Always wear ANSI-certified safety glasses whenever you operate your Dremel drill press workstation. Additionally, wear a dust mask when boring into resin, composite boards, or fiberglass.
Clear accumulated chips away from your workpiece between consecutive drilling plunge strokes. Use a small horsehair bench brush or shop vacuum nozzle to remove debris. Never blow chips away with your mouth to avoid blowing flying grit into eyes.
Maintenance and Troubleshooting Common Issues
Eliminating Carriage Wobble and Side Play
Heavy workshop use can introduce minor carriage wobble along the vertical steel post. Fortunately, you can eliminate side play by tightening the carriage guide adjustment screws. Insert a hex key into the guide tension bolts on the carriage side.
Turn the adjustment screws a quarter turn clockwise to eliminate excessive loose clearance. Test the vertical plunge travel to verify smooth movement without binding along the column. Thus, regular tension calibration guarantees pinpoint drill bit accuracy on every single plunge.
Cleaning and Lubricating the Steel Column
Fine sawdust and metal grit accumulate on the steel column during active drilling sessions. Wipe down the entire column surface monthly using a clean, lint-free shop towel. Avoid using sticky motor grease because grease attracts abrasive sawdust and airborne dust particles.
Instead, apply a thin coat of dry PTFE spray or paste wax onto the post. Dry lubricants protect bare steel against corrosion while allowing effortless carriage plunging action. Inspect the gear rack teeth periodically and clear packed sawdust with a stiff toothbrush.
Conclusion: Achieve Workshop Precision with Your Dremel Stand
Mastering your rotary workstation transforms handheld hobby tools into high-precision benchtop machinery. By following proper alignment steps, woodworkers eliminate bit wander and achieve flawless vertical holes. Furthermore, angle drilling versatility and flex shaft hanging support expand your creative possibilities immensely.
Do not risk ruined craft materials or snapped micro bits on freehand drilling attempts. Mount your rotary tool, lock your square alignment, and start drilling with total confidence today! Precise benchtop fabrication awaits your next custom jewelry, model building, or fine woodworking venture.
Frequently Asked Questions
Can the Dremel workstation hold cordless rotary tools?
Yes, the workstation accommodates cordless models like the 8220 with standard threaded collars.
What is the maximum drilling plunge depth on this workstation?
The rack-and-pinion carriage provides a maximum drilling plunge stroke of two inches.
How do I stop drill bits from wandering on slick metal?
Punch a small center indentation into the metal surface before plunging your drill bit.
Does the workstation include drill bits and clamping hardware?
No, you must purchase rotary drill bits and table clamping accessories separately.
Can I sand workpieces by mounting the rotary tool horizontally?
Yes, the carriage tilts ninety degrees horizontal to create a stationary sanding station.