You fix drill press issues by adjusting pulley tension, cleaning optical sensors, and tightening quill bolts. Next, align table locking mechanisms and reseat the tapered chuck to eliminate vibration. Routine mechanical calibration quickly restores accurate boring performance on dense hardwoods.
In fact, workshop surveys reveal that seventy percent of benchtop drill faults involve drive belts. Furthermore, a properly tuned Jet JWDP-12 drill press maintains total spindle runout under 0.005 inches. Consequently, routine maintenance preserves factory drilling precision across demanding woodworking projects. This complete troubleshooting guide delivers practical repair steps for every common mechanical failure.
Key Takeaways
- Clean and lubricate the variable-speed pulley sheaves regularly to stop drive belt slippage.
- Wipe accumulated sawdust from the optical RPM sensor face to restore accurate digital readouts.
- Tighten the headstock quill collar bolt to eliminate lateral spindle wobble during deep drilling.
- Align both laser guide dials on a scrap workpiece center mark for exact crosshairs.
- Re-seat the Morse taper arbor inside a clean spindle socket to correct chuck runout.
- Reposition the spring-loaded ratchet handle to lock the tilting table securely at ninety degrees.
Fixing Variable-Speed Mechanical Drive Pulley Belt Slipping
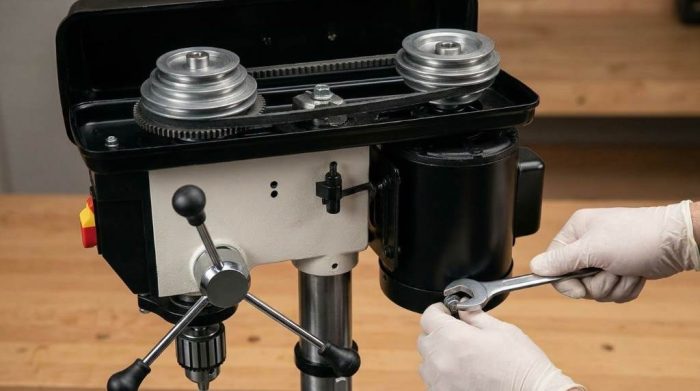
Resolving Reeves Pulley Sheave Sticking
Variable-speed drill presses use spring-loaded split sheaves to alter spindle speeds during motor operation. However, fine wood dust often settles inside the sliding pulley collar mechanisms over time. This gritty residue prevents the movable sheave from sliding smoothly along the drive shaft.
First, disconnect electrical power from the drill press before opening the top pulley guard. Then, blow compressed air across the pulley assembly to dislodge packed wood particles. Apply dry PTFE spray lubricant directly onto the sliding shaft splines to prevent sticking.
Replacing Worn Variable-Speed Drive Belts
Drive belts stretch and glaze after hundreds of hours of heavy drilling friction. Consequently, a glazed belt slips inside the sheaves whenever large Forstner bits encounter dense grain. You will notice rotational stalling while the drive motor continues spinning at full power.
Shift the variable speed lever to the highest setting while rotating the spindle by hand. Next, roll the loose drive belt off the motor sheave carefully without pinching fingers. Install an authentic Jet cogged variable-speed belt to restore optimal mechanical torque.
Calibrating the Digital RPM Readout Sensor
Cleaning the Optical Tachometer Pickup
The Jet JWDP-12 features a front digital display that tracks real-time spindle revolutions per minute. However, airborne sawdust frequently covers the optical tachometer sensor inside the headstock housing. A blinded sensor produces flashing digits, erratic speed fluctuations, or zero readings on the screen.
First, unplug the machine from your workshop electrical outlet for complete personal safety. Next, locate the small optical sensor circuit board beside the upper spindle pulley. Wipe the sensor lens gently using a cotton swab and isopropyl alcohol.
Adjusting Sensor Gap and Wiring Connections
Heavy machine vibration can loosen the sensor mounting bracket over extended operating periods. Furthermore, excessive spacing between the sensor head and the rotating reluctor disk interrupts pulse detection. You must maintain a precise gap of approximately one millimeter for dependable signal transmission.
Loosen the small bracket retaining screw with a precision screwdriver to shift the sensor. Next, position a business card between the sensor face and the pulse disk teeth. Tighten the fastener firmly and reconnect all wire harness plugs to complete sensor calibration.
Adjusting Quill Play and Spindle Runout
Tightening the Headstock Quill Lock Bolt
Excessive lateral quill play produces inaccurate holes and chatter marks on finished timber surfaces. In fact, drill bits wander off target when the quill sleeve wobbles inside cast iron. You can eliminate this unwanted slop by adjusting the headstock quill guide bolt.
First, loosen the locknut on the left side of the main drill head casting. Next, turn the slotted set screw clockwise with a flat screwdriver to eliminate free play. Extend the quill downward fully to ensure smooth mechanical travel without binding or sticking. Finally, hold the set screw in position while tightening the outer hex jam nut securely.
Eliminating Vertical Quill Backlash and Spring Tension
A weak quill return spring causes the spindle to drop unexpectedly during tool changes. Additionally, improper return tension creates fatigue when you drill repeated holes in thick boards. Woodworkers must balance return spring tension to ensure smooth, controlled vertical travel.
Hold the spring housing cover firmly before loosening the two outer locking nuts. Rotate the spring housing counterclockwise one quarter turn to increase upward return force. Then, tighten the inner locknut against the housing to preserve your chosen tension setting.
Correcting Chuck Runout and Arbor Seating
Cleaning the Morse Taper Spindle Socket
Chuck wobble often results from microscopic metal chips or dried rust preventative inside the spindle. Specifically, a fraction of a millimeter of foreign debris creates significant runout at bit tips. This mechanical inaccuracy ruins dowel joinery and degrades twist drill cutting edges quickly.
Lower the spindle and insert a drift key to eject the Morse taper arbor. Next, wrap a lint-free cotton rag around a tapered wooden dowel with solvent. Swab the internal MT2 socket thoroughly until the cloth emerges completely clean and dry.
Reseating the Jacobs Taper Drill Chuck
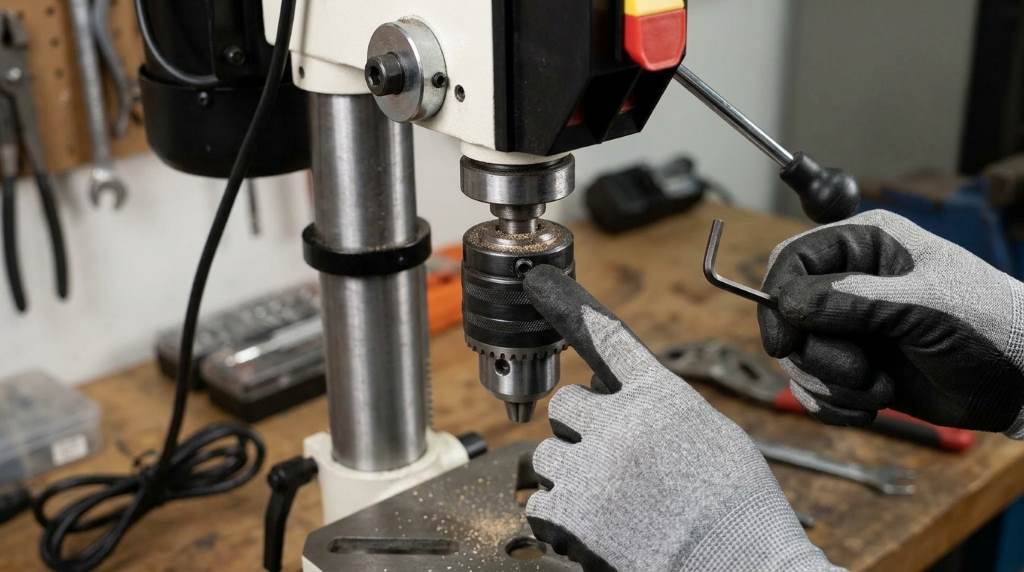
Inspect the Jacobs taper arbor shaft for raised burrs, scratches, or corrosion spots. Polish small surface imperfections smoothly using four-hundred-grit wet sandpaper and mineral spirits. Furthermore, degrease both mating surfaces with solvent to guarantee dry, maximum mechanical friction.
Retract the chuck jaws completely inside the chuck body to prevent internal mechanical damage. Next, push the clean arbor firmly upward into the spindle socket by hand. Strike a scrap hardwood block against the chuck base firmly with a brass mallet. Finally, measure rotational runout using a dial indicator against the spinning chuck body.
Aligning the X-Shaped Laser Crosshair Guide
Adjusting the Dual Laser Aperture Dials
Twin laser diodes cast intersecting lines that mark the exact drill entry point on workpieces. However, continuous motor vibrations often knock these delicate laser modules out of factory alignment. Misaligned laser lines cause drilling errors and ruin delicate cabinetry parts during assembly.
First, locate the two laser adjustment dials on the head casting sides. Loosen the small slotted locking screws with a flathead screwdriver before making adjustments. Next, rotate the knurled laser housings gently to alter the projected beam angles.
Zeroing Laser Crosshairs on Workpieces
Chuck a sharp brad point drill bit into the jaws and lock it securely. Then, lower the drill bit until the center spur dents a scrap hardwood board. Clamp the wooden board tightly to the drill table without shifting its position.
Switch on the laser guide unit using the front rocker power switch. Next, adjust the left laser line until it bisects the indented center hole mark. Rotate the right laser dial until both beams intersect directly across the drill prick. Finally, tighten both outer locking screws carefully to preserve your precise laser alignment.
Fixing Table Bevel Locking Handle Slippage
Repositioning the Spring-Loaded Ratchet Handle
The tilting cast iron work table bevels forty-five degrees left and right for angled drilling. However, repeated bevel adjustments can loosen the internal clamping nut behind the table bracket. A slipping handle permits the heavy table to tilt unexpectedly under downward drilling pressure.
Pull outward on the spring-loaded ratchet handle to disengage its internal drive splines. Next, rotate the disengaged handle backward to find a fresh gripping angle on splines. Release the handle and tighten the clamping bolt firmly against the mounting column casting.
Squaring the Cast Iron Table to the Spindle
Inaccurate bevel settings produce oval holes and angled mortises in fine furniture projects. Furthermore, factory degree indicator marks occasionally shift after heavy workshop usage. You must square the table to the spindle using an engineer square for true accuracy.
Place a precision machinist square flat across the ground cast iron table surface. Next, lower a smooth steel rod inside the drill chuck against the square. Pivot the table bracket until the square blade touches the rod without any light gap. Finally, tighten the bevel lock nut and zero the pointer on the angle scale.
Jet JWDP-12 Mechanical Symptoms and Remedies
Systematically diagnosing mechanical symptoms saves valuable workshop time during equipment repairs. For example, tracking vibration patterns points directly to loose pulleys or arbor runout. The following troubleshooting matrix pairs common operating faults with proven mechanical solutions.
| Operational Symptom | Probable Mechanical Cause | Recommended Repair Action |
|---|---|---|
| Belt slips under load | Worn drive belt or sticky Reeves pulley sheaves | Clean sliding pulley splines and apply dry PTFE spray lubricant. |
| Digital RPM display flashes | Sawdust covering optical tachometer sensor lens | Clean optical sensor lens with an isopropyl alcohol cotton swab. |
| Spindle wobbles laterally | Loose headstock quill guide set screw | Tighten quill guide set screw and lock the outer hex jam nut. |
| Chuck runs out-of-round | Chips or burrs inside Morse taper socket | Clean MT2 spindle socket and reseat arbor using a brass mallet. |
| Laser crosshairs off center | Misaligned laser diode aperture dials | Loosen retaining screws and rotate laser barrels onto center prick. |
| Table slips during drilling | Loose bevel locking ratchet handle splines | Reposition ratchet splines and tighten pivot clamping bolt firmly. |
| Excessive headstock vibration | Loose motor mount bolts or unseated pulleys | Tighten motor mount hex fasteners and check pulley sheave alignment. |
In fact, methodical diagnosis prevents unnecessary replacement of serviceable mechanical components. Therefore, inspect the simplest mechanical causes before disassembling internal drive assemblies. Regular checks maintain peak torque and drilling accuracy through demanding woodworking jobs.
Preventive Maintenance for Workshop Longevity
Routine preventive care keeps your benchtop drill press running smoothly for decades. First, wipe dust and metal filings off the steel column after every project. Apply a light coat of paste wax onto cast iron surfaces to prevent moisture rust.
Furthermore, inspect the variable-speed drive belt for cracking and fraying every month. Vacuum wood chips out of the motor cooling vents to prevent thermal overloads. Consequently, disciplined workshop maintenance prevents costly repairs and ensures consistent hole precision.
Conclusion: Restoring Your Jet JWDP-12 Drill Press
Proper troubleshooting and mechanical calibration restore factory precision to your drill press. Addressing drive belt slipping, sensor fouling, and chuck runout resolves most workshop frustrations. In addition, locking the table securely ensures repeatable angle accuracy on challenging joinery.
Do not let minor mechanical glitches compromise your woodworking craftsmanship or productivity. Apply these proven repair steps today to keep your drill press running at peak performance!
Frequently Asked Questions
Why is my Jet JWDP-12 drive belt slipping under load?
Sawdust binds the sliding pulley sheaves, so clean splines and apply dry PTFE spray lubricant.
How do I fix an erratic digital RPM readout screen?
Wipe airborne sawdust off the optical tachometer sensor lens using an isopropyl alcohol swab.
What causes chuck runout on a Jet JWDP-12 drill press?
Dirt inside the Morse taper socket creates wobble, so swab the socket and reseat the arbor.
How do I eliminate quill play on my drill press?
Tighten the headstock quill guide set screw and lock it securely with the outer jam nut.
How do I realign the X-shaped laser crosshairs?
Loosen the laser housing set screws and rotate both aperture barrels onto a center punch mark.