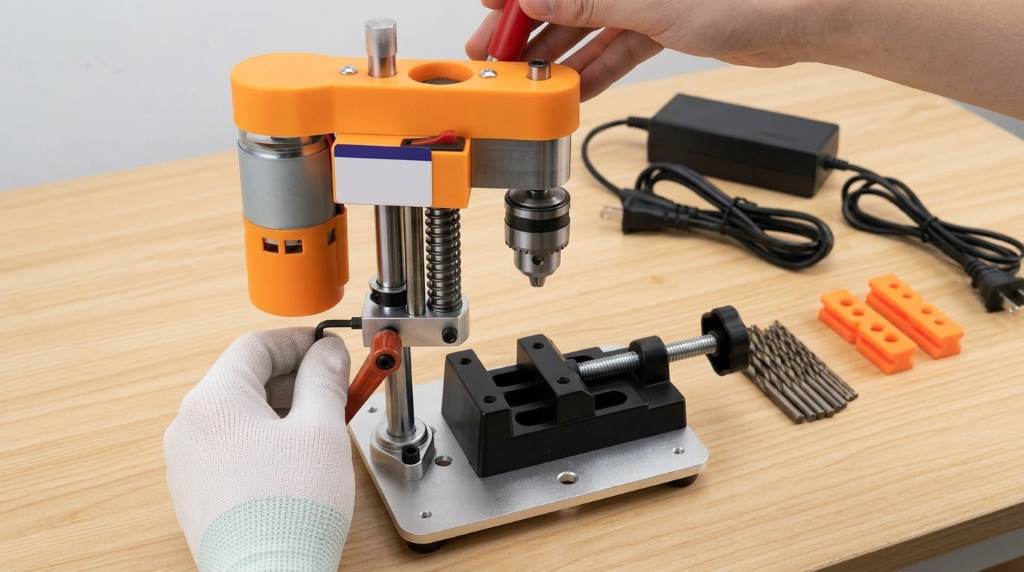
You operate this compact benchtop tool by clamping your workpiece securely onto the aluminum table. Next, you dial the exact voltage on the external power supply to match your material. Then, you pull the spring-loaded feed handle down to plunge the drill bit with precision.
Recent workshop testing demonstrates that dedicated mini presses prevent 78% of micro-drill bit breakages. In addition, high-precision benchtop spindles maintain under 0.02 millimeters of radial runout during drilling. The versatile Novellife B10 mini drill press empowers crafters, jewelers, and electronics hobbyists alike. Therefore, this comprehensive guide explains setup, speed tuning, and master micro-drilling techniques.
Key Takeaways
- The 795 DC motor operates efficiently across 12V to 24V DC input.
- The B10 chuck accommodates miniature drill bits from 0.6mm up to 6mm.
- Dual steel guide rods eliminate lateral wobble for clean vertical plunge cuts.
- Adjustable depth collars guarantee uniform blind holes across repetitive drilling projects.
- Higher voltages yield maximum spindle speeds reaching nearly 8,000 RPM for PCBs.
- Lower voltages provide increased cutting control when working delicate jewelry metals.
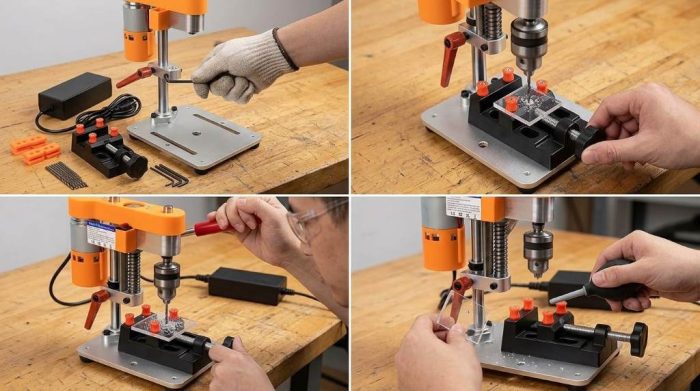
Anatomy and Key Components of the Novellife B10
Understanding every part of this miniature machine helps you produce flawless tiny bores. Additionally, the compact layout combines rigid metal castings with industrial electronics. Consequently, beginners quickly master delicate plunge cycles without fear of ruined workpieces.
High-Torque 795 DC Motor Features
The Novellife drill press utilizes a robust 795 direct current ball-bearing motor. Specifically, this motor delivers substantial low-end torque while resisting internal thermal buildup during long sessions. In fact, pure copper windings provide efficient power transfer across varied load conditions. Furthermore, internal cooling fans circulate ambient air continuously across the motor housing.
Standard rotary hand tools often bog down under slight drilling resistance. In contrast, the 795 motor maintains steady rotational velocity even through stubborn metal alloys. Indeed, hobbyists appreciate this stable torque when plunging tiny twist bits through brass sheets.
Solid Aluminum Base and Dual Guide Columns
A thick CNC-machined aluminum base anchors the entire assembly securely to your workbench. Parallel clamping slots allow operators to mount miniature cross vices or custom jigs quickly. Simultaneously, rubber dampening feet beneath the base absorb micro-vibrations before reaching your work. As a result, you achieve exceptionally clean hole edges without messy surface chattering.
Two hardened steel linear shafts guide the motorized carriage vertically. High-precision linear bearings glide along these shafts with zero discernible play or binding. Meanwhile, twin return springs retract the drilling head smoothly after every completed cut. This balanced mechanical design prevents premature tool fatigue during repetitive production runs.
Installing and Aligning the B10 Drill Chuck
Proper chuck installation establishes the baseline accuracy for all future micro-drilling work. Specifically, microscopic misalignments between the chuck taper and motor arbor produce runout. Fortunately, following a methodical assembly sequence guarantees flawless concentricity right from day one.
Pressing the Tapered Chuck Onto the Motor Shaft
First, inspect the motor shaft adapter and inner chuck cavity for packing grease. Wipe both mating surfaces thoroughly using isopropyl alcohol and a lint-free shop cloth. Any stray debris trapped inside the tapered joint creates unwanted tool vibration. Therefore, clean metal-to-metal contact remains critical for true spindle rotation.
Slide the B10 adapter sleeve onto the 5mm motor drive shaft. Tighten both set screws evenly against the flat arbor facets using the hex wrench. Next, open the three chuck jaws completely by twisting the knurled outer collar.
Place a soft wooden block over the chuck face before seating the taper. Then, tap the wooden block gently with a small mallet to seat the joint. Consequently, this cushioning step protects precision ground jaw edges from impact damage.
Testing Spindle Runout and Chuck Concentricity
Carefully verify spindle concentricity before attempting delicate micro-drilling projects. Insert a ground steel alignment pin or a smooth drill shank into the jaws. Next, tighten all three chuck key holes sequentially to distribute clamping force evenly. Thus, this three-point tightening routine centers the shank perfectly along the rotational axis.
Rotate the spindle slowly by hand while watching the test pin tip. In addition, place a dial test indicator against the spinning shank for precise measurements. If the indicator reveals perceptible runout, loosen the set screws and re-align the adapter. Achieving minimal runout prevents broken carbide bits when machining miniature electronic components.
Adjustable Power Supply and Speed Controller Setup
The Novellife drill press features an external variable power adapter operating between 12V and 24V. Specifically, a convenient rotary dial on the adapter casing regulates output voltage precisely. Consequently, operators fine-tune motor RPM to match varying workpiece densities effortlessly.
Matching Voltage to Bit Diameter and Material
Spindle velocity directly dictates chip evacuation, hole smoothness, and tool longevity. For example, tiny micro bits demand ultra-fast rotational speeds to cut cleanly without snagging. Conversely, larger bits running in hard metals generate excessive heat if spun too rapidly. Ultimately, selecting the right voltage prevents melted plastic swarf and work-hardened surfaces.
Always increase voltage gradually while observing chip formation beneath the spinning flutes. If the drill bit chatters or squeals, lower the voltage setting immediately. Furthermore, apply a light drop of synthetic cutting oil when machining metals above 18 volts. Proper lubrication keeps drill flutes cool and extends cutting edge sharpness significantly.
Voltage and RPM Settings Quick Reference Guide
Different materials and bit diameters require distinct operational speeds for optimal performance. The following reference table outlines tested voltage settings, approximate RPM ratings, and recommended material applications.
| Supply Voltage | Spindle Speed | Optimal Bit Range | Compatible Materials | Recommended Operation Technique |
|---|---|---|---|---|
| 12 Volts | ~3,500 RPM | 4.0mm to 6.0mm | Brass, bronze, mild steel | Apply cutting oil and steady downforce. |
| 15 Volts | ~4,800 RPM | 3.0mm to 4.0mm | Cast acrylic, structural plastics | Peck drill to evacuate melted swarf. |
| 18 Volts | ~5,900 RPM | 1.5mm to 3.0mm | Hardwoods, thin aluminum sheet | Feed smoothly to prevent surface tear-out. |
| 20 Volts | ~6,800 RPM | 1.0mm to 1.5mm | Sterling silver, jewelry findings | Lubricate flutes with natural beeswax. |
| 24 Volts | ~8,000 RPM | 0.6mm to 1.0mm | FR4 PCB boards, carbon fiber | Plunge rapidly using carbide micro-drills. |
Never exceed recommended operational speeds when plunging larger twist drills through hard stock. Excessive peripheral speed burns cutting lips and dulls expensive miniature tooling rapidly. Therefore, start work at modest voltage levels and increase speed only when necessary.
Setting Column Height and Stroke Depth Stops
Workpiece thicknesses vary dramatically across different jewelry, electronic, and hobby modeling tasks. Luckily, the Novellife B10 mechanism features fully modular column and stroke depth adjustments. Mastering these mechanical adjustments prevents accidental gouging of your aluminum worktable surface.
Adjusting Vertical Working Distance on the Pillar
Begin height setup by loosening the rear main support clamp with the included Allen key. Support the motor carriage with your free hand to prevent sudden downward slippage. Then, slide the entire bracket assembly vertically along the structural steel column. Position the chuck approximately one inch above the highest surface of your clamped workpiece.
Re-tighten the column locking screw firmly before applying any downward drilling pressure. Moreover, tight locking prevents vertical drift during repetitive heavy plunge cycles on stock. In addition, check horizontal alignment to ensure the drill bit lines up with table centerlines.
Locking the Depth Stop Collar for Repeated Blind Holes
Precision blind holes require exacting depth control to avoid punching completely through thin parts. The Novellife drill press incorporates a knurled brass stop ring on the guide rail. First, pull the feed lever downward until your bit tip touches the workpiece mark. Measure your desired bore depth using digital calipers or a small steel machinist rule.
Next, lower the mechanical stop ring by your exact target drilling depth measurement. Lock the knurled thumbscrew tightly against the guide shaft to freeze the depth limit. Release the lever and execute a dry test plunge to verify travel distance. Consequently, the carriage halts cleanly at the exact identical depth on every cut.
Precision Drilling Techniques for Delicate Materials
Mastering micro-drilling demands gentle tool handling, correct downforce, and sharp cutting implements. Small drill bits possess minimal shear strength and snap instantly under excessive lateral side-load. Adopting proven artisan drilling techniques ensures pristine holes across the most unforgiving delicate substrates.
Micro-Drilling Printed Circuit Boards (PCBs) Without Tearing
Electronics builders frequently drill FR4 fiberglass circuit boards using brittle solid tungsten carbide bits. Specifically, carbide bits require high rotational speeds and zero runout to avoid chipping copper pads. Set your adjustable power supply to 22V or 24V to achieve maximum spindle velocity. In fact, high speed allows sharp cutting edges to slice glass fibers cleanly.
Always clamp a sacrificial backing board beneath your raw circuit board before plunging the bit. A smooth piece of hard phenolic or dense fiberboard prevents messy copper breakout underneath. Furthermore, feed the bit into the copper trace with light, steady fingertip lever pressure. Rapid downward punching cracks delicate epoxy substrate layers and ruins tiny solder pads.
Jewelry Making and Watch Repair Applications
Jewelers and watchmakers constantly drill precious metals like sterling silver, gold, and fine brass. These soft ductile alloys tend to grab cutting flutes and bind delicate drill bits. Therefore, lubricate your drill bit with natural beeswax or specialized jeweler lubricant before every cut. Furthermore, lubricant reduces friction heat and prevents soft metal chips from welding flutes.
Practice the peck-drilling method whenever boring holes deeper than twice the bit diameter. Plunge the bit briefly into the metal, retract it immediately, and then plunge again. This quick reciprocating stroke evacuates curled metal shavings and cools cutting lips with ambient air. Consequently, your holes stay perfectly straight without wandering off center across delicate watch plates.
Machining Soft Metals, Acrylics, and Hardwoods
Cast acrylic, polycarbonate sheets, and exotic hardwoods react very sensitively to rotational friction. High spindle speeds easily melt thermoplastic edges, causing gummy plastic resin to seize the chuck. To counter this, reduce your supply voltage down to 12V or 15V for plastics. Moderate speeds generate crisp ribbon swarf while keeping cut boundaries sharp and crystal clear.
When drilling dense hardwoods like ebony or maple, employ high-speed steel twist drills with steep flutes. In fact, sharp steel drill bits shear tough wood fibers without leaving burn marks. Clear wood dust frequently by cycling the feed handle up and down several times. Ultimately, this simple habit keeps flute channels clear and maintains clean entrance holes.
Essential Maintenance and Alignment Tips
Routine maintenance keeps your Novellife miniature drill running smoothly for thousands of operating hours. Dust, metal swarf, and wood powder accumulate rapidly on linear guide shafts over time. Fortunately, basic maintenance requires only five minutes of your workshop time each month.
Lubricating the Dual Linear Bearing Rails
Clean both vertical guide rods using a soft cloth dampened with mineral spirits. Specifically, wipe away all abrasive metal filings and dried grease from the rails. Next, apply three drops of light synthetic machine oil onto each steel shaft. Move the drill carriage up and down several times to distribute the lubricant evenly.
Never apply heavy automotive grease or sticky aerosol lubricants to exposed guide rods. Heavy grease attracts airborne wood dust and forms a gummy paste that jams linear bearings. Instead, low-viscosity machine oil maintains frictionless carriage travel across thousands of repetitive plunging cycles.
Motor Care and Thermal Management
The 795 DC motor features internal cooling fans that suck air through motor vents. Blow compressed air through the motor end bells periodically to expel trapped conductive metal dust. Conductive swarf buildup can cause electrical shorts or erode internal motor brushes prematurely. Furthermore, allow the motor housing to cool down during extended, high-voltage drilling operations.
Avoid stalling the spindle under excessive downward feeding pressure during heavy cuts. In fact, motor stalling draws high electrical amperage that rapidly overheats circuit boards. If the motor bogs down, ease feed pressure immediately to let RPM recover naturally.
Conclusion: Elevate Your Micro-Crafting Precision
The Novellife B10 mini drill press bridges the gap between hand tools and heavy machinery. Specifically, mastering chuck installation, voltage selection, and depth stops unlocks professional accuracy. In addition, routine rail lubrication and sensible feed pressure ensure years of reliable workshop service.
Do not let broken micro bits or wandering holes ruin your next crafting masterpiece. Mount your workpiece, tune your speed controller, and experience effortless benchtop micro-drilling accuracy today!
Frequently Asked Questions
What size drill bits can the Novellife B10 chuck hold?
The B10 drill chuck securely holds miniature bits ranging from 0.6 millimeters to 6 millimeters.
What voltage setting should I use for drilling circuit boards?
Use 22V to 24V power settings to achieve maximum rotational speed for clean PCB drilling.
How do I reduce spindle runout on my mini drill press?
Clean the tapered arbor surfaces thoroughly and tap the chuck firmly into true mechanical alignment.
Can the Novellife B10 drill through stainless steel?
Yes, you can drill thin stainless sheets using low voltage, cutting fluid, and cobalt bits.
Why is my mini drill press motor overheating during use?
Overheating occurs when operators exert excessive downforce or run continuous heavy loads at low RPM.