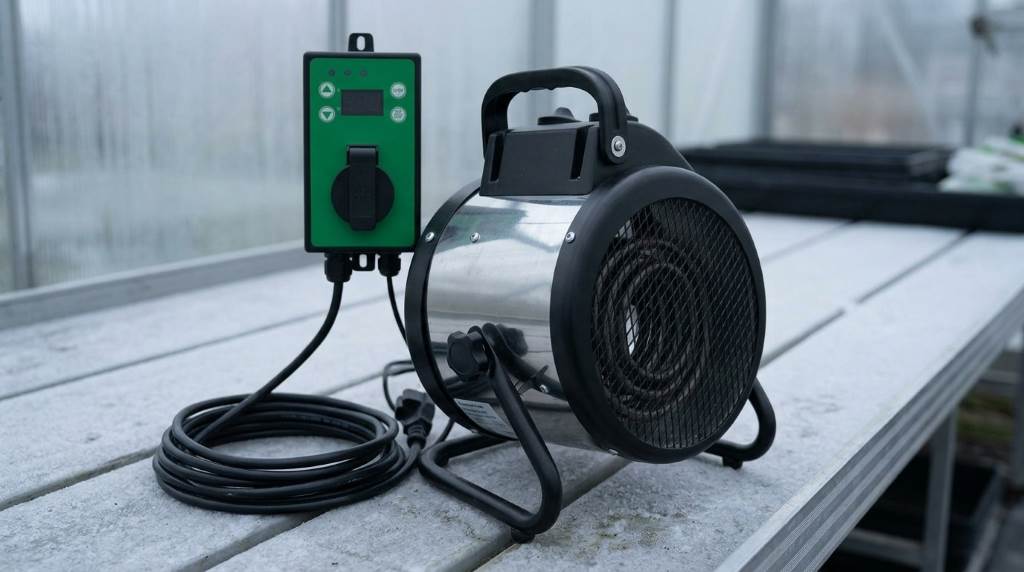
You fix this heater by resetting the internal thermal safety switch and clearing blocked air intakes. Next, verify your thermostat sensor placement to ensure accurate temperature readings across the plant canopy. If the fan blows cold air, inspect the heating coil connections and external circuit breaker.
Cold winter frosts can destroy tender greenhouse crops and tropical plants overnight. Fortunately, a dependable BioGreen Palma greenhouse heater delivers 5,118 BTUs to safeguard sensitive nursery foliage. In fact, horticulture surveys indicate that eighty-five percent of greenhouse heater failures involve tripped thermal switches. Therefore, this practical guide details proven repair steps, electrical safety checks, and thermostat calibration techniques.
Key Takeaways
- Unplug the heater for twenty minutes to reset the internal high-limit thermal safety switch.
- Clean dust, soil particles, and plant debris from both air circulation grills regularly.
- Position the digital thermostat sensor probe at plant canopy level away from drafts.
- Verify that the digital thermostat controller runs in heating mode rather than ventilation mode.
- Use a dedicated 14-gauge outdoor extension cord to prevent voltage drops and tripped breakers.
- Inspect the stainless steel fan blades to ensure smooth, unhindered rotational clearance.
Understanding Common BioGreen Palma Operating Failures
High humidity and airborne potting soil create demanding operating conditions inside home greenhouses. Consequently, fine debris accumulates quickly across heating coils and sensitive electrical contact points. Recognizing specific operational symptoms allows you to diagnose heating problems without unnecessary service expenses.
BioGreen engineered the Palma heater with an IPX4 splash-proof stainless steel housing. However, extreme condensation and direct water spray can still penetrate internal electrical terminal blocks. Moisture intrusion often trips ground-fault circuit interrupters before heat reaches your nursery benches. You must pinpoint the root failure cause before disassembling any protective metal panels.
Fixing a Heater That Only Blows Cold Air
A running fan that produces zero heat indicates a tripped bimetallic thermal cut-off switch. This internal safety component cuts electrical power to heating coils when airflow drops critically. Blocked intake vents and dirty fan impellers commonly trigger this emergency thermal protection system.
First, disconnect the main power plug from the electrical wall outlet immediately. Allow the heater to rest undisturbed for twenty-five minutes in a cool location. This mandatory resting period allows the internal bimetallic disc to cool down and reset.
Meanwhile, clean the rear air intake grill using a soft bristle brush. Blow compressed air through the front outlet to dislodge trapped greenhouse dirt and cobwebs. Next, reconnect the power cord and test the heating elements on the high setting. The heater should deliver warm air within thirty seconds of continuous blower operation.
Troubleshooting the Digital Thermo 2 Thermostat
Many Palma heaters utilize the external BioGreen Thermo 2 digital controller for regulation. Incorrect programming or faulty sensor placement frequently creates erratic temperature swings within greenhouses. Fortunately, calibrating this digital controller requires only a few straightforward adjustments.
First, confirm that the digital display shows the heat icon rather than the snowflake. The snowflake symbol indicates ventilation mode, which disables the heating element during summer months. Press and hold the mode button to toggle back to standard winter heating mode.
Furthermore, examine the black remote temperature probe for physical damage or loose wiring. Hang the sensor probe at plant foliage height near the center of your greenhouse. Never allow the probe to touch moist potting soil, cold glass, or heater airflow. Accurate positioning ensures the thermostat triggers heating cycles at the exact programmed threshold.
Resolving Fan Motor Humming and Blade Jamming
A loud electrical hum without fan rotation signals a mechanical obstruction or seized bearing. Greenhouse humidity causes microscopic dust to settle inside the motor spindle housing over time. Disconnect electrical power before attempting to inspect or touch the metal fan assembly.
Shine a flashlight through the front wire guard to locate any foreign objects. Twigs, loose greenhouse twine, and dried leaves often slip between the spinning fan blades. Carefully remove all foreign debris using needle-nose pliers or a long pair of tweezers.
Next, spin the fan blades gently with your fingers to test mechanical resistance. The fan should rotate freely for several seconds without scraping the cylindrical casing. If the motor feels stiff, apply two drops of synthetic machine oil onto the shaft. Then, reassemble the protective grille and run the fan on ventilation mode first.
Eliminating Breaker Trips and Electrical Faults
High current draw can trip household breakers when running a powerful 1,500-watt electric heater. Specifically, the Palma heater draws twelve and a half amps under maximum heating output. Plugging additional heavy appliances into the same branch circuit instantly triggers breaker overloads.
Connect your greenhouse heater to a dedicated twenty-amp electrical circuit whenever possible. Additionally, avoid using lightweight household extension cords with thin sixteen-gauge internal copper wiring. Long, undersized cords produce severe voltage drops that overheat plugs and trip breaker switches. Always select a heavy-duty, outdoor-rated 12-gauge or 14-gauge extension cord for your heater.
Moisture inside power plugs also triggers sensitive ground-fault circuit interrupter outlets frequently. Therefore, elevate all electrical connections off damp greenhouse floors using plastic hanging brackets. Seal outdoor plug connections inside commercial weatherproof cord protector gaskets to block water intrusion.
BioGreen Palma Heater Technical Specifications and Diagnosis Matrix
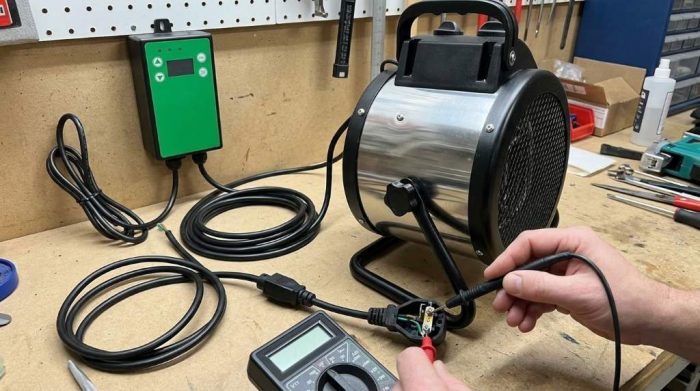
Understanding factory electrical specifications helps you verify normal heating performance during diagnosis. For example, testing resistance across the heating elements confirms whether internal coils remain intact. The following table summarizes technical operating ratings alongside proven troubleshooting solutions.
| Component System | Operating Metric | Repair Action |
|---|---|---|
| Electrical Power Draw | 1,500 Watts (12.5 Amps) | Connect only to dedicated twenty-amp branch circuits. |
| Air Circulation Volume | 96 cubic feet per minute | Clean front and rear mesh grills every month. |
| Thermal Overheat Cutoff | Auto-reset bimetallic switch | Unplug the heater for twenty minutes to reset. |
| Digital Temperature Probe | NTC remote wire sensor | Suspend probe at canopy height away from airflow. |
| Water Protection Rating | IPX4 splash-proof certification | Keep water spray away from the rear intake. |
| Thermostat Temperature Range | 32 to 104 degrees Fahrenheit | Verify heating mode icon on digital display screen. |
Measuring electrical resistance across element terminals typically reveals approximately nine to ten ohms. Consequently, an infinite resistance reading indicates a broken heating element requiring complete replacement. Contact authorized BioGreen parts distributors to secure authentic factory-certified replacement parts.
Preventive Maintenance for Greenhouse Longevity
Regular seasonal maintenance keeps your Palma heater operating safely through freezing winter nights. First, wipe down the exterior stainless steel housing with a damp microfiber cloth. Removing mineral water stains preserves the protective passivation layer against corrosive greenhouse fertilizers.
Inspect the heavy rubber power cord for cracks, kinks, or chewed insulation twice monthly. Rodents seeking warm winter shelter often gnaw on greenhouse wiring inside storage structures. Replace any damaged power cables immediately before plugging the heater back into service.
Furthermore, store the heater in a dry indoor utility room between growing seasons. Place a breathable cotton cover over the unit to keep spiders out of elements. Proper summer storage guarantees rapid, trouble-free deployment when the first autumn frost threatens.
Conclusion: Restore Steady Warmth to Your Greenhouse
Diagnosing and fixing your Palma heater preserves a warm growing sanctuary for tender plants. Resetting thermal cut-offs, cleaning dusty fan impellers, and adjusting thermostat probes resolves most problems. In addition, providing dedicated electrical circuits prevents annoying breaker trips during severe cold snaps.
Do not let sudden winter freezing temperatures endanger your valuable nursery collection. Apply these proven repair steps today and protect your greenhouse plants throughout the winter!
Frequently Asked Questions
Why is my BioGreen Palma heater blowing cold air?
A tripped thermal safety switch cuts heat when clogged vents restrict internal cooling airflow.
How do I reset the thermal cut-off on a Palma heater?
Unplug the unit from electrical power and let it cool for twenty minutes completely.
Why is my Thermo 2 thermostat showing a snowflake icon?
The snowflake symbol indicates ventilation mode, so press the mode button to select heating.
Can I plug this greenhouse heater into a power strip?
No, you must plug the heater directly into an outlet or heavy-duty extension cord.
Where should I place the digital thermostat sensor probe?
Hang the probe at plant canopy level away from heater output and direct sunlight.