Installing a heat protector for a window requires a clean glass surface, accurate measurements, and careful application. Most quality window heat protectors install within one hour and immediately reduce solar heat while improving indoor comfort.
Keeping indoor spaces cooler starts with blocking excessive solar heat before it enters your home. A properly installed heat protector for window can reduce heat gain by up to 70%, depending on the product type. Additionally, the U.S. Department of Energy reports that heat gain through windows significantly increases cooling costs during warm seasons. This guide explains each installation step using simple methods that help you achieve professional looking results without unnecessary complications.
Why Install a Heat Protector for a Window?
Window heat protectors block unwanted solar heat before it enters your living space. As a result, rooms stay cooler while cooling systems work less frequently.
Many products also reduce glare without making rooms feel dark. Furthermore, they help protect flooring, furniture, and curtains from harmful ultraviolet exposure.
Benefits of Proper Installation
- Reduces indoor heat buildup
- Improves energy efficiency
- Minimizes glare on screens
- Helps protect furniture from fading
- Creates a cleaner window appearance
- Extends the life of interior furnishings
Choose the Right Heat Protector
Select a product that matches your window type and climate conditions. Different materials provide different levels of heat rejection and light transmission.
Popular Options
- Reflective window film
- Ceramic heat blocking film
- Static cling window film
- Low emissivity window film
- Exterior solar window film
Ceramic films often provide excellent heat reduction without creating a mirror effect. Meanwhile, static cling films offer easier installation and removal.
Tools and Materials You Need
Gather every tool before starting the installation process. Preparation reduces mistakes and speeds up the overall project.
- Heat protector window film
- Tape measure
- Spray bottle
- Mild soap
- Microfiber cloth
- Glass scraper
- Plastic squeegee
- Utility knife
- Straight edge ruler
- Lint free towel
Prepare the Window Surface
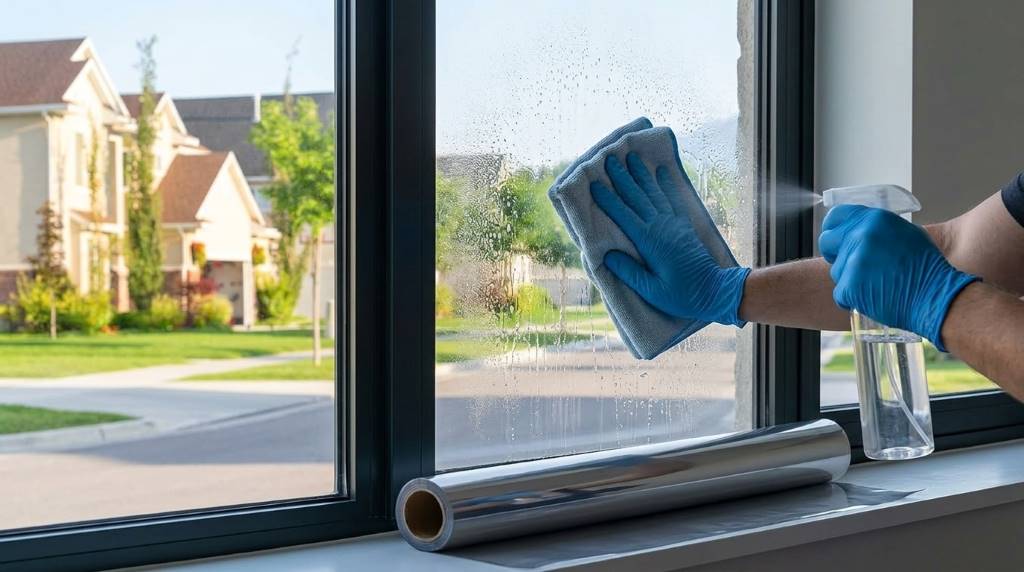
Start by removing dust, grease, and fingerprints from the glass. Even tiny particles may create bubbles after installation.
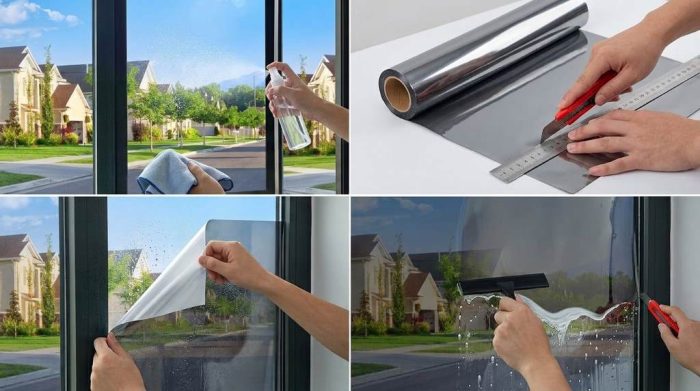
Spray a mild soap solution across the entire window surface. Then wipe every edge carefully using a microfiber cloth.
Next, inspect the glass under bright light for remaining debris. Finally, scrape away stubborn residue with a glass scraper.
Measure the Window Correctly
Measure both the height and width of the glass only. Avoid measuring the surrounding window frame because film covers glass surfaces.
Add about one inch to each measurement before cutting. This extra material allows precise trimming after positioning.
Cut the Heat Protector
Place the film on a clean, flat surface before cutting. Always keep the protective liner attached during this step.
Use a straight edge and sharp utility knife for clean cuts. Dull blades often create rough or uneven edges.
How to Install a Heat Protector for Window
Step 1: Spray the Glass
Generously spray the entire glass with the soap solution. The moisture allows easier positioning before final placement.
Step 2: Remove the Backing
Carefully peel away the protective liner without touching the adhesive side. Work slowly to prevent contamination from dust.
Step 3: Position the Film
Place the adhesive side against the wet glass surface immediately. Then slide the film until every edge aligns properly.
Step 4: Remove Air and Water
Use a plastic squeegee from the center toward each edge. Continue until trapped moisture and bubbles completely disappear.
Step 5: Trim the Edges
Trim excess material using a sharp knife and straight edge. Leave a very small clearance around each edge for expansion.
Step 6: Final Inspection
Check every corner for lifting or trapped bubbles before finishing. Small moisture spots usually disappear during the curing period.
Allow Proper Curing Time
Most window films require several days to cure completely. Cooler weather may extend the drying process slightly.
Avoid cleaning the window until curing finishes completely. This simple precaution prevents accidental lifting around the edges.
Common Installation Mistakes
- Skipping window cleaning
- Using too little application solution
- Touching the adhesive surface
- Cutting the film too small
- Using a dull knife
- Ignoring trapped air bubbles
Preventing these mistakes produces a smoother appearance and longer lasting performance. Careful preparation always improves installation quality.
Maintenance Tips
Clean installed film with a soft microfiber cloth after curing completes. Avoid abrasive cleaners because they may damage protective coatings.
Use ammonia free glass cleaners whenever possible for routine maintenance. Gentle cleaning helps preserve optical clarity for many years.
When Should You Replace Window Heat Protection?
Replace damaged film if peeling, discoloration, or bubbling becomes noticeable. Visible defects reduce appearance and overall heat blocking performance.
Quality films often provide reliable service for many years with proper maintenance. However, direct weather exposure may shorten product lifespan.
Should You Install It Yourself?
Most homeowners can complete this project with patience and basic household tools. Careful measurements and slow application usually deliver professional looking results.
Large decorative windows may require an additional helper for easier positioning. Extra assistance reduces wrinkles during installation.
Conclusion
Installing a heat protector for a window improves comfort, reduces indoor heat, and supports better energy efficiency. Following each preparation and installation step carefully creates cleaner results with fewer bubbles and longer lasting performance.
Gather the right tools, measure accurately, and work patiently for the best finish. Start your installation today and enjoy a cooler, more comfortable home throughout every warm season.
Frequently Asked Questions
Can I install a heat protector without professional help?
Yes, most homeowners can install it successfully using basic tools and careful preparation.
How long does installation take?
Most standard windows require between thirty and sixty minutes to complete.
Will a heat protector reduce natural light?
Yes, although quality films maintain good visibility while reducing excessive glare.
Can I remove the film later?
Yes, most products remove safely with gentle heat and careful peeling.
How soon can I clean the window?
Wait until the curing period finishes before cleaning the installed film.