You fix this unit by resetting the internal thermal switch and clearing the rear air filter. Next, place the cabinet onto a hard, level surface to disengage the mechanical tip-over sensor. If your unit blows cool air, inspect the quartz heating tube and ceramic element connections.
Severe winter cold snaps demand reliable supplementary heating inside modern households. Fortunately, a dependable Dr Infrared portable heater delivers 5,200 BTUs to warm large living areas. In fact, consumer repair studies show that eighty percent of portable heater shutdowns stem from restricted airflow. Therefore, this comprehensive guide provides step-by-step diagnostic procedures, error code resolutions, and preventive maintenance tips.
Key Takeaways
- Unplug your heater for twenty minutes to reset the internal high-limit thermal safety switch.
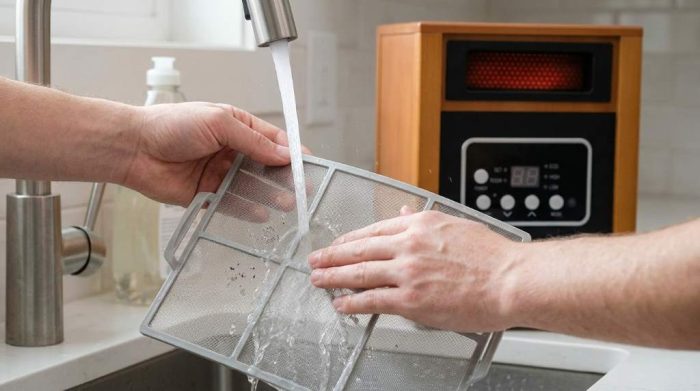
- Vacuum the rear washable electrostatic air filter monthly to prevent dangerous internal overheating.
- Place the unit on a flat, solid floor to engage the mechanical tip-over switch.
- Clear digital error codes E1 through E3 by inspecting internal thermistors and clearing airflow obstructions.
- Test element resistance with a digital multimeter to identify broken quartz tubes or ceramic plates.
- Lubricate the blower fan motor bearings with synthetic oil to eliminate loud squealing noises.
Decoding Dr Infrared Error Codes: E1, E2, and E3
Modern Dr Infrared heating units feature intelligent microcontrollers that display specific diagnostic fault codes. Consequently, these alphanumeric warnings protect sensitive electrical components from severe thermal overload. Understanding these codes allows you to resolve heating failures quickly without guessing.
For example, dirty air filters and loose thermistor wires trigger most digital display warnings. You can decode these operational alerts using the diagnostic troubleshooting matrix below.
| Error Code | Fault Description | Likely Root Cause | Recommended Repair Action |
|---|---|---|---|
| E1 | Temperature Sensor Open Circuit | Disconnected thermistor wire or damaged probe | Reconnect sensor plug or install a new thermistor. |
| E2 | Temperature Sensor Short Circuit | Pinched wire harness or shorted temperature probe | Inspect harness insulation and replace shorted sensor. |
| E3 | High-Limit Chamber Overheat | Clogged rear filter or seized blower fan | Clean air filter and let heater cool thirty minutes. |
| Blank Screen | Total Power Interruption | Tripped circuit breaker or tilted safety switch | Reset breaker and place heater on level flooring. |
Furthermore, always unplug the heating unit before opening the outer wooden cabinet. This safety precaution prevents dangerous electrical shock during internal wire harness inspections.
Resolving the E1 Temperature Sensor Open Circuit Fault
The E1 error code indicates an open electrical circuit across the internal ambient temperature sensor. Specifically, the main control board loses communication with the negative temperature coefficient thermistor probe. Household vibrations or accidental drops often loosen the two-pin sensor plug from the circuit board.
First, remove the rear cabinet screws and locate the small black thermistor bead. Next, trace the thin sensor wires back to the primary electronic control board. Push the plastic wire connector firmly into its designated socket on the circuit board. If the E1 code persists, replace the thermistor probe with an authentic factory part.
Clearing the E2 Temperature Sensor Short Circuit Alert
An E2 error indicates an electrical short circuit within the temperature sensing assembly. Consequently, the control board reads an impossibly high ambient temperature and halts operation. Pinched wire insulation against the sharp metal chassis frequently creates this specific electrical ground.
Carefully inspect the entire length of both sensor wires for bare copper exposure. Wrap any damaged wiring sections securely with heavy electrical tape to eliminate metal contact. Additionally, check the sensor probe tip for moisture intrusion or physical crushed damage. Replacing a defective thermistor restores accurate room temperature readings within minutes.
Fixing the E3 High-Limit Overheat Warning
The E3 error signals that internal chamber temperatures exceeded safe operating thresholds. Therefore, the internal thermal cutoff switch activates immediately to prevent fire hazards. Severe dust accumulation on the rear intake filter causes most E3 emergency shutdowns.
First, turn off the power switch and disconnect the plug from the wall. Allow the heater cabinet to cool completely for thirty minutes in open air. Meanwhile, clean the intake filter thoroughly before you attempt to restart the unit. This resting period resets the bimetallic thermal switch and clears the E3 code.
Diagnosing Heating Elements: PTC Ceramic vs Quartz Infrared Tubes
Dr Infrared engineered a dual heating system that pairs ceramic technology with infrared radiation. Specifically, the unit combines a durable PTC ceramic element with a quartz infrared tube. This hybrid design produces rapid conductive heat while projecting soothing radiant infrared warmth. However, heating element degradation can reduce total heat output over several winter seasons.
Testing the PTC Ceramic Heating Element
Positive temperature coefficient ceramic stones regulate their own electrical resistance automatically during operation. Consequently, ceramic elements deliver consistent warmth without burning delicate heating ribbons or wires. You can verify ceramic element health using a standard digital multimeter set to ohms.
Disconnect both spade terminal leads from the ceramic heating block inside the chamber. Next, touch your multimeter test probes firmly to the exposed metal terminal tabs. A functional ceramic heating assembly typically displays an electrical resistance between twenty and forty ohms. An infinite reading indicates an internal crack, which requires a complete ceramic element replacement.
Inspecting and Replacing the Quartz Infrared Tube
The quartz infrared tube emits long-wave infrared rays that penetrate nearby furniture and people. In fact, this radiant quartz tube creates the characteristic gentle glow inside the front grille. Physical impacts or intense thermal shocks can fracture the internal tungsten coiled wire filament.
Shine a bright flashlight into the front heating chamber to inspect the quartz tube. Look for black discoloration, cracked quartz glass, or broken coil filaments inside the tube. Furthermore, test electrical continuity across the quartz tube wire terminals with your multimeter. Always wear clean nitrile gloves when installing replacement tubes to avoid transferring skin oils.
Restoring Blower Fan Performance and Lubricating Bearings
The cross-flow squirrel-cage blower fan circulates warm air quietly across your living space. However, airborne pet hair and carpet fibers collect on the spinning impeller blades over time. Heavy dust loads restrict airflow volume and force the electric motor to run hotter.
Cleaning Dust from the Squirrel-Cage Blower Wheel
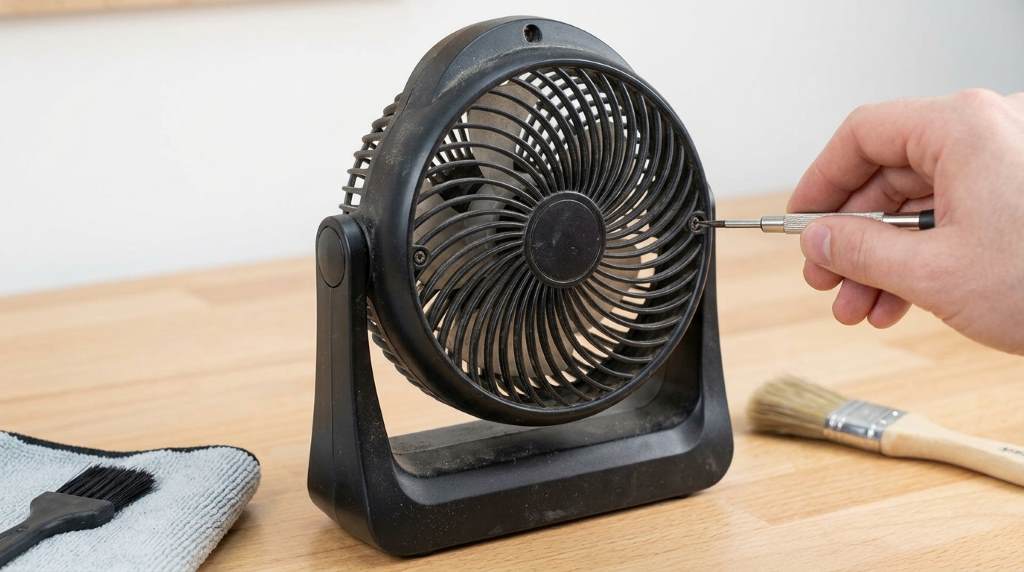
Disconnect the heater cord from electrical wall power before performing any mechanical maintenance. First, remove the outer cabinet panels to expose the cylindrical blower fan housing. Use a soft paint brush to dislodge stubborn dirt from individual curved fan fins. Then, vacuum away the loosened dust using a narrow crevice tool attachment.
Check the blower wheel for loose plastic balancing clips or cracked structural vanes. Rotate the fan assembly by hand to confirm that the wheel spins freely without wobble. Smooth blade rotation ensures balanced airflow and quiet heating performance during chilly winter nights.
Lubricating Motor Bearings to Silence Squealing
A persistent high-pitched squeal indicates dry porous bronze sleeve bearings inside the fan motor. Factory lubricant evaporates after several thousand hours of continuous seasonal operation. Consequently, metal friction increases motor temperature and causes annoying screeching noises.
Apply two drops of non-detergent synthetic SAE 20 oil directly onto the motor shaft bushing. Avoid using aerosol penetrating sprays because thin solvents wash away residual bearing lubricant. Next, spin the motor shaft manually to distribute fresh oil around the porous bronze bushing. Wipe away excess oil droplets with a clean cloth before reassembling the heater cabinet.
Servicing the Washable Lifetime Air Filter
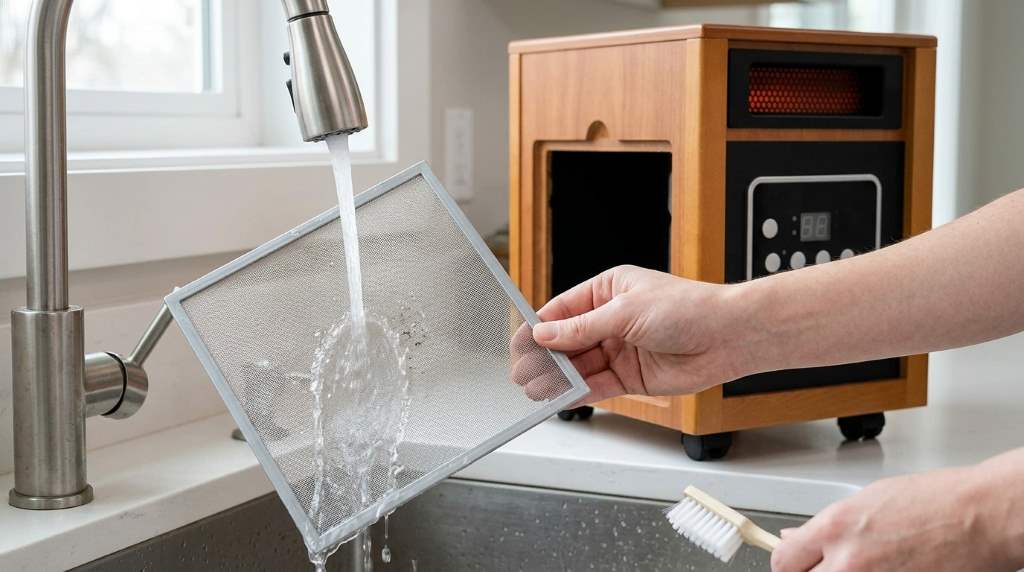
Dr Infrared equips these portable heaters with a removable, washable electrostatic air intake filter. This rear filter traps airborne dander, carpet fibers, and dust before air enters the heating chamber. In fact, a clogged filter reduces thermal efficiency and triggers automatic overheat protection switches. Routine monthly cleaning keeps your heating unit operating at peak thermal performance.
First, slide the filter frame upward out of the rear cabinet mounting channels. Rinse the black mesh filter under warm tap water from the clean side forward. Shake off standing water droplets and let the mesh dry completely for two hours. Never reinstall a damp air filter into your electric heater to avoid moisture hazards.
Testing and Resetting the Tip-Over Safety Switch
A mechanical tip-over safety switch protects your household against accidental fire hazards. Specifically, a weighted pendulum inside the base disconnects power when the heater tilts beyond thirty degrees. Thick shag carpeting often pushes the mechanical plunger upward, triggering a false tip-over shutdown.
Always operate your portable heater on a solid, level wood or tile floor. Alternatively, place a rigid wooden cutting board beneath the heater on plush carpets. If your heater fails to turn on, test the switch continuity using your digital multimeter. Replace any damaged tip-over microswitch that fails to close contacts on level surfaces.
Troubleshooting the Remote Control and Infrared Sensor Receiver
Dr Infrared heaters feature a convenient wireless remote control for temperature and timer adjustments. However, unresponsive controls can stem from weak batteries or a blocked infrared sensor diode. You can verify remote signal transmission quickly using any modern smartphone camera.
Open your smartphone camera app and point the remote emitter directly at the camera lens. Press any remote button while watching your mobile phone screen closely. A functioning remote displays a flashing purple or blue light on your phone display. If no light flashes, install fresh AAA batteries to restore remote control function.
Next, clean the dark acrylic receiver window on the front heater control panel. Dust smudges on this plastic window block incoming infrared light signals from the handheld remote. Also, inspect the multi-pin ribbon cable connecting the display board to the main PCB. Reseating loose ribbon connectors resolves unresponsive front panel touch buttons and remote receiver issues.
Dr Infrared Heater Component Specifications and Diagnostic Matrix
Comparing electrical measurements against factory benchmarks accelerates your diagnostic troubleshooting process. For example, knowing proper element resistance helps you separate wiring faults from broken components. The following technical matrix provides standard operating metrics alongside targeted repair remedies.
| Component System | Operating Specification | Normal Multimeter Value | Repair Remedy |
|---|---|---|---|
| PTC Ceramic Element | 1,500W High / 1,000W Low | 20 to 40 Ohms (cold) | Replace ceramic block if resistance measures infinite. |
| Quartz Infrared Tube | Sealed tungsten filament tube | 15 to 25 Ohms | Replace broken quartz tube and inspect end caps. |
| Cross-Flow Blower Fan | 120V AC shaded-pole motor | 80 to 120 Ohms | Clean impeller wheel and lubricate motor shaft bearings. |
| Ambient NTC Thermistor | Temperature sensor probe | 10k Ohms at 77°F | Reconnect loose board plug or replace sensor probe. |
| Tip-Over Microswitch | Gravity mechanical switch | Near 0 Ohms (closed upright) | Move unit to hard floor or replace switch. |
| High-Limit Thermal Cutoff | 185°F auto-reset bimetal | 0 Ohms (continuity when cool) | Clean air filter and let unit cool down. |
Furthermore, always use calibrated test meters to ensure accurate diagnostic electrical readings. Precise continuity measurements eliminate costly trial-and-error component replacements during heater repairs.
Preventive Maintenance Tips for Dr Infrared Heaters
Routine preventive care extends heater operating life across many cold winter seasons. First, wipe down the exterior wood cabinet using a soft, dry microfiber cloth. Never spray liquid furniture polishes directly into the front warm air exhaust louvers.
Inspect the heavy-duty power cable and three-prong wall plug for discoloration or heat damage. If the wall plug feels unusually hot, inspect your electrical wall receptacle for loose wiring. Additionally, store your portable heater in a climate-controlled closet during warm summer months. Storing your unit in a sealed plastic bag keeps moisture and nesting pests away.
Conclusion
Fixing your portable heater saves substantial replacement costs while restoring cozy winter warmth. Routine air filter washing, error code diagnosis, and bearing lubrication resolve most common heating issues. In addition, checking the tip-over switch ensures safe heating across cold winter evenings.
Do not let sudden cold snaps leave your family shivering indoors without heat. Inspect your heating unit today and enjoy dependable, energy-efficient comfort all winter long!
Frequently Asked Questions
Why does my Dr Infrared heater shut off after a few minutes?
A dirty rear air filter restricts airflow, which triggers the automatic high-limit overheat safety cutoff.
How do I reset my Dr Infrared portable heater?
Unplug the heater from the wall outlet and wait twenty minutes before plugging it back in.
What does the E1 error code mean on a Dr Infrared heater?
The E1 code signals an open electrical circuit on the ambient temperature sensor thermistor probe.
Why is my Dr Infrared heater fan making a squealing noise?
Dry motor shaft bearings cause friction noise, which requires two drops of synthetic lubricating oil.
Can I run my Dr Infrared heater on an extension cord?
No, you should plug this 1,500-watt heater directly into a dedicated wall electrical outlet.