To set up a Silonn ice maker countertop, place it on a flat surface, add clean water, connect the power, and start the ice making cycle. Keep enough space around the unit for airflow, then clean it before the first use for the best performance.
Setting up an ice maker correctly improves ice quality and helps the machine last longer. Studies show that proper appliance maintenance can improve efficiency while reducing unnecessary wear over time. This guide explains every setup step in simple language so you can begin making fresh ice quickly. If you are comparing different models, the Silonn ice maker countertop buying guide offers additional helpful information before installation.
Why Proper Setup Matters
A correct setup helps your ice maker produce clear and consistent ice cubes. It also prevents common operating problems during the first use.
Proper airflow keeps internal parts cool throughout every ice making cycle. As a result, the machine operates more efficiently and stays reliable.
What You Need Before Setup
Gather everything before starting the installation process. Preparation saves time and avoids unnecessary interruptions.
- Silonn countertop ice maker
- User manual
- Clean drinking water
- Soft cleaning cloth
- Mild dish soap
- Dry towel
- Nearby grounded electrical outlet
Choose the Right Location
Use a Flat Surface
Place the machine on a stable countertop without any wobbling. A level position helps water circulate correctly inside the appliance.
Leave Enough Clearance
Keep several inches of open space around every side of the unit. Good ventilation prevents overheating during continuous operation.
Avoid Heat Sources
Keep the appliance away from ovens and direct sunlight whenever possible. Excessive heat reduces cooling performance and slows ice production.
Clean Before First Use
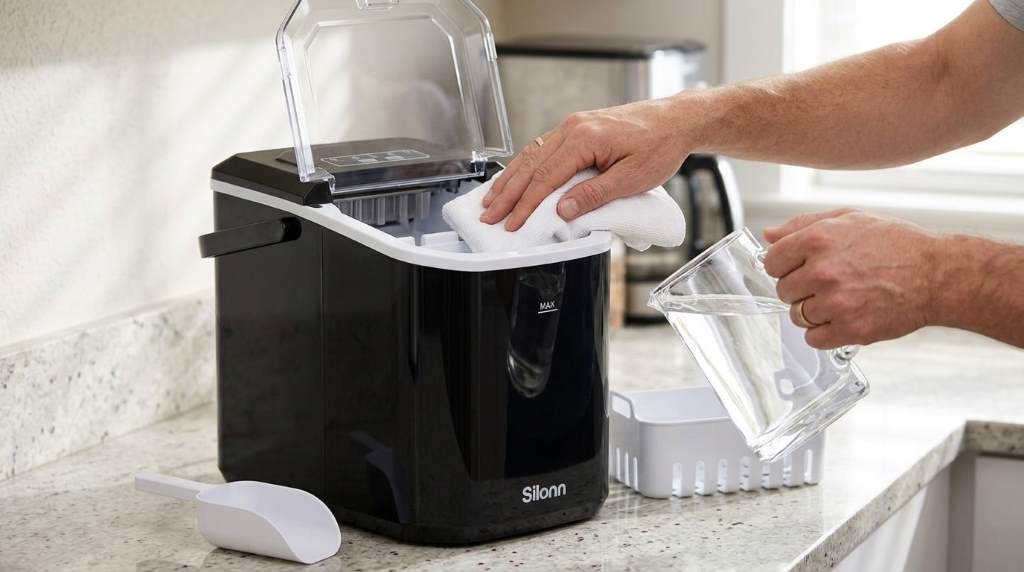
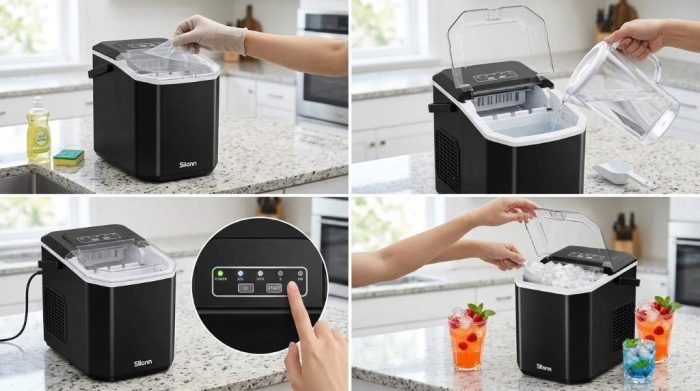
Wash removable parts with warm water and mild dish soap before operating. Rinse everything thoroughly and let every component dry completely.
Next, wipe the interior with a soft damp cloth before reassembling the machine. This removes dust collected during packaging and shipping.
Fill the Water Reservoir
Remove the water reservoir cover if your model includes one. Pour clean drinking water until it reaches the recommended fill line.
Do not overfill the reservoir because excess water may affect normal operation. Fresh filtered water usually produces cleaner tasting ice cubes.
Connect the Power Supply
Plug the power cord into a grounded electrical outlet. Avoid extension cords unless the manufacturer specifically approves their use.
Press the power button after confirming everything sits correctly. Most models begin preparing for the first ice making cycle immediately.
Start the First Ice Making Cycle
Select the preferred ice cube size if your model offers multiple options. Then allow the machine to complete its first production cycle.
Discard the first batch because manufacturing residue may remain inside. Every following batch will normally provide cleaner and fresher ice.
Understand the Control Panel
Power Button
The power button turns the appliance on and off quickly. Always switch it off before cleaning the machine.
Ice Size Selection
Many models include small and large ice cube settings. Select the option that matches your daily needs.
Indicator Lights
Indicator lights notify you about low water or a full ice basket. Respond quickly whenever these alerts appear.
Helpful Setup Tips
- Use filtered water for better tasting ice.
- Keep ventilation openings completely clear.
- Empty melted ice from the basket regularly.
- Replace standing water after extended storage.
- Clean the machine every few weeks.
Common Setup Mistakes to Avoid
Many users place the appliance too close to walls or cabinets. Restricted airflow often reduces cooling efficiency.
Others forget to discard the first batch of freshly made ice. Skipping this step may affect taste during initial use.
Some owners also use hard water without regular cleaning schedules. Mineral buildup eventually reduces overall performance and efficiency.
Basic Maintenance After Setup
Empty the water reservoir whenever the appliance remains unused for several days. Fresh water always supports cleaner ice production.
Wipe the exterior with a soft cloth after every cleaning session. Regular maintenance keeps the appliance looking clean and working smoothly.
Inspect the power cord occasionally for signs of visible damage. Replace damaged parts immediately according to manufacturer recommendations.
Troubleshooting Simple Setup Problems
The Machine Does Not Start
Check the electrical outlet and confirm the power cord connects securely. Also verify that the power button is activated.
No Ice Is Produced
Make sure the water reservoir contains enough clean water. Then wait several minutes because the first cycle needs additional time.
Ice Cubes Look Small
Higher room temperatures may reduce cube size during production. Improve ventilation around the appliance for better cooling.
Water Indicator Stays On
Refill the reservoir and confirm the water level reaches the recommended mark. Restart the machine if the light remains illuminated.
How Often Should You Clean the Ice Maker?
Clean the interior every two to four weeks during regular household use. More frequent cleaning helps if you produce ice daily.
Descale the appliance whenever mineral deposits become noticeable inside the reservoir. Following a regular schedule protects long term performance.
Final Thoughts
Setting up a Silonn countertop ice maker takes only a few simple steps when you follow the correct process. Clean the appliance, use fresh water, maintain proper airflow, and perform routine maintenance for dependable ice production.
Follow these setup practices every time you reinstall or clean your machine. A few extra minutes today can deliver reliable performance for years.
Frequently Asked Questions
How long does the first ice cycle take?
The first ice making cycle usually takes about six to ten minutes.
Should I throw away the first batch of ice?
Yes, discard the first batch to remove any remaining manufacturing residue.
Can I use tap water in my Silonn ice maker?
Yes, although filtered water usually produces cleaner tasting ice.
How much space should I leave around the machine?
Leave several inches of clearance on every side for proper ventilation.
How often should I clean the ice maker?
Clean the appliance every two to four weeks during normal use.